Archives for September 2011

DIY Headboard

**This post may contain affiliate links. I receive a small amount of compensation when you purchase from my links, which I"ll totally blow on waffle fries and sweet tea, y'all!**


My bed has been sitting on the floor, no frame, no headboard, no nothing, for the last 2 years.  About a year ago I started shopping around for headboards and was appalled by the pricing.  I was griping to my mother, and she said, “Tiffany, just make your own!” Well duh!  I don’t know why I didn’t think of that before!  So I rushed out and bought plywood and the material I wanted for the cover.  I found 2 old, ugly comforters at a discount cloth outlet that were perfect for the padding.  (This particular outlet sells torn and stained fabric from their warehouse by the pound!)

And then I hurried home.

And did nothing with it.

For a year.

Since then, my husband has tried to throw out the wood at least a dozen times, I’ve lost the cover material more than I can count, and my kids have taken over the comforters.  Well, on Monday, I decided I had had enough.  I gathered all of the materials and got to work!

Materials used:

1 4×8 plywood board ($5)

1 used brown suede zippy cover thing ($1)

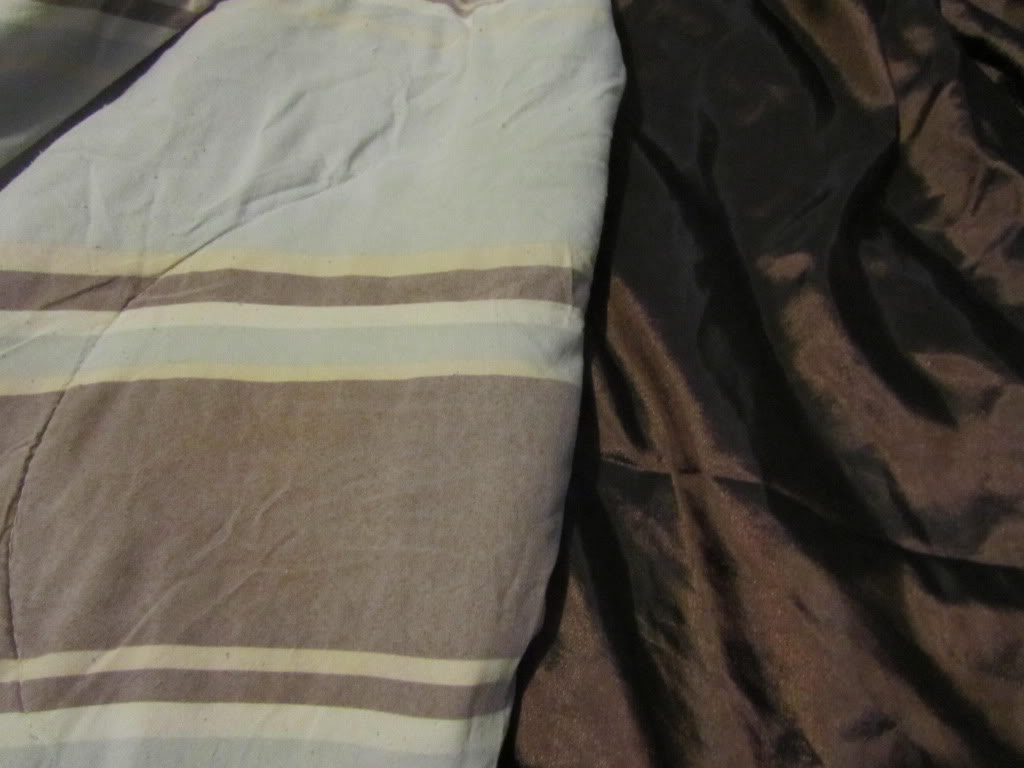
2 used large, ugly comforters ($4)
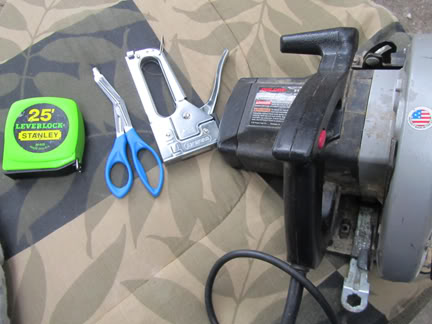
Tools needed:

Circular saw

Staple gun

Measuring tape

Chalk

Scissors (I used bandage scissors, they worked GREAT!)

DIY Headboard

Directions:

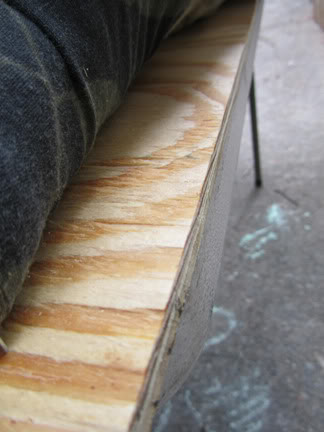
1. Measure and cut the wood down to the size you need.

I cut mine .  It didn’t occur to me to take pictures until after I got started, so no visual for this step!

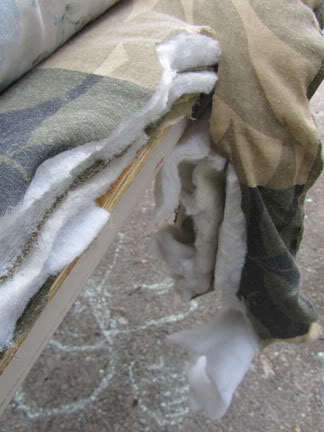
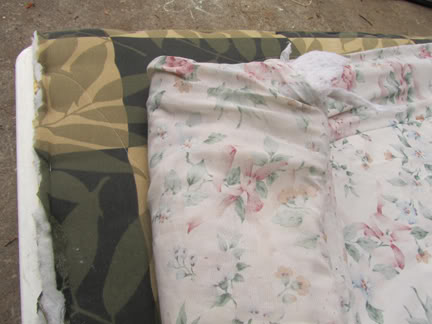
2.  Fold first comforter and lay out across board, cut off excess.

I don’t own sawhorses, so I used two plastic tables instead.  It helped A LOT to line the edge of the board up with the table edge.  I also spent forever hacking away at the comforter with kitchen shears until my husband suggested the bandage scissors.  What a lifesaver!  By the way, it doesn’t have to look perfect. 🙂

DIY Headboard

DIY Headboard

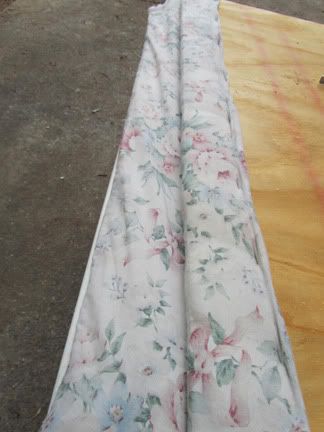
3.  Staple around the edges, pulling the comforter tight as you go. Pretty simple, I stapled about every 4 inches or so.

DIY Headboard

4. Lay out the second comforter, cut slightly larger than the first.

This one will get folded over the back of the board, so cut it a bit longer.

DIY Headboard

5.  Flip over the board, pull the fabric tight, and start stapling!

Make sure the fabric is pulled very tight, so that you don’t end up with a saggy headboard in a few weeks!

DIY Headboard

6.  Last step, attaching the cover!

I slide the fabric underneath the board and put in 2 staples on each side as I pulled it tight.  I stapled the corners and then went down the sides to finish it off.

DIY Headboard

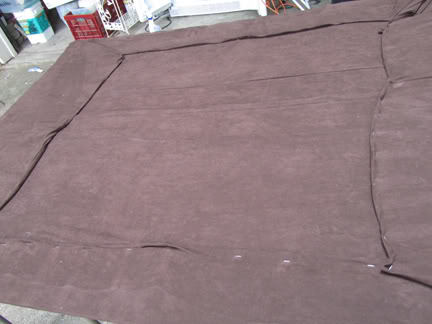
I wasn’t too concerned about it being exactly even and neat, since it’s the back and no one will know but me.  And you.  But you won’t tell, right?

DIY Headboard

Things NOT to do when making your own headboard:

1. Drop the finished board on your foot while trying to pick it up off the table.

2. Drop the board on the table and knock it over.

3. Fall down on the cement.

4.  Crack the debit card in your pocket when you land on the ground.

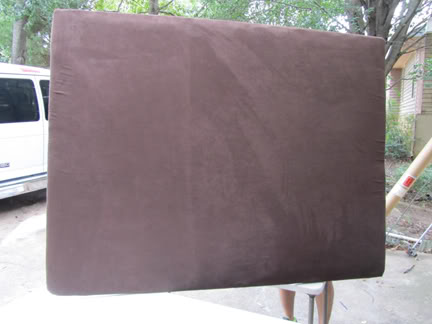
If you *do* choose to go all out, be prepared to end up with this beauty:

DIY Headboard

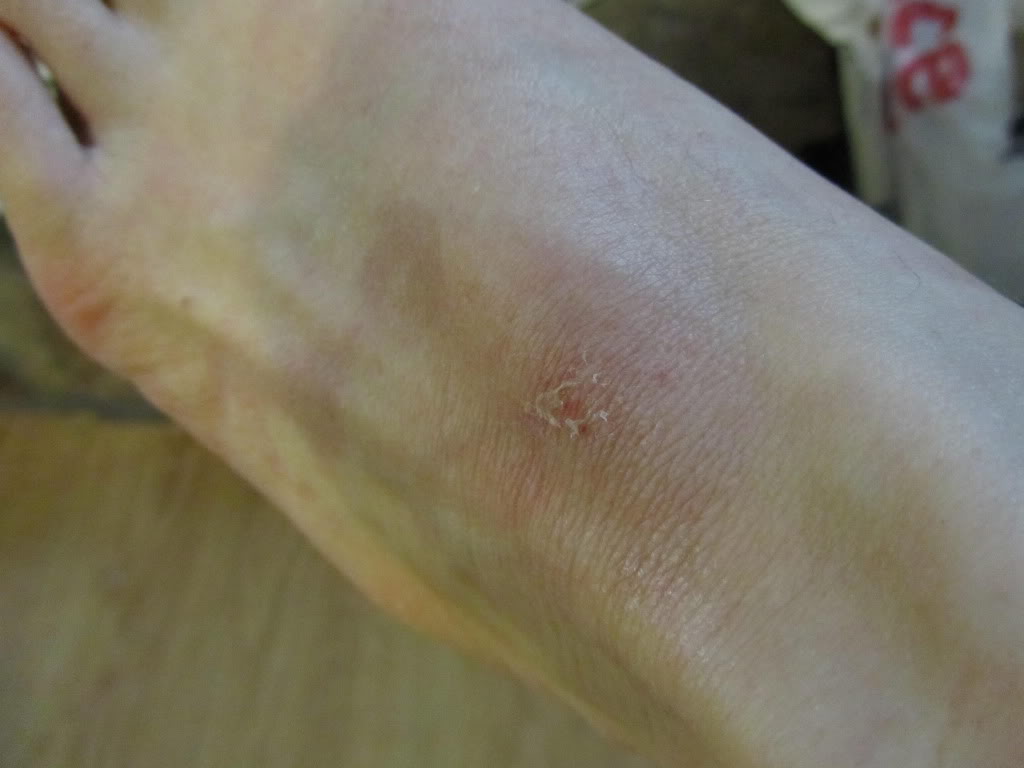
I seriously thought I broke my foot, but within a few hours, I was as good as new!  Now, onto the before and after shots!

DIY Headboard before

DIY Headboard after

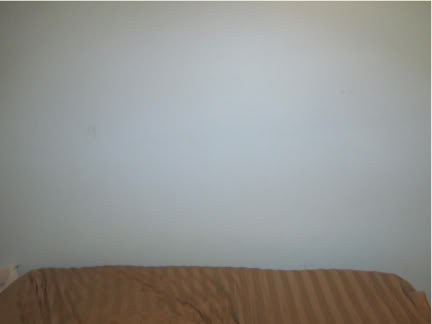
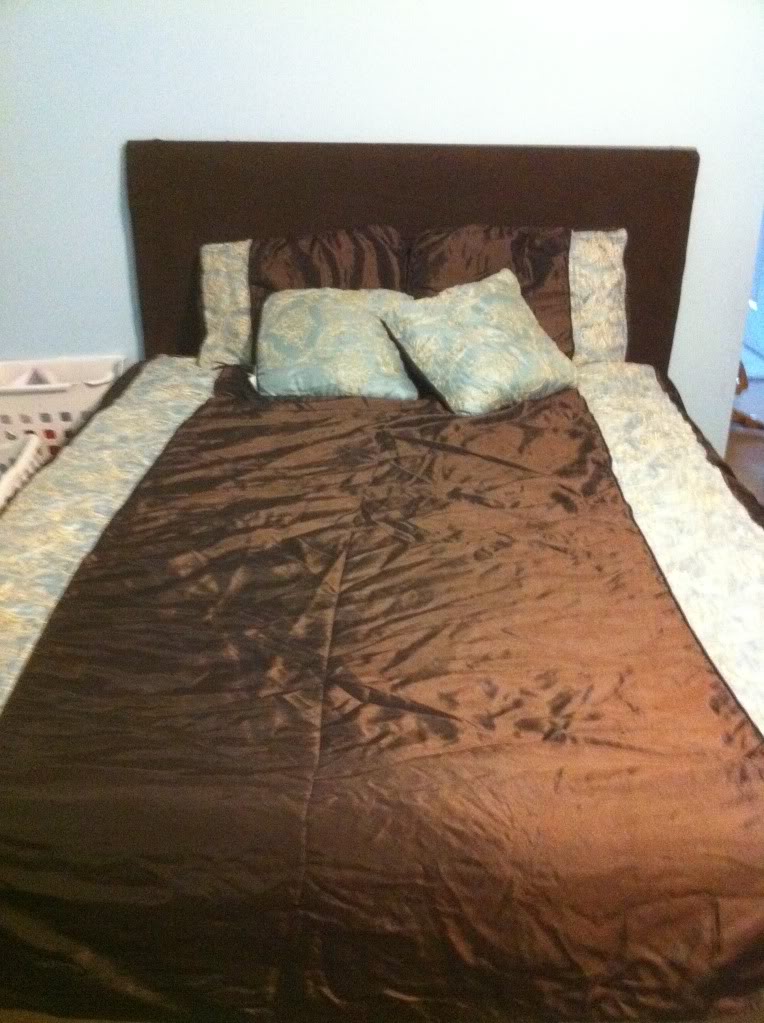
Doesn’t it look lovely?  All for less than $10 and 30 minutes!  What’s your favorite fast DIY project?

Keep on saving!  :o)
--Barbara

**Remember, y'all, this post may contain affiliate links. I receive a small amount of compensation when you purchase from my links, which I"ll totally blow on waffle fries and sweet tea, y'all!**

(semi)New bedroom decor!

**This post may contain affiliate links. I receive a small amount of compensation when you purchase from my links, which I"ll totally blow on waffle fries and sweet tea, y'all!**


We officially moved into our home in October of 2009.  We bought a newish mattress shortly after and I bought a beautiful new comforter set from Garden Ridge for $30.  I couldn’t wait to get it home and on the bed.  It looked fabulous!  Then I washed it.  And this happened.

New to me bedroom set

That USED to be baby blue and chocolate brown.  🙁  So I have been using this horribly faded comforter set for almost 2 years, and can’t stand the sight of it.  But, this past week, Goodwill came to my rescue!  I found this beautiful comforter set for a whopping $30!  It is in immaculate condition and matches my bedroom color scheme perfectly.

Goodwill comforter set

I finished the headboard today, the down and dirty tutorial for that can be found here.  Once I got it in place, I added the comforter set for the final touch.  It’s amazing how different your room can look just from changing the comforter and pillows out.  Even my kids are impressed. 🙂

Have you done any low cost decor changes recently?  How did yours turn out?

Keep on saving!  :o)
--Barbara

**Remember, y'all, this post may contain affiliate links. I receive a small amount of compensation when you purchase from my links, which I"ll totally blow on waffle fries and sweet tea, y'all!**

Not-So-Extreme Couponing: Learning to Let Go (Sorta)

**This post may contain affiliate links. I receive a small amount of compensation when you purchase from my links, which I"ll totally blow on waffle fries and sweet tea, y'all!**


Any good couponer has experienced that invigorating coupon high, but what happens when you find yourself going to extremes, all in the name of saving a few bucks?  There’s been quite a buzz in the blogosphere created in recent months thanks largely in part to TLC’s Extreme Couponing.  Many viewers are left with the impression that couponing creates, or encourages hoarding, shelf-clearing of sale items, and downright obsessive behavior.*  


Admittedly, I’ve found myself in situations where I was running out to buy something, all in the name of a “good deal”, only to later be ridden with buyers remorse, often thinking, “I didn’t even reallyneed that product!”  I’ve spoken to many of you, my dear readers, and quite a few of you admit to being new to couponing, so please bear my cautionary tale.  Just like any thing else, couponing CAN become addicting, and it, too, may spiral out of control.

Two and a half years ago, when my daughter was born, I became obsessed with maintaining a good diaper stockpile.  As you may know by now, I’ve learned to find ways to get some cheap diapers.  But over two years ago, when I was beginning to dive deeper in to the depths of couponing, I would go out and willy-nilly buy in to the diaper deal of the week.  I hadn’t yet come to realize that the boxes are seldom the better deal, and my gripping  -yet highly unrealistic- fear of running out of diapers was beginning to take over, so I wanted to be well-stocked.  I would schlep my sweet little girl here, there, and everywhere, all in the name of stocking up.  Loaded with gift cards and coupons in hand, I even found myself buying the big ol’ boxes of Huggies, Pampers, and store brand from Babies R Us.  (Note: they are NEVER, EVER a cheap deal.)

When I decided I was stocked well-enough with the current size diaper, I would start on the next size.  Keep in mind, my petite skinyata spent over a year wearing her six month clothes, so we were able to really take advantage of a large stock pile of size 2s, and then size 3s for quite some time.  But even though the logical part of me knew we were well-stocked, I couldn’t pass up good diaper deals.  Period.

Suffice it to say, I took a long, hard look in the mirror one day, and decided enough was enough.  There will always be good diaper deals.  I don’t need to use every single Huggies or Pampers coupon in my possession.  (Enter the Coupon Fairy!)  And while it’s fine to stock up on the next size, I can do so in moderation, without dragging my daughter here, there, and everywhere, soley to satisfy my crazy, unrealistic fear of running out of diapers.

Now that we’ve successfully crossed potty training off our list (yahoo!), I look at my collection of size 4 diapers, and am grateful in the knowledge that Baby Boy will be well-stocked already; but not without the burden of stockpiling.  

I digress.

Diapers are just one example of how I personally went over board (um, perhaps extreme, even) in my couponing endeavors.  It is easy to do, particularly as a SAHM, eager to just get out of the house.  It’s also easy to talk yourself in to believing that you did, indeed, need to rush out of the house right then and there to save a buck on ice cream, or a quarter on gum, or get that free deodorant (even if you already possessed a dozen other free sticks).

What’s not so easy, but must be done, is taking a step back and realizing that a good deal will always come back around.  As a couponer, one must take on the responsibility of keeping oneself in check, to keep from going to extremes.  


I share my cautionary tale with you, so that you may benefit from my wackiness.  Do you have a wacky couponing cautionary tale you’d like to share?  I’d love to hear it!


*I’m pulling all of these impressions from various blogs’ comments, Facebook comments, and Tweets I’ve read on the matter — that’s just a representative sample of the opinions expressed about the show.
Keep on saving!  :o)

–Barbara
**This post may contain affiliate links.**
Follow Me on Pinterest

Keep on saving!  :o)
--Barbara

**Remember, y'all, this post may contain affiliate links. I receive a small amount of compensation when you purchase from my links, which I"ll totally blow on waffle fries and sweet tea, y'all!**

Improv Frittata (recipe)

**This post may contain affiliate links. I receive a small amount of compensation when you purchase from my links, which I"ll totally blow on waffle fries and sweet tea, y'all!**


So tonight I ventured in to the world of cooking on the fly, a task I had not done in quite a while. The plan was to make frittatas, based on a combination of two recipes I’d seen.  BUT, given my current forgetfulness brought on by a heavy dose of preggo brain, I kept forgetting to get the veggies needed for what I was attempting to make.  Instead, I opened the fridge, and threw this together.  I was nervous, but even my two-year-old daughter (Picky Ricky) ate a few bites.

Hashbrown, cheesy frittata

15-20 oz frozen southern style hash browns 
1 tbs oil
1 carton Egg Beaters (16 oz)
1/2 c salsa
1/4 c bacon pieces
1/3 c finely chopped baby spinach
1/2 c + 3 tbs shredded cheddar cheese

Preheat oven to 350 degrees.  Warm skillet to medium heat, with ~1 tbs oil.  Cook hash browns through for about 7 minutes.  In the meantime, whisk together eggs, salsa, bacon bits, spinach, and cheese.  Place cooked hash brown in thin layer on bottom of oven-safe dish, then pour egg mixture over.  Cook in oven for 20 minutes.  Pull out, set oven to broiler,  sprinkle remaining shredded cheese over, and place back in oven.  Broil 2-4 minutes, until golden bubbly.  Let stand 5 minutes before slicing in to it.

**Since I was making this on the fly, most measurements are estimates.  You may adjust accordingly, based on our tastes and desires.

Keep on saving!  :o)
–Barbara
**This post may contain affiliate links.**
Follow Me on Pinterest

Keep on saving!  :o)
--Barbara

**Remember, y'all, this post may contain affiliate links. I receive a small amount of compensation when you purchase from my links, which I"ll totally blow on waffle fries and sweet tea, y'all!**

Atlanta's Frugal Mom is a participant in the Amazon Services LLC Associates Program, an affiliate advertising program designed to provide a means for sites to earn advertising fees by advertising and linking to Amazon. In other words, if you click through to Amazon from some of the books or products I recommend and make a purchase, I get a small percentage in exchange for your purchase. It's a small way you can support AFM.