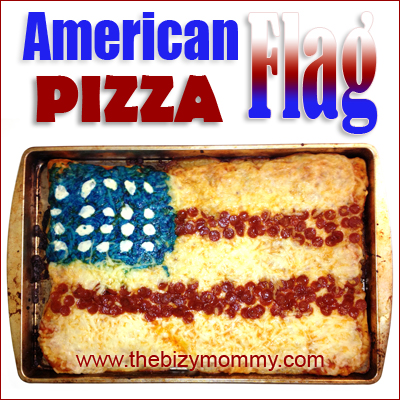
This red, white, and blue American Flag pizza recipe is a fun activity for the whole family! It’s great for a 4th of July get together, or just as part of a special Independence Day themed lunch. We had fun making it, and of course eating it too. This works really well for kids of all ages because it’s super simple to make.
American Flag Pizza
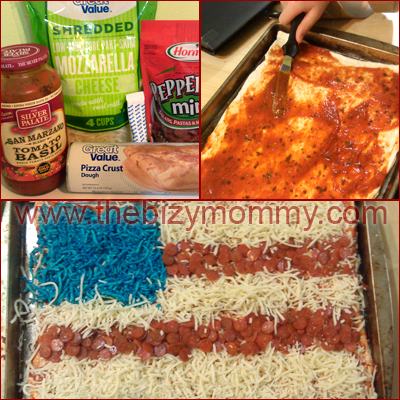
Ingredients:
Pizza dough
Shredded Italian or mozzarella cheese
Blue food coloring
Mini pepperoni
Spaghetti sauce (I like tomato basil)
Sliced mozzarella balls (optional)
Directions:
1. Preheat oven to 400 degrees
2. Spread dough out on a cookie sheet
3. Cover dough with sauce
4. Cover with cheese, leaving the top left corner empty
5. Lay out pepperoni in stripes
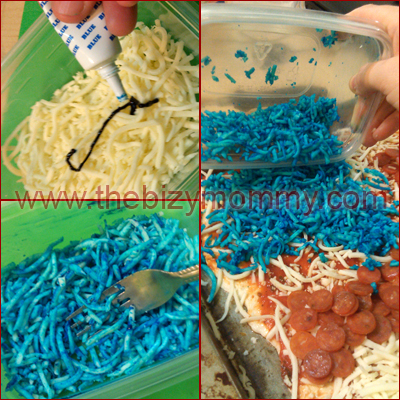
6. Mix blue food coloring with 1 cup of cheese (see pic below)
7. Cover top left corner of pizza with the blue cheese
8. Bake for 13 minutes, remove from oven
9. Add sliced mozzarella as stars on top of the blue cheese
10. Bake for 4 more minutes to melt star cheese
11. Remove from oven, slice and serve while hot
American Flag Pizza printer friendly recipe
This American flag pizza recipe is so simple, and your kids are sure to enjoy it. If you can find cheese stars, those look even better, but it’s still cool looking without them. You could also use this same concept to make themed pizzas for other occasions, like Halloween or even Christmas!
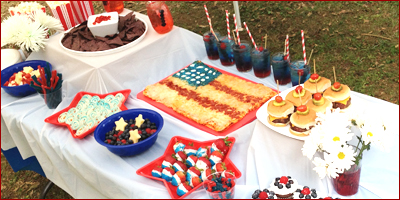
I’ve got several more red, white, and blue recipes that are perfect for your family holiday get together, don’t forget to check them out!
Make me VIRAL! Share this:

--Barbara
**Remember, y'all, this post may contain affiliate links. I receive a small amount of compensation when you purchase from my links, which I"ll totally blow on waffle fries and sweet tea, y'all!**