
When we bought our home three years ago, our kitchen was really tiny. There was a laundry room and “pantry” area beside it that led out to the garage. We ended up knocking out the walls for that room, closing in the coat closet by the front door, and adding all of that space to the kitchen. But I still just don’t have enough shelf space to store food for all eight of us.
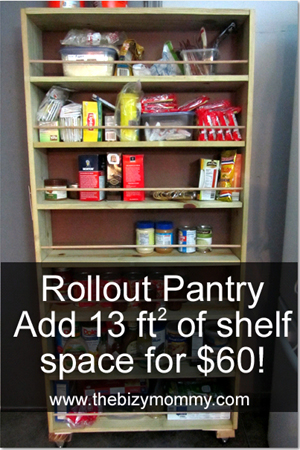
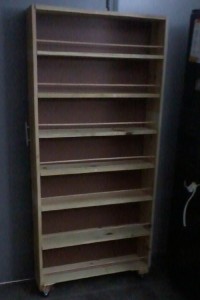
I saw a post in the past about a roll out pantry that goes beside the refrigerator. Our old fridge was too wide to do something like that, but we recently got a new fridge that was thinner, leaving us with about 8 inches of space between it and the wall. So I decided a few weeks ago that it was time to get to work and make a roll out pantry for our home.
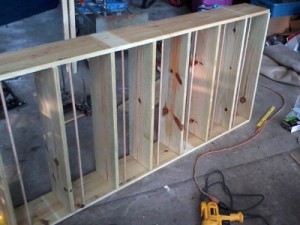
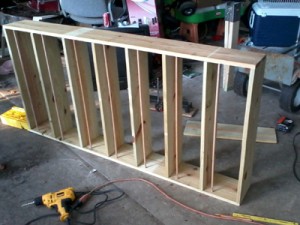
I started with a set of plans from Classy Cutter, but modified them to fit our family’s needs. We need to have enough room for 2 rows of cans, as well as larger boxes of pasta, so I doubled the depth of the shelves to eight inches instead of four. So instead of buying 1×4 pieces of wood, I got 1×8. I just bought the cheapest wood available, as I’m on a pretty tight budget. I also chose to make the bottom two shelf spaces slightly taller than the rest, so I can fit in larger items. For the back I got a 4×8 piece of thin hardboard, it was about $12 and was in the plywood section. Be sure to check out Classy Clutter to get the full details about how to make your own, their directions are really easy to follow!
Since I already had all of the screws and nails on hand, all I had to pick up was the wood, casters, dowels, and handle.
Supplies I purchased:
3 1x8x12 boards (cut on site into 2 64″ boards and 8 20.5″ boards)
1 sheet of 4×8 hardboard (cut down to 31.5 x 64 on site)
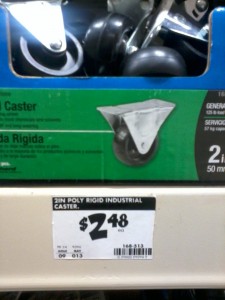
4 casters (2″ stationary 125 wheels, don’t get the swivel wheels, they make it hard to roll out the shelf)
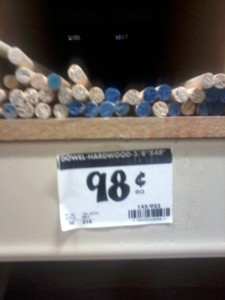
7 dowel rods (I used 3/8″ rods, and just cut them down to size at home with a hacksaw)
1 cabinet handle (There are tons to choose from under $3.00 at Home Depot)
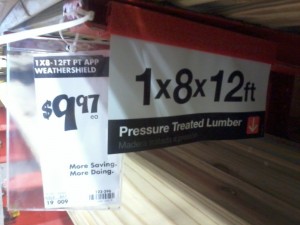


3 1×8 boards: $30
7 dowels: $7
Hardboard: $13
4 casters: $10
Handle: $3
Total spent: $63
Have you seen my DIY pot rack that freed up lots of cabinet space? It’s less than $20 to make, and you can have it up in just 5 minutes!
Make me VIRAL! Share this:

--Barbara
**Remember, y'all, this post may contain affiliate links. I receive a small amount of compensation when you purchase from my links, which I"ll totally blow on waffle fries and sweet tea, y'all!**


Very clever use of space! Thanks for sharing this… You have my wheels turning 🙂 I am visiting from the Growing Home Link Up. Have a wonderful week!
Thanks for stopping by! It really is a nice way to use that gap between the fridge and the wall. With a family of eight, we really need a good bit of pantry space. This was the perfect solution for us!
WOW! I love craftyness!! Very creative!
Thanks Bernetta! I can’t take all the credit, because I found the idea online, but it certainly has been a big space saver for us!
Love it! All it needs is a white coat of paint = )
I was going to paint it, but I was out of the paint we used for our kitchen walls. Having the space right now was more important to me than painting, so I went ahead and put it in place. I’m hoping to get it painted at some point though!
Great idea. I wish something like this would work in our house, but there isn’t a single space to slide anything like that.
I am always trying to figure out ways to add extra storage in our home. Before we got this new fridge, this just wasn’t an option. I’m posting next week about how we made a new space for storing pans as well, maybe it will be helpful for you!
Wow!!! That looks amazing and I love how frugal it was. What a great way to add space to your kitchen.
Thanks Leandrea! Most of the plans I found were over $100, but I was able to do it much cheaper. I’m hoping to get to Home Depot tomorrow and take pictures of the supplies I used so I can show exactly how I made I for less. It really helps to have that extra space now!
This is amazing! I need to do this for the new place. Thanks for the tips!
It was pretty simple, especially since I had the major cuts done at Home Depot. It is such a great way to add extra space to your kitchen!
You did an excellent job!!! It looks great!!
Thanks Katherine!
Fabulous idea! I shared it on my Frugal Local Kitchen page on FB.
Thanks Barb! It was pretty quick to make and was a great way to help free up space on my unorganized shelves!
This is SO cool! Thank you so much for sharing it at Thrifty Thursday, hope to see you again this week! I’m pinning it to our Thrifty Thursday board so I can go back to it later and maybe actually make one myself. Great job! http://pinterest.com/jenniferthorson/thrifty-thursday-favorites/
This is great! I have the same type of fridge as yours. Is the pantry aligned with the fridge door or is it flushed back a bit so that you can open the fridge door? Did you put anything along the wall to stabilize the pantry or to prevent it from scratching the wall/fridge? Last question, do you have extra pieces of wood where you screw in the casters? Thanks!
Hi Amy! Thanks for stopping by! It’s back a bit so I can open the door all the way. I hot glued a piece of felt across the top edge on the back to keep it from rubbing the wall when we move it. And yep, there are two blocks of wood screwed into the bottom of the shelf for the casters to attach to!