frugal living

Explore a wide way of keeping your spending down, beyond just clipping coupons and being "cheap".  Whether it be ways to cut out excess spending, or how to tighten up your budget, how to get by during the holidays or holiday flights, tips to a frugal Disney trip, or even if you just want to keep your kids cool during the summer - I've got it all covered!

Take a Load Off Your Laundry – Practical Tips to Beat the Laundry Blahs

**This post may contain affiliate links. I receive a small amount of compensation when you purchase from my links, which I"ll totally blow on waffle fries and sweet tea, y'all!**


Tips for beating the laundry blahs


Take a load off your laundry?  I’ll be the first to say it: I loath laundry!  Perhaps because it’s one of those household tasks that literally never ends, or because stubborn stains just seem to laugh at you time after time, or perhaps it’s the snarky sock monster — for whatever reason, I know I’m not alone in my feelings about this.  Am I right?

In any case, I’ve developed a few strategies to help ease the pain of this never-ending saga known as laundry.  Take a look, and see which ones work for you, or what more you would add to this.

* Schedule it: I do one load of laundry every weekday.  (An awesome tip I picked up from The Stressed Mom!)  I’ve found that by sticking to a schedule, and doing just one load a day, it’s MUCH more manageable for me.  I bring that load down either first thing in the morning or after I put the kids to bed the night before; throw the clothes in the dryer in the morning; then fold while the kids nap – or whenever I get a moment.  This also allows for a little wiggle room, like if I fall behind, it’s not dreadful to catch up, doing two loads a day, or simply moving each load back a day, and doing one load over the weekend.  Here’s my schedule, if you need some inspiration: Monday – whites; Tuesday – darks; Wednesday – alternate between bed sheets and hub’s dress shirts; Thursday – towels (includes all bibs, washcloths, hand towels, etc); Friday – kids clothes

Vinegar! If you haven’t unleashed the awesomeness that is vinegar, the laundry is a great place to start.  Since I only use a little bit of laundry detergent, I fill the rest of my cup with vinegar.   This acts as both a fabric softener, and helps to brighten clothes.  As a bonus, it costs only a buck or two for a gallon size, compared to the much smaller containers of liquid fabric softener.

Make it Smell Good.  Yeah, this may seem silly, but indulge in products like Downy Unstopables or Purex Crystals for select loads of laundry, and your senses will thank you!  I use them on bed sheets, towels, and my husband’s dress shirts.  (I also stick some in mismatched baby socks, and toss them under the trash bags in our diaper pail and kitchen trash.  This makes a BIG difference!)  An added benefit is the rather long-lasting scent that’ll stick with you (er, your clothes) for WEEKS!

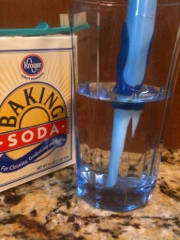
* Designate a “Soaking” Area. I’m fortunate to have a sink in my laundry room; but I don’t like taking up the sink for the sake of soaking one (or even a few) pieces of clothes in the process, nor using the washing machine either.  SO, I use a small bucket or tub (the ones we brought home with us from the hospital) to soak a few items.  I use a paint stick to stir or agitate when needed.  This would be easy to do in a smaller laundry area, as well.  (P.S.  WHY don’t I soak in the machine?  Because sometimes I let items soak overnight, and want to keep the machine available.  Also, it typically takes less water to soak this way.)

That’s a few of my favorite laundry tips.  Do you have others you’d like to share?  Please comment below with some of your favorite tips OR questions about laundry.

Keep on saving!  :o)

–Barbara [Read more…]
Keep on saving!  :o)
--Barbara

**Remember, y'all, this post may contain affiliate links. I receive a small amount of compensation when you purchase from my links, which I"ll totally blow on waffle fries and sweet tea, y'all!**

Ten Gift Ideas for the Whole Family

**This post may contain affiliate links. I receive a small amount of compensation when you purchase from my links, which I"ll totally blow on waffle fries and sweet tea, y'all!**


Often around the holidays, we are faced with buying gifts for families with multiple children. Trying to figure out what to get for each person, and fitting those individual gifts into your budget can be draining, both mentally and financially. One of the things we always suggest to friends and family when they ask what to buy, is that they put together a family present that everyone can enjoy. Here are some great “whole family” gifts that everyone is sure to love.

10 gift ideas for the whole family

10 Gift Ideas for the Whole Family

1. Movie passesAlmost all major movie theater companies offer gift certificates or cards that you can load with an amount of your choice.  You can also order them online in $25 and $50 denominations if there isn’t a theater near you (Regal and AMC gift cards are available on Amazon). Surprising a family with a gift card that will allow them to take their children to a movie and purchase some popcorn or candy is a gift solution that never disappoints. This works especially well for families with teens or children of varying ages, because everyone loves going to the movies! If that’s still too much for your budget, a movie gift basket is a great alternative. One or two DVDs, boxed candy and popcorn, and a bottle of soda makes for a fun night in, and they can watch the movies over and over in the future. (Psst…if you are a Costco member you can buy cheap tickets online and in store!)

Also, if you live near a Studio Movie Grill, Groupon frequently has a GREAT deal for movie tickets!


2. Museum, Aquarium or Zoo memberships

My children love to visit local museums, and we’ve received family passes as gifts in previous years that allowed us to go multiple times over the course of a year. Many museums have exhibits that change several times a year, so there is always something new to see each visit. Be sure to check and see if their local museum, aquarium, or zoo is part of a reciprocal program, such as ASTC, NARM, or AZA.  Reciprocal programs allow families to use their memberships for free admission to other participating museums, zoos and aquariums.  Another thing to consider with museums and aquariums is that they are inside, whereas zoos are not, so if they live in an area with extreme weather conditions, they may get more use from a membership that allows them to be indoors during their visits.

3. Video games

We have several gaming systems in our home, but they are specifically for use as a family.  If the family you are shopping for has an Xbox or Playstation system, buying them a game that they can play together is a wonderful gift. Just Dance and Mario Party are two of our favorites, as we can play together as a family, instead of just one or two kids zoning out in front of the television.  If the family you are purchasing for doesn’t have a gaming system, and it’s in your budget to purchase one for them, there are quite a few bundles available right now on Amazon that include the system, multiple controls, and often more than one game.


4. Board gamesBoard games can also be a lot fun, especially the ones that can be played by a wide range of ages.  Yahtzee is very popular in our house, even though the younger ones don’t really understand the concept, we team up and they have fun rolling the dice and writing down the scores.  Pictionary, Jenga, and Guesstures (like charades) are fun classic choices too. Of course, if you really want to knock it out of the park, you could go for some newer games that are SUPER popular right now, like Pie Face, Gas Out (eww, I know!) and Speak Out (aka the cheek retractor game). All of these games are simple enough for young children, yet still entertaining enough to keep the older ones involved.


5. Hotel weekend

Who doesn’t love staying the night in a nice hotel?  Find a hotel that is close to the family you are shopping for, and book them a room for the weekend.  Be sure to look for hotels that have free wifi, continental breakfast, and a pool that is open.  Some hotels even offer free happy hour appetizers in their restaurant, or a game room in the lobby.  You may not be able to buy them a vacation, but you can gift them a faux getaway, and that can still be loads of fun!  We have a hotel about 10 minutes away from us that we love to take the kids to for a treat.  They have an indoor pool, a lending library, a game room, a snack bar, free breakfast, and awesome happy hour deals.  It’s a ton of fun for them, and a nice break from the stresses of home for us.

These family gifts are sure to be enjoyed by everyone, and you don’t have to go broke buying them.  Still not sure?  Here’s another quick couple of suggestions below:

6. Outdoor games such as bocce, badminton, trampoline.  Check out these great outdoor toys for little ones!

7. Pizza/Date night Offer to take the kids out for pizza while the parents go on a date night.  Make sure to peruse Scoutmob and local Groupon deals for date night inspiration, and to try out new pizza places!

8. DVD set of classic movies (Disney is a great choice)

9. Family Fun Center pass (miniature golf, bowling, arcade, go karts)

(If all else fails, and you don’t think any of these would work for your situation, you can NEVER go wrong with #10)

10.  Amazon gift card

You can buy one last minute, you can send it via email, and they can choose whatever they want for themselves.  Clothes, games, toys, electronics, gift cards, you name it, Amazon has it.  Some people feel like gift cards can be impersonal, but I’d much rather get a gift card than some ugly sweater I’m never going to wear!

Have you ever received or given one large family gift?

What do you think about gift cards as presents?  Practical or tacky?

*This post includes affiliate links, and I earn a small commission from any items purchasedMaybe even enough to take my kids out for some family fun!*

Keep on saving!  :o)
--Barbara

**Remember, y'all, this post may contain affiliate links. I receive a small amount of compensation when you purchase from my links, which I"ll totally blow on waffle fries and sweet tea, y'all!**

DIY Pot Rack: Extra cabinet space for less than $20!

**This post may contain affiliate links. I receive a small amount of compensation when you purchase from my links, which I"ll totally blow on waffle fries and sweet tea, y'all!**


As I’ve mentioned before, our kitchen just does not have enough storage space for a family of eight.  We only have a few cabinets for pots and pans, and it’s just not been working out too well these past 3 years.  In our previous home, we installed DIY pot rack that was a rod that sat on top of the cabinets on either side of the sink, and used that to hang pots and pans.  I’ve been talking about doing the same thing in this home, and finally got around to it this week.

DIY Pot Rack

Supplies needed:

1″ dowel rod 36-48 inches long (Less than $4 from Home Depot)

1 package of closet pole sockets ($2-6 at Home Depot depending on the type you purchase)

1 package of pot hooks (I got a dozen for $9 from a local store, but you can get them from Amazon
for pretty cheap as well)

DIY Pot Rack

DIY Pot Rack

DIY Pot Rack

It’s really quite simple.  You just install the pole sockets on the cabinets above your sink, cut the dowel rod to size and put it in place, and start hanging your cookware!

DIY Pot Rack

The pots and pans are close enough to the window that they aren’t in my face when I’m at the sink, and they are easy to access when cooking.  Now my two cabinets that were full of pans are freed up for other things, like my absurdly large amount of plastic containers and bowls!

DIY Pot Rack

Have you seen the roll out pantry I built to go in the empty space beside my fridge?  It only cost $63 and added 13 square feet of storage space in my kitchen!

Keep on saving!  :o)
--Barbara

**Remember, y'all, this post may contain affiliate links. I receive a small amount of compensation when you purchase from my links, which I"ll totally blow on waffle fries and sweet tea, y'all!**

Treat yourself – Eat dinner at home and out for dessert

**This post may contain affiliate links. I receive a small amount of compensation when you purchase from my links, which I"ll totally blow on waffle fries and sweet tea, y'all!**


My kids love to go out to eat.  I mean, LOVE it.  Unfortunately, my wallet and bank account do not.  One thing that we have started doing is to eat dinner at home, and then take the kids out for dessert.  It’s not something we do all the time, but it’s a nice treat for them and a way to keep from spending a fortune on dining outside the home.

We usually go to a local ice cream shop instead of a sit down restaurant, so that we can keep the bill as low as possible.  Having worked in food service for several years, I always tip extremely well, but that’s difficult to do when you have a limited budget.  Instead of going to a full service restaurant and tipping a server, we just go to a self serve or counter service place where we can avoid paying a tip on top of our bill.  Two of our favorites are Five Spot and Brusters.


Eat dinner at home and grab dessert out for a cheaper way to treat yourself!

Five Spot is a frozen yogurt place where you purchase your desserts based on weight.  During the week the maximum price is $5.00, no matter what you get.  Friday through Sunday it’s only $0.44 an ounce.  Brusters single scoop cones are huge and can easily be split between two people.  They also offer free kid cones for children under a certain height.  If you’re lucky, you may be able to find a Brusters coupon book through your local school, they are only a couple of dollars and are full of BOGO coupons that never expire.

Of course, there are times when I would love to treat my family to a yummy dessert, but going out is just not an option.  I plan ahead for those times by buying a half gallon of ice cream when I’m doing my regular shopping, along with some cheap cones, whip cream, and sprinkles.  They may not get to choose from 50 different flavors, but they still enjoy the homemade ice cream sundaes just the same.

Do you enjoy the out-to-eat experience but find it hard on your wallet?  Have you ever considered just going out for dessert instead?

Keep on saving!  :o)
--Barbara

**Remember, y'all, this post may contain affiliate links. I receive a small amount of compensation when you purchase from my links, which I"ll totally blow on waffle fries and sweet tea, y'all!**

How I added 13 square feet to my pantry for only $63!

**This post may contain affiliate links. I receive a small amount of compensation when you purchase from my links, which I"ll totally blow on waffle fries and sweet tea, y'all!**


When we bought our home three years ago, our kitchen was really tiny.  There was a laundry room and “pantry” area beside it that led out to the garage.  We ended up knocking out the walls for that room, closing in the coat closet by the front door, and adding all of that space to the kitchen.  But I still just don’t have enough shelf space to store food for all eight of us.

I saw a post in the past about a roll out pantry that goes beside the refrigerator.  Our old fridge was too wide to do something like that, but we recently got a new fridge that was thinner, leaving us with about 8 inches of space between it and the wall.  So I decided a few weeks ago that it was time to get to work and make a roll out pantry for our home.

I started with a set of plans from Classy Cutter, but modified them to fit our family’s needs.  We need to have enough room for 2 rows of cans, as well as larger boxes of pasta, so I doubled the depth of the shelves to eight inches instead of four.  So instead of buying 1×4 pieces of wood, I got 1×8.  I just bought the cheapest wood available, as I’m on a pretty tight budget.  I also chose to make the bottom two shelf spaces slightly taller than the rest, so I can fit in larger items.  For the back I got a 4×8 piece of thin hardboard, it was about $12 and was in the plywood section.  Be sure to check out Classy Clutter to get the full details about how to make your own, their directions are really easy to follow!

DIY Rollout Pantry - 13sqft of space for $60!

Since I already had all of the screws and nails on hand, all I had to pick up was the wood, casters, dowels, and handle.

Supplies I purchased:

3 1x8x12 boards (cut on site into 2 64″ boards and 8 20.5″ boards)

1 sheet of 4×8 hardboard (cut down to 31.5 x 64 on site)

4 casters (2″ stationary 125 wheels, don’t get the swivel wheels, they make it hard to roll out the shelf)

7 dowel rods (I used 3/8″ rods, and just cut them down to size at home with a hacksaw)

1 cabinet handle (There are tons to choose from under $3.00 at Home Depot)

DIY Rollout Pantry - 13sqft of space for $60!

DIY Rollout Pantry - 13sqft of space for $60!


DIY Rollout Pantry - 13sqft of space for $60!

DIY Rollout Pantry - 13sqft of space for $60!

DIY Rollout Pantry - 13sqft of space for $60!

I didn’t want to bother with cutting each piece myself, so I had the associates at Home Depot cut them all for me.  Our local store will make several cuts for free, although they may charge a small fee for multiple cuts (ours is $0.25 each for anything over 2).  Even with the additional charge, it’s still worth it to me because I don’t have to spend the time to do it myself at home.  (Bonus: They didn’t charge us for the extra cuts, so I saved a few dollars!)

DIY Rollout Pantry - 13sqft of space for $60!

I’ve posted a few pictures below, but I will give you two big tips.  Make sure the wood you get from the store is STRAIGHT.  I thought our wood was, but once I started putting the shelf together, I realized there were some bowed pieces.  It still came out okay, but it took some extra screws and elbow grease before it was all said and done.  Also, for cheaper wood, be sure to check to cull lumber section of your store.  Home Depot often sells leftover cuts of wood for $0.51, so you may be able to save some more money that way.
DIY Rollout Pantry - 13sqft of space for $60!
I chose not to paint or decorate the shelf, as I really don’t care what it looks like, as long as I have the extra space for my food.  Maybe I’ll paint it eventually, but for now, I’m fine with the plain wood look.

DIY Rollout Pantry - 13sqft of space for $60!

For about $60 and a few hours of my time, I was able to add over 13 square feet of storage space to my kitchen area.  That’s a deal in my book!
DIY Rollout Pantry - 13sqft of space for $60!
Cost of supplies:

3 1×8 boards: $30
7 dowels: $7
Hardboard: $13
4 casters: $10
Handle: $3

Total spent: $63

Have you seen my DIY pot rack that freed up lots of cabinet space?  It’s less than $20 to make, and you can have it up in just 5 minutes!

Is your pantry area too small for your family?  What do you do when you can’t fit everything in the space you have now?
Keep on saving!  :o)
--Barbara

**Remember, y'all, this post may contain affiliate links. I receive a small amount of compensation when you purchase from my links, which I"ll totally blow on waffle fries and sweet tea, y'all!**

Cleaning an Electric Toothbrush {Frugal Homemaking}

**This post may contain affiliate links. I receive a small amount of compensation when you purchase from my links, which I"ll totally blow on waffle fries and sweet tea, y'all!**


Every time I changed the head on my electric toothbrush, I spent hours devising the perfect method of cleaning the (absurdly nasty!) gunk from the inside. The dilemma I faced was finding a cleaner that was safe to use on an item I put in my mouth


Then it finally dawned on me: vinegar!


First, I let it dry out overnight with the head off.  Once dry, I knocked as much funk out as I could, then let it soak in a glass of vinegar for about 15 minutes. Next, I used one of my “for cleaning only” manual toothbrushes, and cleaned most I the gunk out.


However, there was still some gunk I couldn’t quite reach just inside the neck. So I thought back to 2nd grade science… I put the toothbrush back in the glass of vinegar, then added about a tsp of baking soda.


After marveling over the bubbles (hee hee!  it never gets old!), I was then able to loosen the remaining gunk, and -voila!- my toothbrush was good as new again.


What uses have YOU discovered for vinegar?


Keep on saving!  :o)


–Barbara 

**This post may contain affiliate links.**

Follow Me on Pinterest

Keep on saving!  :o)
--Barbara

**Remember, y'all, this post may contain affiliate links. I receive a small amount of compensation when you purchase from my links, which I"ll totally blow on waffle fries and sweet tea, y'all!**

Frugal Parenting: DIY Fathers Day Crafts

**This post may contain affiliate links. I receive a small amount of compensation when you purchase from my links, which I"ll totally blow on waffle fries and sweet tea, y'all!**


For Father’s Day this year, I wanted to continue to impress upon my daughter the importance of ownership of the gifts she gives. Gifts, thank you notes, and various cards hold more meaning to the giver and receiver when made more personable, so I helped my daughter create some cards for her daddy, and both grandfathers this year.  Thus, a DIY Father’s Day craft seemed in order….

DIY Father's Day crafts
Lesson learned: Glue the construction paper to the cardstock FIRST,
to prevent the glue from interfering with the paint!

We sat down, working bit by bit over the span of a few days, creating these cards. I brushed washable paint over her hand to create the “flower”. (The paint acquired, by luck, at a garage sale — a pack of 10 small tubs for a quarter.) Then, while she colored on a few sheets of construction paper (to be used later), I asked her “why do you love daddy?”, recording her responses and offering prompts (basically rephrasing the question) to redirect her when needed.

She helped put down the glue for each step (reciting our glue motto of “just a dot, not a lot!”), then placed the strips with her responses on the paper. It was all glued down to card stock, to make it sturdier. The card stock also served as a quick and simple way for my infant son to put his own stamp on each card, too. 🙂

DIY Father's Day crafts - baby's stamp

We repeated this for a single-flowered card for each of her grandfathers.

DIY Father's Day crafts

The sheets she colored were used as wrapping paper for the two small gifts we got for her daddy. (Since he had actually requested something specific, we indulged him.)

Each card was greeted with great pride by its intended receiver– so much so, that first thing Monday morning the card for her Daddy was proudly displayed at his office. 🙂

Do you have any DIY Fathers Day crafts or gift ideas to share? Please leave a comment here or contact me. I’d love to hear all about it!

Keep on saving!  :o)
--Barbara

**Remember, y'all, this post may contain affiliate links. I receive a small amount of compensation when you purchase from my links, which I"ll totally blow on waffle fries and sweet tea, y'all!**

Frugal Parenting: Fun with Paint, Water, and Recyclables

**This post may contain affiliate links. I receive a small amount of compensation when you purchase from my links, which I"ll totally blow on waffle fries and sweet tea, y'all!**


I hoard containers. There — I put it out there. I save various, sturdy containers, with the idea that I could re-use it ….for something. This came in handy the other day with my 3-year-old daughter.

I’m always looking for ways to keep my children entertained, as well as offer them chances to explore and learn.  If I can additionally do so in a “green” manner, even better.

For this occasion, I put red food coloring in an old throat spray bottle, blue in an old dish soap bottle, grabbed some old foam letters (but sponges would work just as well) and put a little paint in old flushable wipes containers, gathered up a few unused medicine droppers, opened some paper bags at the seems, and threw in a few paint brushes, and  empty toilet paper and paper towel rolls.

In our driveway, we “painted” a large hopscotch-like path with various shapes using the dish soap bottle. Then we experimented with painting with rocks, sticks, and our fingers. When asked which she liked best,she responded “the rock — because it’s MAGIC!”

She and I had a blast, and all for pennies. More importantly, these activities encouraged her imagination, worked on dexterity (pushing the spray button, utilizing the various objects for painting, etc), and allowed for open-ended inquiry. Certainly this was a good example of “process over product”.

My next plan is to get some old, large containers to create makeshift water tubs, and let her play and explore. I already have a few containers in mind for this. When my son is a little older -perhaps later in the summer- he can join in the fun.

Do YOU have some great, cheap (and green) ways to entertain your kids? Please share, or contact me. 🙂

**Sidenote: I’ve learned that food coloring, while great for learning, does not easily come off hands — it requires a good dose of elbow grease.

Keep on saving!  :o)
--Barbara

**Remember, y'all, this post may contain affiliate links. I receive a small amount of compensation when you purchase from my links, which I"ll totally blow on waffle fries and sweet tea, y'all!**

DIY Headboard

**This post may contain affiliate links. I receive a small amount of compensation when you purchase from my links, which I"ll totally blow on waffle fries and sweet tea, y'all!**


My bed has been sitting on the floor, no frame, no headboard, no nothing, for the last 2 years.  About a year ago I started shopping around for headboards and was appalled by the pricing.  I was griping to my mother, and she said, “Tiffany, just make your own!” Well duh!  I don’t know why I didn’t think of that before!  So I rushed out and bought plywood and the material I wanted for the cover.  I found 2 old, ugly comforters at a discount cloth outlet that were perfect for the padding.  (This particular outlet sells torn and stained fabric from their warehouse by the pound!)

And then I hurried home.

And did nothing with it.

For a year.

Since then, my husband has tried to throw out the wood at least a dozen times, I’ve lost the cover material more than I can count, and my kids have taken over the comforters.  Well, on Monday, I decided I had had enough.  I gathered all of the materials and got to work!

Materials used:

1 4×8 plywood board ($5)

1 used brown suede zippy cover thing ($1)

2 used large, ugly comforters ($4)

Tools needed:

Circular saw

Staple gun

Measuring tape

Chalk

Scissors (I used bandage scissors, they worked GREAT!)

DIY Headboard

Directions:

1. Measure and cut the wood down to the size you need.

I cut mine .  It didn’t occur to me to take pictures until after I got started, so no visual for this step!

2.  Fold first comforter and lay out across board, cut off excess.

I don’t own sawhorses, so I used two plastic tables instead.  It helped A LOT to line the edge of the board up with the table edge.  I also spent forever hacking away at the comforter with kitchen shears until my husband suggested the bandage scissors.  What a lifesaver!  By the way, it doesn’t have to look perfect. 🙂

DIY Headboard

DIY Headboard

3.  Staple around the edges, pulling the comforter tight as you go. Pretty simple, I stapled about every 4 inches or so.

DIY Headboard

4. Lay out the second comforter, cut slightly larger than the first.

This one will get folded over the back of the board, so cut it a bit longer.

DIY Headboard

5.  Flip over the board, pull the fabric tight, and start stapling!

Make sure the fabric is pulled very tight, so that you don’t end up with a saggy headboard in a few weeks!

DIY Headboard

6.  Last step, attaching the cover!

I slide the fabric underneath the board and put in 2 staples on each side as I pulled it tight.  I stapled the corners and then went down the sides to finish it off.

DIY Headboard

I wasn’t too concerned about it being exactly even and neat, since it’s the back and no one will know but me.  And you.  But you won’t tell, right?

DIY Headboard

Things NOT to do when making your own headboard:

1. Drop the finished board on your foot while trying to pick it up off the table.

2. Drop the board on the table and knock it over.

3. Fall down on the cement.

4.  Crack the debit card in your pocket when you land on the ground.

If you *do* choose to go all out, be prepared to end up with this beauty:

DIY Headboard

I seriously thought I broke my foot, but within a few hours, I was as good as new!  Now, onto the before and after shots!

DIY Headboard before

DIY Headboard after

Doesn’t it look lovely?  All for less than $10 and 30 minutes!  What’s your favorite fast DIY project?

Keep on saving!  :o)
--Barbara

**Remember, y'all, this post may contain affiliate links. I receive a small amount of compensation when you purchase from my links, which I"ll totally blow on waffle fries and sweet tea, y'all!**

(semi)New bedroom decor!

**This post may contain affiliate links. I receive a small amount of compensation when you purchase from my links, which I"ll totally blow on waffle fries and sweet tea, y'all!**


We officially moved into our home in October of 2009.  We bought a newish mattress shortly after and I bought a beautiful new comforter set from Garden Ridge for $30.  I couldn’t wait to get it home and on the bed.  It looked fabulous!  Then I washed it.  And this happened.

New to me bedroom set

That USED to be baby blue and chocolate brown.  🙁  So I have been using this horribly faded comforter set for almost 2 years, and can’t stand the sight of it.  But, this past week, Goodwill came to my rescue!  I found this beautiful comforter set for a whopping $30!  It is in immaculate condition and matches my bedroom color scheme perfectly.

Goodwill comforter set

I finished the headboard today, the down and dirty tutorial for that can be found here.  Once I got it in place, I added the comforter set for the final touch.  It’s amazing how different your room can look just from changing the comforter and pillows out.  Even my kids are impressed. 🙂

Have you done any low cost decor changes recently?  How did yours turn out?

Keep on saving!  :o)
--Barbara

**Remember, y'all, this post may contain affiliate links. I receive a small amount of compensation when you purchase from my links, which I"ll totally blow on waffle fries and sweet tea, y'all!**

Atlanta's Frugal Mom is a participant in the Amazon Services LLC Associates Program, an affiliate advertising program designed to provide a means for sites to earn advertising fees by advertising and linking to Amazon. In other words, if you click through to Amazon from some of the books or products I recommend and make a purchase, I get a small percentage in exchange for your purchase. It's a small way you can support AFM.