Macaroni and Cheese Recipe – Restaurant Style

**This post may contain affiliate links. I receive a small amount of compensation when you purchase from my links, which I"ll totally blow on waffle fries and sweet tea, y'all!**

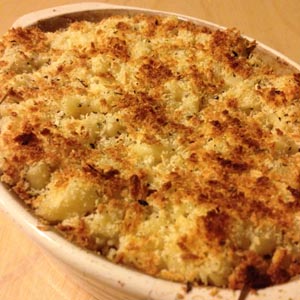

Macaroni and cheese is one of my favorite dishes.  Not the fake version that comes in the blue box, but the real deal.  My mother made it from scratch when I was a child, and now I do the same for my family.  Often times I’ll just make it with American cheese and a little bit of butter and milk, but lately I’ve been playing around with richer, creamier versions.  Multiple cheeses, heavy cream, and even a pinch of cayenne can take this simple comfort food to an entirely new level.  My newest recipe (which I’m sharing today) has quickly become a favorite in our home.  A layer of seasoned breadcrumbs and a few minutes in the broiler gives it a lightly crispy topping that is a perfect compliment to the delicious, creamy sauce.  The result is a delicious dish that is similar to one you would get at a restaurant!  (For more make-at-home restaurant style dishes, check out this post with 10 of my favorite copycat recipes!)

Restaurant style macaroni and cheese


Restaurant Style Macaroni and Cheese

Ingredients:

6 cups water

2 cups elbow noodles

1 Tbs butter, unsalted

3/4 c milk

3/4 c shredded Colby and Monterey Jack cheese

3/4 c shredded Italian style cheese

1/4 tsp garlic powder

1/8 tsp pepper

1/2 tsp salt

Pinch of cayenne

1/2 c Parmesan herb panko bread crumbs (Private Selection from Kroger)

Restaurant style macaroni and cheese

Directions:

1.  Bring water to a boil on high heat.

2.  Add in noodles and boil for 8-10 minutes.

3.  Remove from heat and drain in a colander. Set aside.

4.  Set oven to high broil.

5.  Melt butter in pot on medium heat.

6.  Add in milk, cheese, and spices.  Whisk until melted completely.

7.  Fold in elbow noodles, stirring gently to coat with sauce.

8.  Pour noodles into oven safe dish.

9.  Top with panko bread crumbs.

10.  Place in oven for 2 minutes until top is browned.

11.  Remove from oven and serve immediately.

Printer friendly recipe for Restaurant Style Macaroni and Cheese

Restaurant style macaroni and cheese

Do you have a macaroni and cheese recipe that’s a family favorite?  I’d love to hear your version, please take a moment to share in the comments below!

Keep on saving!  :o)
--Barbara

**Remember, y'all, this post may contain affiliate links. I receive a small amount of compensation when you purchase from my links, which I"ll totally blow on waffle fries and sweet tea, y'all!**

Smoky beef and bean chili recipe

**This post may contain affiliate links. I receive a small amount of compensation when you purchase from my links, which I"ll totally blow on waffle fries and sweet tea, y'all!**


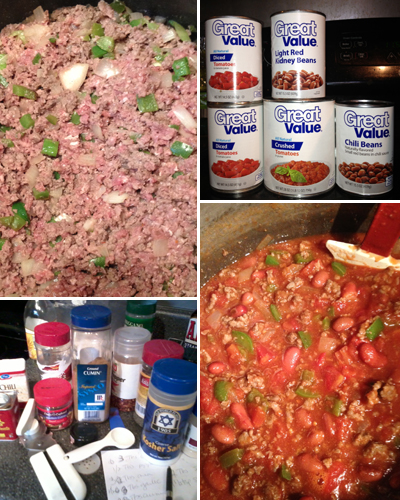
One of my favorite dishes to make is chili.  It’s effortless, great for any season, and it freezes perfectly!  It’s also a great source of protein, and can be very good for you when it’s not coming from a can!  I’ve been making lots of chili over the last month because the hubs won’t stop eating all the frozen stock I put away.  He eats it on everything.  Fries, hot dogs, rice, nachos, potatoes….you name it, he’ll cover it with chili.  Luckily it’s made with ingredients that are simple to find at any grocery store, and I spend about 10 minutes physically preparing it, so it’s not too bad.  Don’t let the longer list of spice ingredients scare you off either.  I promise this spice mix is 1000x times better than what you get in the pack at the store, and it’s wheat and preservative free!

My favorite two ingredients in this chili are the sausage and the smoked paprika.  Something about chili with sausage is just SO much better to me than plain ol’ beef.  Of course, if you don’t eat pork, just switch it out for more beef.  If you aren’t familiar with smoked paprika, it is one of my most favorite spices of all time.  It’s subtle and smoky, and you don’t need too much, but it gives you a delicious finish that would make you swear that the meat in your chili had been cooked on a smoker.  Just don’t go nuts with it, too much smoky flavor can be a bad thing!

Smoky beef and bean chili

The Bizy Mommy’s Best Chili Recipe

Ingredients:

1 Tbs oil
1 onion, diced
1 green pepper, diced
1 lb beef
1 lb sausage (I use mild)
1 can light red kidney beans (drained)
1 can chili beans (I use mild)
1 can crushed tomatoes (28 oz)
2 can diced tomatoes (15 oz)
4 beef bouillion cubes
4 cups water
1.5 Tbs chili powder
1/4 Tbs red pepper flakes
1.5 Tbs onion powder
2 Tbs garlic powder
1 Tbs ground cumin
1 Tbs parsley
3/4 tsp smoked paprika
1/4 tsp pepper
1 Tbs salt

Smoky beef and bean chiliDirections:

1. Heat oil on medium high in a stock pot and add in pepper and onion.  Cook until the onions start to soften.
2. Add in beef and sausage and cook on medium high until browned throughout.
3. Add in all remaining ingredients and bring to a boil, stirring frequently to prevent burning to the bottom.
4. Once boiling, reduce heat to low/med and cover.  Let simmer for at least 2 hours, the longer the better.

(Click here for a printer friendly version of this recipe)

Smoky beef and bean chili

-It’s going to look *really* thin while it’s simmering.  Don’t worry, it thickens up as it cooks and then cools.

-The red pepper flakes give it a tiny bit of heat, but it’s not spicy.  If you don’t do heat, leave that out.  If you love heat, keep on pourin!

-You can sub out 4 c. beef broth for the bouillion cubes and water.

-Smoked paprika *really* gives this a nice finish.  If you can get it, I would really suggest using it!

-This makes about 16-18 cups of chili, so if you don’t need a ton, throw it in the freezer for lazy dinner nights!

-If your slow cooker is big enough, you could definitely simmer the chili in it all day.  I would still cook the peppers, onions, and meat in another pot first though, and then add in everything on medium heat for an hour, and then low heat for another 3-4.

Hope you enjoy our family’s favorite chili recipe!  Let me know what you think!


Keep on saving!  :o)
--Barbara

**Remember, y'all, this post may contain affiliate links. I receive a small amount of compensation when you purchase from my links, which I"ll totally blow on waffle fries and sweet tea, y'all!**
$5.00 No Peek Pot Roast

**This post may contain affiliate links. I receive a small amount of compensation when you purchase from my links, which I"ll totally blow on waffle fries and sweet tea, y'all!**



So I kinda threw my food budget out the window over the holidays, and now we’re playing catch up.  I actually find it rather entertaining, because being short on funds means I have to get really creative with healthy meals that don’t break the bank.  Earlier this week, Lori over at Vann Clan 5 shared a simple no peek beef tips recipe that got me thinking.

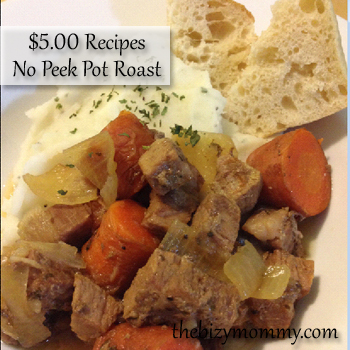
I headed out to Aldi to do my shopping and was stoked to find THREE marked down packs of eye of round steak for right at $3.00 each.  I LOVE picking up discounted packs of tough-as-leather-nobody-wants-to-buy-it meat at Walmart and Aldi, because once you slow cook it, it’s tender as can be!  I grabbed some carrots and onions and a few more ingredients and headed home to make some magic.  This is *such* an easy recipe for anyone to make, check out my $5.00 No Peek Pot Roast below!

$5.00 No Peek Pot Roast

$5.oo No Peek Pot Roast

Ingredients:

1 pound of cheap beef (cut into 1/2-1″ cubes) – $3.25

2 cups of chopped carrots (I used 5 medium carrots) – $0.40 [Read more…]

Keep on saving!  :o)
--Barbara

**Remember, y'all, this post may contain affiliate links. I receive a small amount of compensation when you purchase from my links, which I"ll totally blow on waffle fries and sweet tea, y'all!**
Wordless Wednesday: PINK Girls and Chunky Babies

**This post may contain affiliate links. I receive a small amount of compensation when you purchase from my links, which I"ll totally blow on waffle fries and sweet tea, y'all!**


Today was the first day back at school for my daughter, so she naturally felt compelled to show off her new pink threads.

Little guy had his one-year check-up this morning, too.

Both are doing quite well, but only ONE is sleeping off the ensuing traumas from their morning. 😉

Atlanta's Chunky Baby
Playing with teething beads, all 22 lbs of him.

Atlanta's Pink Preschooler
Pretty in (all) pink –yep, those are cowgirl boots.
Keep on saving!  :o)
–Barbara 

**This post may contain affiliate links.**

Follow Me on Pinterest

Keep on saving!  :o)
--Barbara

**Remember, y'all, this post may contain affiliate links. I receive a small amount of compensation when you purchase from my links, which I"ll totally blow on waffle fries and sweet tea, y'all!**

Cooking with the kids: Chocolate Peppermint Popcorn

**This post may contain affiliate links. I receive a small amount of compensation when you purchase from my links, which I"ll totally blow on waffle fries and sweet tea, y'all!**



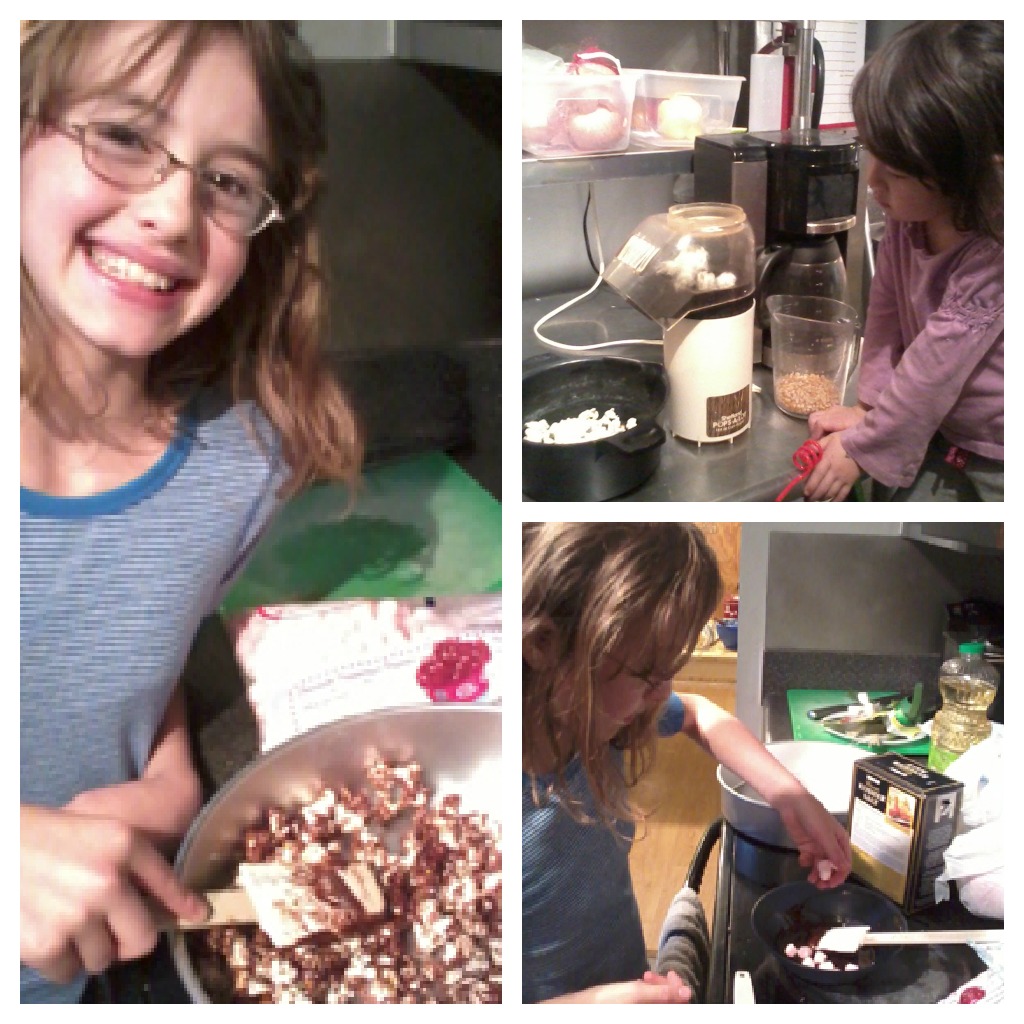
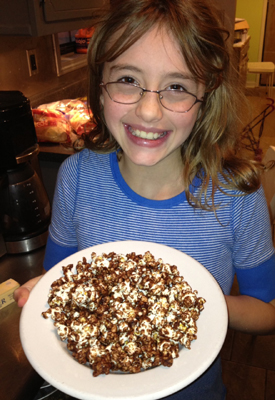
Today while doing last minute stocking stuffer shopping, I grabbed a bag of Kraft peppermint marshmallows.  My kids love marshmallows, and I thought the peppermint ones would be really tasty in their Christmas morning cocoa.  Once I got home, Angel saw there was a recipe on the back and asked if she could make it for everyone.  I love letting the kids cook and create in the kitchen, so of course I said sure!

Chocolate Peppermint Popcorn 

Chocolate Peppermint Popcorn

Ingredients:

1/2 tsp salt

12 cups air-popped popcorn (6-8 Tbs kernels)

1/2 cup dark chocolate morsels

1 stick unsalted butter

40 mini peppermint marshmallows

Chocolate Peppermint Popcorn

Directions:

1.  Heat oven to 275.

2.  Add chocolate and butter into a microwaveable bowl and heat for 30 seconds at a time until melted completely.

3.  Stir in marshmallows and heat for 15 seconds at a time until melted.

4.  Stir in salt.

5.  Pour over popcorn and toss until coated.

6.  Spread out on a greased baking sheet.

7.  Bake for 10 minutes, stir and bake for another 10 minutes until crisp.

8.  Enjoy!

Chocolate Peppermint Popcorn

This would make a great treat for a party, or a gift for someone special on your list.  Adding in extra marshmallows after the mix cools can give it some extra color and texture.  The original recipe called for semi-sweet chocolate, but we are big dark chocolate fans over here, so we used that instead.  If I hadn’t used all of our mint flavoring on fudge this week, I would have added in a bit more to the chocolate mix, as it wasn’t *quite* as minty as we would have liked.  Still delicious overall though!

Keep on saving!  :o)
--Barbara

**Remember, y'all, this post may contain affiliate links. I receive a small amount of compensation when you purchase from my links, which I"ll totally blow on waffle fries and sweet tea, y'all!**
Christmas on a budget: $250 for six kids

**This post may contain affiliate links. I receive a small amount of compensation when you purchase from my links, which I"ll totally blow on waffle fries and sweet tea, y'all!**


Wowzers!  I wrote this post last year to share what I purchased for my children for Christmas, and to show that it is completely possible to shop for six kids on a $250 budget.  The information I shared is very specific to what I actually did and how I saved.  As of late, this post has become very popular and I want to be sure to share information that is helpful for you as a visitor to my site.  Please check out the 2 posts below some awesome tips that will help your holidays rock even with the smallest budget!

10 tips for planning Christmas on a budget

10 Stocking Stuffers for Whole Family for Under $2

Our family typically doesn’t spend a ton on Christmas gifts, but this year our budget is really tight.  I decided in October that I was going to try to get gifts for all six children for under $300, and I did it!  See what I bought and how I did it below:

Christmas on a budget - $250 for 6 kids

© Devy | Stock Free Images & Dreamstime Stock Photos

How I saved

1.  Earned referral fees from retail sites.  Some of the items below were free with referral credits I had earned from various websites.  You *do not* have to be a blogger to earn referral fees, and it’s a great way to save on things for your own family, some offer up to $15 per friend that you refer! Some of my favorites are One King’s Lane and Zulily.  And yep, those are my referral links. 🙂

2.  Enter giveaways hosted by local bloggers.  Some of the other items say FREE because I won them through giveaways hosted by local bloggers.  I do sometimes enter larger, national giveaways, but the odds are better if you stick with smaller, local blogs.  I also won several Amazon gift cards as well, as you’ll see below. [Read more…]

Keep on saving!  :o)
--Barbara

**Remember, y'all, this post may contain affiliate links. I receive a small amount of compensation when you purchase from my links, which I"ll totally blow on waffle fries and sweet tea, y'all!**

Paper Christmas Tree Craft (with free download!)

**This post may contain affiliate links. I receive a small amount of compensation when you purchase from my links, which I"ll totally blow on waffle fries and sweet tea, y'all!**


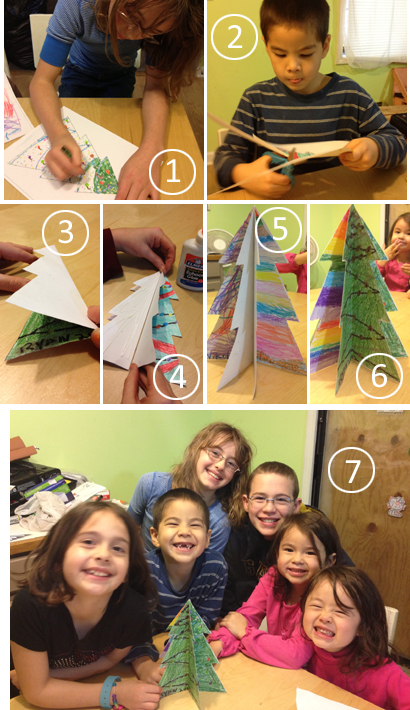
Every year we make all sorts of holiday crafts and decorations with our children, and I’ve ended up with a whole box of crumpled, torn paper crafts as a result.  I want to save them all, but I’m running out of ways to display (and repair) them!  This year, we decided to start a grow-with-me holiday centerpiece that we can add to every year and proudly display on the table or mantle.  Check out this fun, easy craft below!

Keepsake paper christmas tree craft 

Supplies needed:Keepsake paper christmas tree craft

Cardstock (see link to the right for free template download)

Markers/crayons

Scissors

Glue

Paperclip (optional)


Instructions:

1. Print out the template on cardstock and have your child decorate it as desired.

2. Cut out the colored tree. (You may need to help younger ones with this step)

3. Fold the tree in half down the center.

4. Glue the tree halves together, back-to-back.

5. Glue the last two backs together.

6. Fan out the papers so the tree can stand on its own.

7. Enjoy your new holiday decoration!

Keepsake paper christmas tree craft

A few notes here:

-If you want to add to the tree each year, don’t glue the last two backs together.  Instead, clip with together with a paper clip.  The tree can be folded flat after the holidays for storage, and you can easily add in new trees each year.

-Be sure to download and save the coloring sheet you choose to use, so you can have it next year and in years to come.

-Have children write their name and the year on the bottom of the tree for future reference.

-If you have less than three children, you’ll need to have them color more than one trees for the finished tree to be able to stand.

Keep on saving!  :o)
--Barbara

**Remember, y'all, this post may contain affiliate links. I receive a small amount of compensation when you purchase from my links, which I"ll totally blow on waffle fries and sweet tea, y'all!**

Teaching My Child to Brush Her Teeth and Wash Her Hands

**This post may contain affiliate links. I receive a small amount of compensation when you purchase from my links, which I"ll totally blow on waffle fries and sweet tea, y'all!**


teaching my child to brush her teeth

We successfully tackled potty training about a year and a half ago, so when my daughter started preschool last year, her teacher taught the class a song to help with proper hand washing.  To the tune of Row, Row, Row Your Boat:

Wash, wash, wash your hands,
Wash them very clean.
Wash the fronts and wash the backs,
and even in-between.  Yeah!*

*My daughter and I added the enthusiastic “yeah!”

teaching my child to brush her teeth


We would repeat a few times while she washed, and it served as a good way for her to remember to do a complete, proper hand wash.  teaching my child to brush her teeth - washing hands

So, here I find myself teaching my child to brush her teeth through song – along the same -ahem- note, we adapted the song to brushing teeth:

Brush, brush, brush your teeth,
Brush them very clean.
Brush the tops and brush the bottoms,
and even brush your tongue!

teaching my child to brush her teeth - washing-hands2

Do you have any clever songs you use with your kids? What ways do you help your kids learn and maintain good hygiene habits?

Keep on saving!  :o)
--Barbara

**Remember, y'all, this post may contain affiliate links. I receive a small amount of compensation when you purchase from my links, which I"ll totally blow on waffle fries and sweet tea, y'all!**
Buried Treasure Sensory Bin

**This post may contain affiliate links. I receive a small amount of compensation when you purchase from my links, which I"ll totally blow on waffle fries and sweet tea, y'all!**


All children, young and old, love the idea of hunting for treasure.  This week’s sensory bin plays on that fascination using colorful fake coins and necklaces.  The inspiration for this bin comes from a pirate party game by The Fickle Pickle, and the original post can be found here.

Buried Treasure Sensory Bin

Buried Treasure Sensory Bin

Supplies needed:

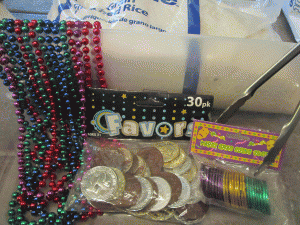
Rice (uncooked, of course)

Play necklaces

Colorful pirate coins

Suction cup hooks (optional)

Tongs (optional)

Plastic bin

Tub for sorting

Buried Treasure Sensory Bin

Fill the bin about halfway with rice, then add in your necklaces and coins.  That is, if you can get your thrilled-to-death daughter off of the bag of rice.

Buried Treasure Sensory Bin

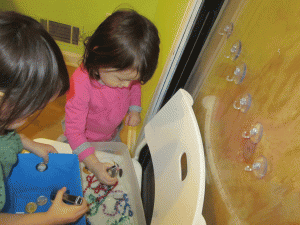
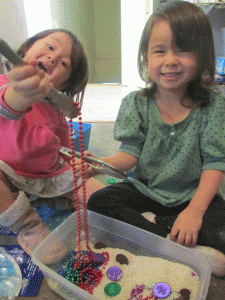
I chose to have the girls use tongs instead of their hands to dig around for treasure, as a way to work on their fine motor skills.  Using their hands works just as well. 🙂

Buried Treasure Sensory Bin

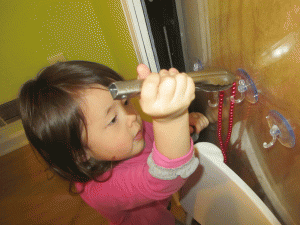
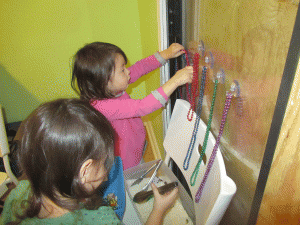
You can give them an additional bin or box at this point to put their found treasures in, or you can take it a step further and use the suction cup hooks for hanging necklaces.  I just stuck them to our sliding glass door at about eye level.

Buried Treasure Sensory Bin

I gave them simple directions to follow.  Use the tongs to get the treasure out of the box.  Then put the coins in the blue bin and hang the necklaces on the hooks.

Buried Treasure Sensory Bin

They had a blast!

Buried Treasure Sensory Bin

As any parent of preschoolers will tell you, finding an activity that will keep them occupied for more than mere seconds can be a challenge.  Eva and Chooby actively played with their buried treasure bin for well over an hour, which gave me time to get some work done around my house and online.  This one is definitely a winner!

Almost all of the supplies for the buried treasure bin came from the Dollar Tree.  I had tongs at home already, but plastic ones can be found in the party/wedding supplies section of your local store, and obviously rice is pretty easy to get anywhere.  I spent a total of $7 on this bin, which was well worth it for the hours of play time it will provide in the future!

Do you have a sensory bin that your little ones really love?  Please share your ideas in the comment box below!

(Disclaimer: Be prepared for some rice on the floor.  I made it a point to remind them that if they spilled all of the rice, then their game would be over, so they tried really hard to keep it all in the bin.)

Keep on saving!  :o)
--Barbara

**Remember, y'all, this post may contain affiliate links. I receive a small amount of compensation when you purchase from my links, which I"ll totally blow on waffle fries and sweet tea, y'all!**

Omelets in a bag – Cooking with the kids

**This post may contain affiliate links. I receive a small amount of compensation when you purchase from my links, which I"ll totally blow on waffle fries and sweet tea, y'all!**



My friend Nancy (she’s an artist, check out her stuffs y’all!) sent me a link to a post about omelets in a bag recently.  I can’t believe I had never heard of them before!

Each weekend that I have a day off from events, I try to plan a hands on breakfast that I can make with my kids.  We love omelets, but it’s hard to make 8 of them at once and still manage to eat all together.  I always have two pans going, but even so, by the time I finish cooking, the first two batches have already been gobbled up.  This method allows the kids to customize their own breakfast, and everything can be cooked all at once.  (For another delicious breakfast recipe that’s easy to make with the kids, check out my Biscuit Breakfast Bake post!)

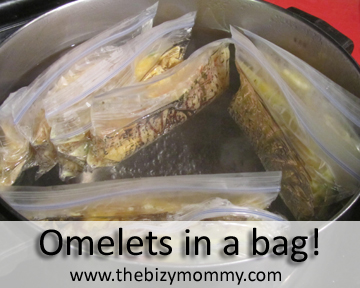
Omelets in a bagOmelets in a bag

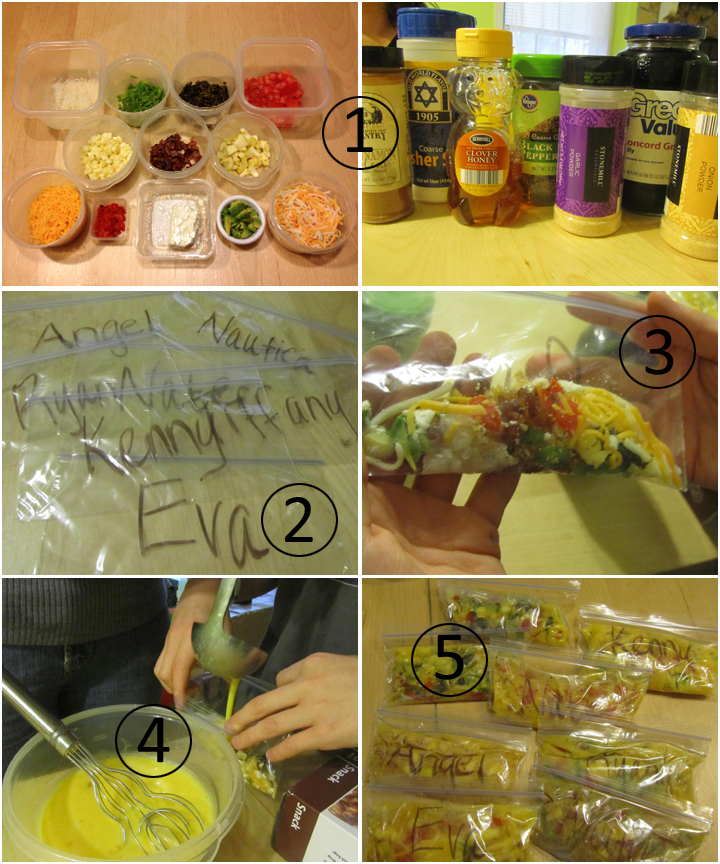
Directions:

1. Set out your ingredients.

2. Write everyone’s name on a bag (permanent marker).

3. Let everyone pick out their own ingredients.

4. Add a ladle of egg to each bag.

5. Double check everyone’s bags to make sure they are sealed all the way. (watery eggs, yuck!)

This time, I chopped up a wide variety of ingredients.  The kids were able to choose from peppers, onions, olives, tomatoes, peppers, cheese, apples, bacon, and more.  For seasonings, I set out cinnamon, honey, garlic powder, onion powder, jelly, pepper, and salt.  Cracking eggs can get a little messy with kids, so I did that part for them before portioning the eggs into the bags.

Omelets in a bag

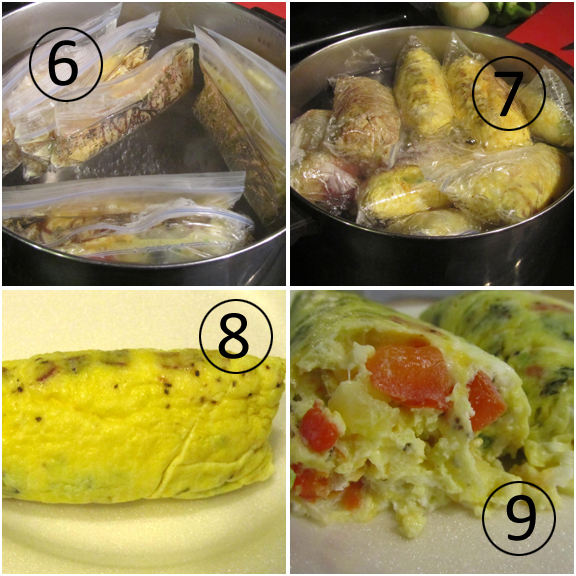
6.   Put the bags into a large pot of water.  Bring to a boil.

7.  Cook for about 10 minutes, you’ll be able to see when the eggs are finished cooking.

8.  Open the bags and remove the omelets.  They should just slide right out. (No grease, oil, or butter needed!)

9.  Enjoy!

Omelets in a bag

Not only is this a quick way to prepare omelets, but it takes the caked-on egg skillets out of the equation!  My kids loved that they could choose exactly what they wanted in their omelets.  Allowing children to make their own choices about small things helps to build their confidence, and teaches them about independence.  Plus, it’s a lesson in consequences as well.  If they refuse to listen to mom and instead put in 6 Tbs of jelly and 2 Tbs of salt into their eggs, they’ll learn really quick that maybe they should have paid attention, and you won’t even have to nag!

I may be busy a lot of the time with business, but weekend breakfast with my kids is a moment I treasure.  We get a chance to talk about school, friends, their activities, and more.  It’s such a great way to start the day!  And now with this easy bagged method, we can all eat at the same time on omelet day!

(BTW, if you are a camper, this is an excellent way to cook eggs at a campsite!)

Want to make this meal even easier?  Check out some of my favorite time saving kitchen tools below!

1.  Double balloon whisk – Mine is from when I was a Pampered Chef consultant, but any brand will do.  They work so much better than a traditional whisk, and really beat things up pretty quickly.  Twice the wires means half the work time! (Be sure to use the end of the whisk to “pop” the yolks first, they’ll mix up much faster that way.)

2.  Food chopper – Another thing I had from Pampered Chef days, a food chopper really saves times on chopping up ingredients, and you can get the exact type of chop you desire, from rough to extremely fine.

3. Mini ladles – My favorite is the one ounce size.  We have a variety of ladles, but this one is the most versatile.  Works great for ladling eggs in this case, but it’s also perfect for gravy, dessert sauces, and more.  Using those huge soup ladles just doesn’t cut it sometimes!

*This post includes affiliate links, and I earn a small commission from any items purchasedMaybe even enough to take my kids out for ice cream. Or buy myself a cheap bottle of wine!*

Have you ever tried to cook eggs in a bag?  What’s your favorite way to eat your omelet?  Share your favorite recipe in the comments below!

Keep on saving!  :o)
--Barbara

**Remember, y'all, this post may contain affiliate links. I receive a small amount of compensation when you purchase from my links, which I"ll totally blow on waffle fries and sweet tea, y'all!**
Atlanta's Frugal Mom is a participant in the Amazon Services LLC Associates Program, an affiliate advertising program designed to provide a means for sites to earn advertising fees by advertising and linking to Amazon. In other words, if you click through to Amazon from some of the books or products I recommend and make a purchase, I get a small percentage in exchange for your purchase. It's a small way you can support AFM.