Beach, Car Repairs, & a LASIK Giveaway ($4990 value!!!)

**This post may contain affiliate links. I receive a small amount of compensation when you purchase from my links, which I"ll totally blow on waffle fries and sweet tea, y'all!**


LASIK giveaway, beach, and lemons posing as vans.  Yep, this is what I’ve been up to the last few weeks! We spent the last week at the beach – on vacation.  It was a much-needed getaway for all of us.  First, we visited hubs’ parents for a few days.  It was golf carts and dips in the pool galore!  Luckily, Florida’s weather faired better -um- dryer than Georgia’s did!

 Golf Carts RULE


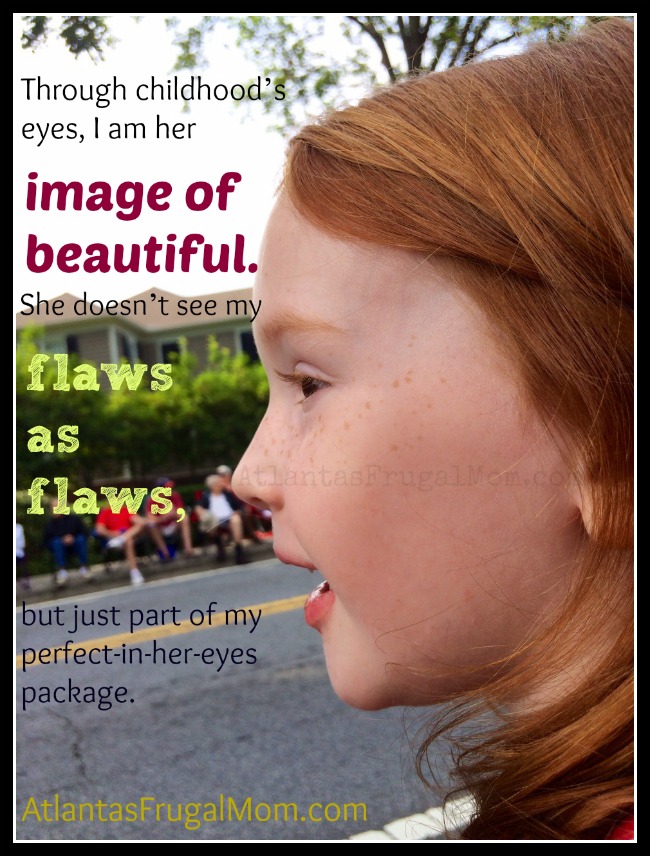
Then, we all hopped in the car, and headed to the beach for a few days. This was each of my children’s second time at the beach.  But really first time for my son, who just slept in the tent on the beach last year.  (Oh, the life of an infant.)  They each had an absolute BLAST!  From my son toddling after seagulls (“birdie WAIT!”), to my daughter’s ever-growing seashell collection, to just digging my toes in the sand (even for just a fleeting moment, before bouncing off to chase an active and curious toddler), to just -getting away.  We were LONG overdue, and made the most of absolutely every moment!  (Did I mention how free I felt, sans glasses and contacts??)


Unfortuantely, we have also been experiencing some less-than-pleasant issues with our lemon of a van.  Boo.  Let’s just say, I’ve spent more time and money with Honda than I ever care to do again!

I digress.  Now for the REAL news: a LASIK giveaway!

Y’all may know by now Thomas Eye Group recently helped me ditch my glasses when I had LASIK.  Now you can have a chance to experience the freedom I’ve felt these last few weeks.  They’ve launched a “Summer LASIK Giveaway” contest. Facebook users desiring a LASIK procedure are asked to submit an essay explaining why you or a loved one deserves LASIK. The essay with the most votes as of 12:00 p.m. on August 1 wins a free LASIK procedure valued at $4,990.

 LASIK giveaway

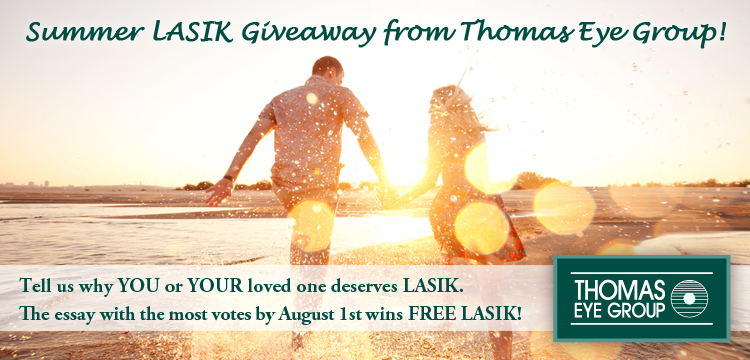
To be eligible to win, participants are asked to “like” the Thomas Eye Group Facebook page, fill out the entry form, and draft an essay of up to 500 words. The Grand Prize Winner, based on Facebook votes, will be announced on August 2. All entrants in the contest will receive a gift certificate good for $600 off LASIK – so it’s truly a win-win for everyone!

Keep on saving!  :o)
--Barbara

**Remember, y'all, this post may contain affiliate links. I receive a small amount of compensation when you purchase from my links, which I"ll totally blow on waffle fries and sweet tea, y'all!**

Christmas in July – 10 ways to start planning now and avoid holiday debt

**This post may contain affiliate links. I receive a small amount of compensation when you purchase from my links, which I"ll totally blow on waffle fries and sweet tea, y'all!**


Being extremely active on social media, I’ve seen tons of updates about how Christmas is just around the corner.  As much as I don’t want to start planning right now (procastinator!) it’s important so that I’m not breaking the bank in December.  So many families don’t plan for the holidays early enough, and end up putting a lot of their holiday gifts on credit cards.  Proper planning and smart shopping starting now can help you save in the long run, and avoid massive credit card bills when the new year rolls around.  Check out these 10 tips for making your Christmas as financially un-stressful as possible!

Start Christmas planning now avoid holiday debt

10 tips for planning Christmas on a budget

10.  Start making a list of what your kids want – As you hear them ask for specific things, or notice something that they could use, add it to a list.  You can easily make a list on your smartphone with an app like Evernote, and access it from anywhere.  This will really come in handy once you start actually purchasing gifts.

9.  Put aside money each pay period – Set aside a little bit each time you get paid.  Cut out stopping for coffee in the morning a few days a week, or maybe pack your lunch for work instead of going out.  Use that money for your Christmas fund instead.  There are about 25 weeks from the beginning of July until Christmas, so just saving $20 a week means you’ll have $500 to spend on gifts!  Be sure that money goes into a separate account so you don’t accidentally spend it!

8.  Subscribe to Amazon deals – Did you know that Amazon has Gold Box lightening deals available for a short period each day?  Subscribe to get those deals in your inbox and never miss out again!  Many of the deals are well over 50% off!

Start Christmas planning now avoid holiday debt

7.  Start cleaning out toys – Go ahead and start going through your kids’ toys now, and get rid of items that are broken, missing pieces, or that they have outgrown.  Once you pare them down and see what they have left, you’ll have a better idea of what they need.  You may realize they already have tons of stuff they still play with, or that they could use more Barbie clothes or Legos for their collection.  It’s easier to figure out what to buy when you have an accurate list of what they already own.

6.  Talk to your family about what to buy – If you have family members that always give your children gifts, talk to them about what they plan to purchase.  If there are specific items that you know your child wants, let everyone know.  If you plan to buy something that has accessories or add-on kits, that’s a great thing to clue family in on.  Another great way to share your child’s holiday wish list is through a site like GiftBirdy, which lets the kids make their own list online and then share it with others.

5.  Shop Craigslist, Ebay, and consignment sales – You can find great deals on gently used (and often new) items by searching Craigslist and Ebay.   I’ve also found great gifts by shopping yard sales and consignment sales in during the fall.  Your kids are going to open the boxes and use their gifts anyway, so why not buy something that’s out of the box but still in excellent condition?  This is a great way to pick up things like toddler toys, video games, outdoor toys and more, for often less than 50% of the regular retail price.  (Just be sure to exercise caution when purchasing items from Craigslist.  Meet sellers in a very public place, and if a deal sounds way too good to be true, it probably is.)

4.  Utilize layaway plans – If you have your eye on a big ticket item that you don’t currently have the money for, see if one of your local stores offers layaway.  You can pay a portion of the money up front, and then make payments over several weeks.  If the item goes on sale while it’s on layaway, most stores will honor that price and adjust it if you just bring it to their attention. Toys R Us, KMart, and Sears are just a few of the stores that currently offer layaway programs for their customers.

3.  Shop daily deal sites – Sites like Zulily and One Kings Lane offer short term deals on popular items.  Sign up to get their updates via email, and you’ll know about the big deals as soon as they are available.  Last year I got the super popular Pillow Pets for my kids for $1o from 1SaleADay.com for just $10, when they were retailing for at least $25 at other stores!  Be sure to share deals your friends would like as well, because most of those sites reward you with credit when your friends place an order.

Start Christmas planning now avoid holiday debt

2.  Check out the clearance section – Big name stores like Walmart and Target always have items on clearance, so when you are doing your regular shopping each week, take a second to check out the clearance aisle.  I have picked up several gifts at a huge discount that way.  I also like to look for clearance deals at local drug stores, and even grocery stores have good deals sometimes!

1.  Saving pocket change – Instead of using that change in the bottom of your purse, set it aside for your holiday fund.  Just a few coins here and there can really add up!  Do the same thing with found money, and you’ll have a nice little stash of cash to add to your holiday budget by the end of the year.  Every penny really does count, trust me!

Start Christmas planning now avoid holiday debt

Using these tips and a few others, I managed to spend just $250 on holiday gifts for my six children last year.  Christmas on a budget is totally possible, as long as you plan ahead!  Need some ideas for budget friendly gifts?  Check out the post I wrote with over 100 gifts you can get on Amazon for $2.00 or less, including shipping!

http://thebizymommy.com/100-gifts-can-buy-2-00-less/

Keep on saving!  :o)
--Barbara

**Remember, y'all, this post may contain affiliate links. I receive a small amount of compensation when you purchase from my links, which I"ll totally blow on waffle fries and sweet tea, y'all!**

Red, White and Blue Party Food Roundup

**This post may contain affiliate links. I receive a small amount of compensation when you purchase from my links, which I"ll totally blow on waffle fries and sweet tea, y'all!**


Fourth of July is just around the corner, and if you’re a regular reader of my blog you know that I have been sharing all sorts of fun red, white, and blue recipes over the last few weeks.  Today’s post is a roundup of fun patriotic recipes that are perfect for your holiday get together!

Red White and Blue Party Foods

Red, White and Blue Patriotic Party Foods

1.  Pigs in a blanket – These are pretty simple.  Just make them like usual, then brush with a little bit of food coloring before baking.  We used blue, but you could do red as well.

Red White and Blue Party Foods | Pigs in a blanket

2.  Two step cupcakes – Cute and tasty, these cupcakes can be made by little ones in just a matter of minutes!

Red White and Blue Cupcakes | Only two steps!

3.  Dipped strawberries – Another really easy treat, these strawberries are just dipped in white chocolate and blue sprinkles.

Red White and Blue Party Foods | Dipped strawberries

4.  American flag pizzaSometimes it’s nice to have something more filling than finger foods, and this pizza makes a great centerpiece for your holiday party table too!

Red White and Blue Party Foods | American Flag Pizza

5.  Fruit salad – Blueberries, raspberries, and star shaped cheese make a cute salad that’s good for you too!

Red White and Blue Party Foods | Fruit salad

6.  Patriotic pinwheels – Yummy and adorable, these pinwheels are made with cream cheese, provolone, peppers and tortillas.

Red White and Blue Party Foods | Patriotic Pinwheels

7.  Layered party punch – A science experiment and refreshing drink, your kids are sure to love this tri-colored beverage.

Red White and Blue Party Foods | Layered punch

8.  Caprese salad – Mozzarella pearls, grape tomatoes, basil and olive oil make a simple, beautiful salad that is super delicious.

Red White and Blue Party Foods | Caprese Salad

9.  Twizzlers – No preparation needed here!  Red and blue twizzlers make a sweet addition to your party foods.

Red White and Blue Party Foods

10.  Parent punch – Grown up cocktails with a patriotic twist, the same 3 ingredients make two tasty drinks for Mom and Dad!

Red White and Blue Party Foods | Party Punch and Martinis

Did you know that June 27th is National Bomb Pop Day?  Bomb Pops are one of my all time favorite childhood treats, and we still buy them on a regular basis today.  So you can probably imagine how tickled I was when they asked me to share some pops with my kids along with some other neat holiday party food ideas!  The folks over at Bomb Pop and Publix sent us a whole party pack to celebrate with, along with 2 boxes of popsicles, and that’s where the inspiration for all of my recipes came from!  Check out all of our fun party pictures below!

Red White and Blue Party Foods

Keep on saving!  :o)
--Barbara

**Remember, y'all, this post may contain affiliate links. I receive a small amount of compensation when you purchase from my links, which I"ll totally blow on waffle fries and sweet tea, y'all!**

Red white and blue martini – Parent party punch recipe

**This post may contain affiliate links. I receive a small amount of compensation when you purchase from my links, which I"ll totally blow on waffle fries and sweet tea, y'all!**


Last week I shared a recipe for a cute red, white, and blue layered party punch for kids, and it was so popular that today I’m sharing another drink that’s just for grown ups!  It fits right in with the patriotic party theme for the upcoming 4th of July holiday, and I’ve got two versions for you: one for a casual cookout and another for a more formal get together.  They both have the same exact ingredients, they are just prepared a little differently.  Check out the recipe below!Red White and Blue Party Foods | Party Punch and Martinis


Red, White and Blue Parent Party Punch and Martinis

Ingredients:

2 oz vodka

6 oz mandarin orange sparkling water (I used Clear American)

1 Tbsp grenadine

Ice

Fresh blueberries on a skewer for garnish

Red White & Blue Martinis and Parent Party Punch

Parent Party Punch Directions:

1.  Mix vodka, sparkling water, and grenadine in a 16 oz glass.

2.  Fill with ice to the top.

3.  Garnish with blueberry skewer and a cute straw (if desired)

Red White and Blue Party Punch

Red, White and Blue Martini Directions:

1.  Fill a shaker with ice.

2.  Pour in vodka and sparkling water, shake well to mix.

3.  Strain into a chilled martini glass.

4.  Slowly pour grenadine down the side of the glass so it settles in the bottom.

5.  Garnish with blueberry skewer.Red White & Blue Martinis and Parent Party Punch


***Tip – If you pour the grenadine into the martini glass too quickly, it will just mix with the vodka.  You MUST pour it slowly down the side of the glass for it to layer properly.

This drink is just as delicious with rum or a silver tequila, I’m just a vodka kind of gal. 😉  You could also you a different flavor of sparkling water if you like, but trust me, the mandarin orange is really tasty!Red White & Blue Martinis and Parent Party Punch


Red White & Blue Martinis and Parent Party Punch


Having lots of people over?  Make a whole pitcher!  You can premix all of it without ice for the punch, or just premix the vodka and sparkling water to prep for the martinis.  Blueberry skewers can be made in advance as well.  Just remember to keep it out of the reach of kiddos, it’s colorful and fun, and they’ll be tempted to take a sip!

Red White & Blue Martinis and Parent Party Punch


Have you checked out my other red, white, and blue recipes? 

Red White and Blue Party Foods

Keep on saving!  :o)
--Barbara

**Remember, y'all, this post may contain affiliate links. I receive a small amount of compensation when you purchase from my links, which I"ll totally blow on waffle fries and sweet tea, y'all!**

Red White and Blue Pinwheel Recipe

**This post may contain affiliate links. I receive a small amount of compensation when you purchase from my links, which I"ll totally blow on waffle fries and sweet tea, y'all!**


This red, white, and blue pinwheel recipe is the perfect addition to your 4th of July get together!  It’s simple and quick, and looks adorable when it’s all finished and cut up for serving.  Don’t worry, it doesn’t taste “blue” either, there’s ranch mixed in there!

Red white and blue recipes | Pinwheels

Red White and Blue Pinwheels

Ingredients:
3 large flour tortillas
8 oz tub of whipped cream cheese
Blue food coloring
1 packet ranch dip/dressing mix
1 pack sliced provolone (or any other white cheese)
1 small sweet red pepper
Plastic wrap

Red white and blue recipes | Pinwheels

This recipe does have blue food coloring in it, so if you try to stay away from food dyes you’ll want to check out an alternative like India Tree Natural Decorating Colours.

Directions:
1.  Pour the ranch packet into the cream cheese, mix well.
2.  Squeeze blue food coloring into cream cheese, stir until desired color.
3.  Spread cream cheese across tortillas.
4.  Cover each tortilla with 4 pieces of cheese.
5.  Cut pepper into thin strips and lay out across the top of the cheese.
6.  Tightly roll up each tortilla.
7.  Wrap each tortilla in plastic wrap and chill for at least 3o minutes.
8.  Remove plastic wrap from chilled tortillas and slice before serving.

Red, White & Blue Pinwheels printer friendly recipe

Red white and blue recipes | Pinwheels


Red white and blue recipes | Pinwheels

Spread the cream cheese across the tortillas

Red white and blue recipes | Pinwheels

Top the cream cheese with provolone

Red white and blue recipes | Pinwheels

Top the cheese with sliced peppers

Red white and blue recipes | Pinwheels

Tightly roll the tortillas


Red white and blue recipes | Pinwheels

Wrap each rolled tortilla with plastic wrap

Red white and blue recipes | Pinwheels

Chill wrapped tortillas for 30 minutes then unwrap and slice

***FRUIT VERSION – If you want more of a dessert pinwheel, you can trade out the ranch mix for a half teaspoon of clear vanilla extract, and use sliced strawberries instead of the peppers.  Yummy!
These pinwheels can be a tiny bit difficult to roll, as you want to make sure they are REALLY tight, so that they stay together when you slice them.  Other than that, it’s a cute finger food that’s perfect for holiday get togethers.  You could even change up the colors, doing green instead of blue for Christmas, or orange peppers and black coloring for Halloween!

Don’t forget to pin this patriotic pinwheel recipe for later, and be sure to share your pictures with me when you make it!

Red white and blue recipes

Keep on saving!  :o)
--Barbara

**Remember, y'all, this post may contain affiliate links. I receive a small amount of compensation when you purchase from my links, which I"ll totally blow on waffle fries and sweet tea, y'all!**

Red, white and blue punch recipe – Great for kids!

**This post may contain affiliate links. I receive a small amount of compensation when you purchase from my links, which I"ll totally blow on waffle fries and sweet tea, y'all!**


I’ve been sharing some of our favorite red, white, and blue recipes this month, and today’s post is a fun multi-colored punch that is perfect for the upcoming 4th of July holiday. It’s easy to make, yummy to drink, and sure to delight your littles.  You can even use it as a mini science lesson while you’re at it!

Red White and Blue layered party punch | Great for kids

Red, White and Blue Punch

Ingredients:Red White and Blue layered party punch | Great for kids

Cranberry Juice Cocktail

Blueberry Pomegranate G2 Gatorade

Mandarin Orange Clear American Zero


Directions:

1.  Pour about an inch of cranberry into the bottom of a clear glass.

2.  Fill with ice to the top.

3.  Slowly pour in the Gatorade until the glass is 2/3 full.

4.  Top off with clear soda.

5.  Let it sit for about 5 minutes before serving to make sure the different drinks have time to fully separate.

6.  Blow your kids away with your magic drink skills!


How it works:

Liquids will separate based on their sugar content.  Those with the highest concentration of sugar will sink to the bottom, whereas those with no sugar (or a sugar alternative like Splenda or Stevia) will end up on top.  You really don’t have to use the specific drinks I mentioned above in the ingredients, you just need to make sure that you have one with a high sugar content, one with low sugar, and one with little to no sugar.  But if you don’t want to run around the store comparing nutrition labels, just use the ones I listed above.  We typically don’t do any sort of high sugar drinks at all in our house (or those with fake sugars) but I made an exception for these because they are so cool looking.

Red White and Blue layered party punch | Great for kids

Want to make these drinks even more spectacular?  Top them off with a cherry and a skewer of blueberries and a cute straw!  Be sure you use a clear cup or glass, otherwise you won’t be able to see the colors, lol!

Red White and Blue layered party punch | Great for kids

Red white and blue recipes

Keep on saving!  :o)
--Barbara

**Remember, y'all, this post may contain affiliate links. I receive a small amount of compensation when you purchase from my links, which I"ll totally blow on waffle fries and sweet tea, y'all!**

Holding a Successful Garage Sale

**This post may contain affiliate links. I receive a small amount of compensation when you purchase from my links, which I"ll totally blow on waffle fries and sweet tea, y'all!**


holding a successful garage sale

Holding a successful garage sale

Holding a successful garage sale takes a little planning, and a little thought.  If you expect to just throw your stuff out on the lawn the morning of, with no price tags, and sell everything like hot cakes, then you’ll likely be sorely disappointed.  Unless you actually have hot cakes to sell, in which case, let me know; I’ll bring my own fork.  😉

As a self-proclaimed veteran garage sale goer and holder, I’ve picked up a few tips and tricks along the way. And with it being “garage sale season”, I know many of you may be looking to unload lots of your loot.

So, here are my (sometimes rather opinionated) tips to making the most of your garage sale:

Holding a Successful Garage Sale: Before the sale (Prep work)

  • Take the sentimentality out of your pricing. So you’re ready to part with that adorable costume your kid wore for Halloween? Great, but keep in mind what someone would actually PAY for it, not what you think it was worth to you.
  • It doesn’t matter what you paid for something new.  This is a garage sale, and people expect reasonable prices for goods being sold.  You may have paid $100 for that lovely purse when it was new, but if you’re selling it at a garage sale, expect to let it go for less than $20.  If you think you could (should) get more for it, try posting it to a Facebook yard sale group, Craigslist, Amazon, or eBay.  Remember, this is a garage sale; people are looking for cheap finds on used goods.  You just won’t see many high-end items at a garage sale, and there’s good reason for that.
  • Have prices clearly marked or posted.  My biggest pet peeve, and the quickest way for me to exit a sale, is to not find prices on anything.  Yes, this takes time and preparation before hand.  You’ll want to start pricing things at least a few days ahead of time, and put price tags on as much as you can.  If you have a group of like items all at the same price (clothes, books, etc), you may be able to get away with just posting a sign for that group.
  • Advertise your sale.  Utilize free tools, like Craigslist and Facebook, to get the word out about your sale.  If you don’t have any, create (or buy) signs so people can know where you are.  Make sure your signs are EASILY readable from the street, and your address is clearly shown.
  • “Display” as much as possible.  Don’t make me dig through a box on your driveway to find something worthwhile.  Set up multiple tables, shelves, and other areas on which to display what you’re selling.  The more visible your items are, the easier people can spot them, the more likely they’ll be to come over and browse!  This is especially critical for big-ticket items or any items you really wish to MOVE!  Selling clothes? Take two ladders, and run a pole through the rungs, and voila!  You’ve got a rack to display clothing on hangers.  Or if you’re really lucky or fancy, utilize one of these.  Books — show as many of them with their front covers showing as possible.  Group series, and/or same authors together — people may wish to “bundle” them.

Holding a Successful Garage Sale: During the sale

  • Be prepared for haggling.  This should go without saying, but I’ve been to many garage sales where people seemed shocked that I suggested a lower price on items.  Along those lines, see my next point:
  • Keep your goal in mind.  Are you selling items to help make ends meet?  Are you simply looking to purge clutter in your home?  Are you raising money for a charity?  (If so, you definitely advertise that it’s a fundraiser — it’ll be certain to drive customers your way.)  What will happen with unsold items: will they be donated, or will some items come back in to be sold at future garage sales or online?  If you’re looking simply to lighten your load, then flexibility in price is key.  However, if you are looking to make money, then stay firm with your (reasonable, well-thought-out) prices; but be prepared for some items to not sell that day.  Consider an online sale via Craigslist, eBay, or in a Facebook group.  There are TONS of Facebook groups just within the Atlanta area dedicated to this purpose.


All in all, if you take a little time before hand to prep and tag your items at reasonable prices, but are prepared to wiggle on them; have things displayed well for folks to peruse through;  and can let that sentimental item out of your tight grip — you, too, can hold a successful garage sale!

Keep on saving!  :o)
--Barbara

**Remember, y'all, this post may contain affiliate links. I receive a small amount of compensation when you purchase from my links, which I"ll totally blow on waffle fries and sweet tea, y'all!**

Red, white and blue cupcakes in just 2 steps!

**This post may contain affiliate links. I receive a small amount of compensation when you purchase from my links, which I"ll totally blow on waffle fries and sweet tea, y'all!**


These cute red, white, and blue cupcakes are perfect for patriotic holidays like the 4th of July. Not only are they adorable and delicious, but they are also really easy to make!  Keep reading to find the secret behind these tasty treats!

Two step Red White and Blue cupcakes| Great for kids

Did y’all know just a few years ago I was big into baking?  I mean, I baked ALL KINDS of stuff.  Cupcakes, cakes, cake balls (before they got popular, dangit!), the list just goes on and on.  See, I’m good at that sort of thing but I don’t have the heart and passion for it.  It takes a lot of work, and tons of patience, and I’m just not up for doing that every day any more.  But the kiddos still want treats somedays, we still have get togethers to attend, which means I had to come up with something awesome but easy.  So today I’m sharing my super secret, 2 step recipe for red, white, and blue cupcakes that are the perfect dessert for your upcoming 4th of July parties.  Are you ready?  Let’s get started!

Red, White & Blue Cupcakes

Step 1: Buy premade cupcakes with white icing, raspberries, and blueberries.

Two step Red White and Blue cupcakes| Great for kids

Step 2: Arrange the berries on top of the cupcakes.

Two step Red White and Blue cupcakes| Great for kids

Ta-dah!  That’s it!  I know, it’s super lazy easy right?  Look how cute they are, and they literally take seconds to put together.  My 4yo daughter actually made the ones for our party, and she was so proud of herself when she was finished.  She had just as much fun as if we had made them from scratch, but this was faster and a lot less messy!  Just don’t tell on me now, ya hear? 😉

Two step Red White and Blue cupcakes| Great for kids

A few tips:

-You can switch out any red berry for the raspberries, it really doesn’t matter.  You could do strawberries or even cherries!

-Check for discount cupcakes, I know they mark them down the next day at Kroger and Walmart.  I paid about $6.00 for the dozen, but didn’t have to bake or pipe icing on, woohoo!

-Make sure all your blueberries are facing the same way, or they won’t look nearly as cutesy.

Be sure to check out my American Flag Pizza recipe, it’s kid friendly and fits in perfectly with the patriotic party food theme!

Keep on saving!  :o)
--Barbara

**Remember, y'all, this post may contain affiliate links. I receive a small amount of compensation when you purchase from my links, which I"ll totally blow on waffle fries and sweet tea, y'all!**

American flag pizza recipe

**This post may contain affiliate links. I receive a small amount of compensation when you purchase from my links, which I"ll totally blow on waffle fries and sweet tea, y'all!**


This red, white, and blue American Flag pizza recipe is a fun activity for the whole family! It’s great for a 4th of July get together, or just as part of a special Independence Day themed lunch. We had fun making it, and of course eating it too. This works really well for kids of all ages because it’s super simple to make.

Red White and Blue Party Foods | American Flag Pizza

American Flag Pizza

Ingredients:
Pizza dough
Shredded Italian or mozzarella cheese
Blue food coloring
Mini pepperoni
Spaghetti sauce (I like tomato basil)
Sliced mozzarella balls (optional)

American Flag Pizza

Directions:
1.  Preheat oven to 400 degrees
2.  Spread dough out on a cookie sheet
3.  Cover dough with sauce
4.  Cover with cheese, leaving the top left corner empty
5.  Lay out pepperoni in stripes
6.  Mix blue food coloring with 1 cup of cheese (see pic below)
7. Cover top left corner of pizza with the blue cheese
8. Bake for 13 minutes, remove from oven
9.  Add sliced mozzarella as stars on top of the blue cheese
10. Bake for 4 more minutes to melt star cheese
11. Remove from oven, slice and serve while hot

American Flag Pizza printer friendly recipe

American Flag Pizza

This American flag pizza recipe is so simple, and your kids are sure to enjoy it. If you can find cheese stars, those look even better, but it’s still cool looking without them.  You could also use this same concept to make themed pizzas for other occasions, like Halloween or even Christmas!

Red white and blue recipes

I’ve got several more red, white, and blue recipes that are perfect for your family holiday get together, don’t forget to check them out!

Keep on saving!  :o)
--Barbara

**Remember, y'all, this post may contain affiliate links. I receive a small amount of compensation when you purchase from my links, which I"ll totally blow on waffle fries and sweet tea, y'all!**

Spinach and Pepperoni Grilled Cheese Sandwiches

**This post may contain affiliate links. I receive a small amount of compensation when you purchase from my links, which I"ll totally blow on waffle fries and sweet tea, y'all!**


You guys are in for a treat with this recipe!  It’s a great twist on a classic childhood favorite, grilled cheese sandwiches.  And they are SUPER easy to make too!

My friend Karen over at In the Kitchen with KP shared a picture of her awesome Double Cheese & Pepperoni Grilled Cheese on Facebook today, and I knew I had to make them.  Like right away.  Which worked out perfectly because it was time for lunch and I had just realized we were out of eggs so the egg salad I had planned was a no-go!

I didn’t have everything for her exact recipe, so I had to tweak it a little for what I had in the fridge.  I really wanted to do something with roasted red peppers, but the jar I had in the fridge had gone bad.  Don’t you hate when that happens?  I ended up with pepperoni, raw spinach, a shredded cheese blend, a halfway smashed loaf of white bread, and a jar of tomato basil pasta sauce.  Lol.

spinach and pepperoni grilled cheese sandwiches

Spinach & Pepperoni Grilled Cheese Sandwiches

(makes six sandwiches)

Ingredients:spinach and pepperoni grilled cheese sandwiches

3 Tbs unsalted butter, softened

2 Tbs Parmesan cheese

1 tsp garlic powder

1/2 tsp Italian seasoning

1/4 tsp salt

12 slices of bread

2 cups of cheese

30 slices of pepperoni

2 cups of chopped raw spinach

1 cup of tomato basil pasta sauce

spinach and pepperoni grilled cheese sandwiches

spinach and pepperoni grilled cheese sandwiches

Directions:

1.  Mix together butter, garlic powder, Italian seasoning,

Parmesan, and salt.spinach and pepperoni grilled cheese sandwiches

2.  Heat skillet to medium heat.

3.  Spread butter mix on one side of each bread slice.

4.  Place bread, butter side down, in heated skillet.

5.  Top bread with 2 Tbsp shredded cheese, 5 slices pepperoni,

1/4 cup spinach, and another 2 Tbsp cheese.

6.  Place another piece of bread on top, with buttered side up.

7.  Cook for 30-45 seconds until bread is browned, then flip and

cook for another 30-45 seconds.

8.  Remove from heat and serve with warm pasta sauce for dipping.

Printer-friendly version of Spinach & Pepperoni Grilled Cheese Sandwiches

spinach and pepperoni grilled cheese sandwiches

Thank you again to In the Kitchen with KP for the inspiration for this tasty lunch recipe!

The butter spread really puts this sandwich over the top.  You can switch it up and use bell peppers, onions, tomatoes, any sort of veggies instead or (or along with) the spinach and pepperoni.  You can also use any sort of tomato based sauce for dipping, I just happened to have the tomato basil on hand.  I bet ranch would be really delicious too!

spinach and pepperoni grilled cheese sandwiches

What’s your favorite way to make grilled cheese sandwiches?

Keep on saving!  :o)
--Barbara

**Remember, y'all, this post may contain affiliate links. I receive a small amount of compensation when you purchase from my links, which I"ll totally blow on waffle fries and sweet tea, y'all!**

Atlanta's Frugal Mom is a participant in the Amazon Services LLC Associates Program, an affiliate advertising program designed to provide a means for sites to earn advertising fees by advertising and linking to Amazon. In other words, if you click through to Amazon from some of the books or products I recommend and make a purchase, I get a small percentage in exchange for your purchase. It's a small way you can support AFM.