“My Mom’s” Chicken Tortilla Soup Recipe

**This post may contain affiliate links. I receive a small amount of compensation when you purchase from my links, which I"ll totally blow on waffle fries and sweet tea, y'all!**


Ok, just putting the words “chicken” and “tortilla” together make me salivate.  So, when I had the opportunity to create two different versions of chicken tortilla soup, it was like sensory overload, y’all!

First, I wanted to share the recipe my mom has been making for a few years.  I’m not going to lie, it’s not the healthiest recipe, but OH-MY-GOODNESS!  Is it ever so delicious!  Talk about “comfort food” – this one is packed with “comforting” goodness in every bite!

Chicken Tortilla Soup Recipe

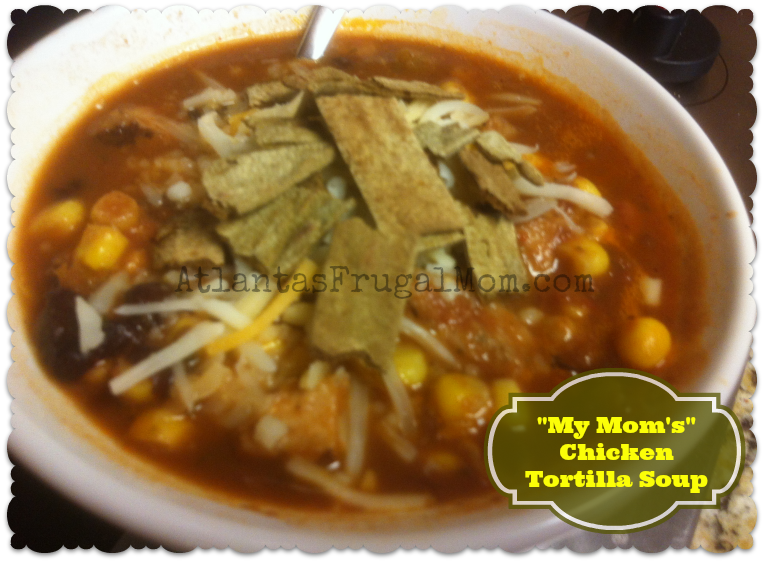
When you’re done with this one, check out my Vitamix recipe for chicken tortilla soup, too!

“My Mom’s Chicken Tortilla Soup” [Read more…]

Keep on saving!  :o)
--Barbara

**Remember, y'all, this post may contain affiliate links. I receive a small amount of compensation when you purchase from my links, which I"ll totally blow on waffle fries and sweet tea, y'all!**

Potty Training Essentials & Tips

**This post may contain affiliate links. I receive a small amount of compensation when you purchase from my links, which I"ll totally blow on waffle fries and sweet tea, y'all!**


It’s been almost two and a half years since I potty trained my daughter in four days at 26 months.  Once we finished those four days, she never ever looked back!  With that total success, and with my son (22 mo) on the brink of being ready, I’ve devised and revised some of my favorite potty training tips for other parents.

Potty Training Essentials
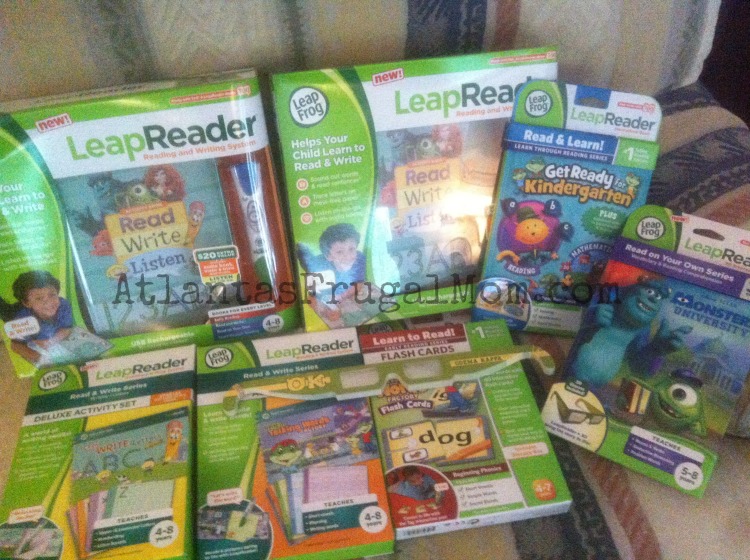
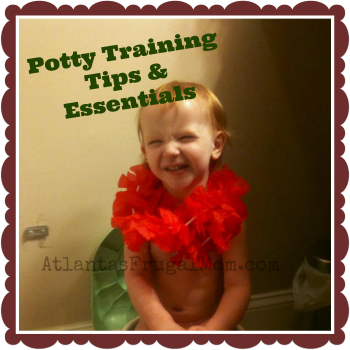
Here’s what I consider potty training essentials and/or what I’d recommend when undergoing the process:

  • Foam hand soap – it just makes hand washing more fun, and makes hand-washing easier.  You can always check for coupons to print before you head to purchase!  😉
  • Keep towels for drying hands on counter in reach, if your towel holder is too high; I still keep hand towels on the counter for my now 4.5 year old daughter.
  • Potty seats for the big potty, as well as little portable potty chairs, because you never know what might interest him most!  When you’re on the go, consider a foldable potty seat.
  • Step stools — for the sink, for the potty, for each bathroom he’ll be using; some portable potties double as step stools.  If your child uses the big potty, you’ll definitely want something to plant his feet on, to make going a little more comfortable.
  • LOADS of paper towels. No explanation needed.
  • Throw in a good pair of gloves, preferably disposable.
  • You’ll want to invest in at least a few packs of toddler underwear. I think I started with three packs for Carol: one with princesses, and two generic packs. On the first day, I constantly reminded her to keep the princesses dry.  Here are some girl panties and here are some cute boy undies.
  • panty liners – yep.  You read that correctly.  Place one towards the back of the undies (where the fanny lies) to help minimize -um- skid marks.  Thanks Lady Poppins for sharing this tip!
  • Lots of fresh, juicy fruits. We lived on cantaloupe, watermelon, and milk that week!  This is essential if you utilize Three Day Method.

Robbie Potty w Blankie

Not necessarily things you’ll need, but my additional two cents on potty training essentials and tips:

  • Make sure your child has the physical skills.  Well before you start potty training, begin working on, and encouraging child to pull pants up and down – when undressing and when changing diapers.  Getting them involved in the steps also helps her feel more independent and in control of the process.Potty Training Essentials - Motor Skills
  • Keep your laundry room available. You WILL be washing those cute li’l undies at least a few times during the process.  This means you may need to shuffle your laundry schedule a bit.
  • Have as much prepped ahead of time as possible. On day one with Carol, I turned my attention to preparing our (simple) lunch, and that’s when she stood on her little chair in the kitchen and peed all over the seat, because she couldn’t tell me in time, and because I didn’t pay attention to follow her cues.  (Remember what I said earlier about paper towels and gloves?)
  • If you use the Three Day Method, you’ll want fun activities, but you can’t get *too* involved in activities because they’ll forget to go potty! Pull out puzzles she hasn’t seen in a while (or new ones), introduce new library books, dolls, trucks, etc – things that could even be brought in to the bathroom while she goes potty.
  • Incentives.  Of course, it’s always best to start something like this with non-tangible rewards (verbal praise, high fives, phone calls to loved ones, “happy dance and song”, etc.), but just in case that doesn’t fully motivate your tot, have small tangible rewards  at the ready.  M&Ms are popular, as are animal crackers, stickers, and other small trinkets.  Consider creating a rewards chart.  Sometimes, the simple act of placing a sticker on a chart is rewarding enough, but pair it with an additional small prize after so many stickers, and you’re golden!  Check out these cute potty training charts here.


Keep your eyes on the prize: no more diapers!!  Commit to ditching the diapers, and don’t look back.  Investing in this time with your child, in taking this big step will pay off HUGE in the end!

Got any additional tips to add on potty training essentials?  I’d love to hear from other seasoned potty trainers what’s worked. Leave a comment here on the blog, so others can see.  🙂

Keep on saving!  :o)
--Barbara

**Remember, y'all, this post may contain affiliate links. I receive a small amount of compensation when you purchase from my links, which I"ll totally blow on waffle fries and sweet tea, y'all!**

Smoked Salmon Flatbread

**This post may contain affiliate links. I receive a small amount of compensation when you purchase from my links, which I"ll totally blow on waffle fries and sweet tea, y'all!**


I seriously heart smoked salmon.  Like borderline addict love it.  This oh-so-fancy smoked salmon and arugula flatbread is one of my favorite dishes to order when we manage to sneak out to a nice restaurant without kiddos.  Unfortunately, that happens never like twice a year, and that’s just not often enough for me.  Did I mention how much I love smoked salmon?

Anyhow, after making the ghost pizzas with the kiddos for Halloween, I realized there was a leftover tube of pizza dough, and I had a smoked-salmon-withdrawal-induced stroke of genius.  I could just make my own flatbread at home!  Duh, right?  I’m super cheap and make copycat restaurant meals all the time, so why this never occurred to me, I don’t know.

It’s awesome.  You’ll love it.  I promise.

Smoked salmon flatbread with arugula, dill, lemon, capers, onions and cream cheese - Super easy and great for parties!

Smoked Salmon Flatbread

Ingredients:
1 tube prepared pizza dough (in the canned biscuit aisle)
8 ounces cream cheese (whipped is easier to spread)
1 Tbs minced garlic
Juice of 1/2 lemon
1 Tbs chopped fresh dill
2 cups arugula
2-3 ounces smoked salmon, torn into small pieces
2 Tbs chopped red onion
2 Tbs capers
Salt and pepper

Smoked salmon flatbread with arugula, dill, lemon, capers, onions and cream cheese - Super easy and great for parties!

Directions:
1. Preheat oven to 425
2. Unroll pizza dough and spread out onto a large cookie sheet
3. Bake until lightly browned and cooked all the way through
4. Remove from heat and let cool
5. Mix together cream cheese, lemon juice, garlic and dill
6. Spread evenly over cooled flatbread
7. Top with arugula, salmon, onions and capers
8. Season with salt and pepper as desired
9. Cut into squares and serve immediately

Printer friendly version of Smoked Salmon Flatbread

Smoked salmon flatbread with arugula, dill, lemon, capers, onions and cream cheese - Super easy and great for parties!

This smoked salmon flatbread is the perfect finger food for parties.  Or delicious for lunch if you want to keep the whole thing to yourself.  I won’t tell anyone if you eat all of it in one sitting.  As long as you don’t tell anyone that I did the same thing. 😉

Keep on saving!  :o)
--Barbara

**Remember, y'all, this post may contain affiliate links. I receive a small amount of compensation when you purchase from my links, which I"ll totally blow on waffle fries and sweet tea, y'all!**

LeapFrog LeapReader™ “Ready, Set, Read & Write!

**This post may contain affiliate links. I receive a small amount of compensation when you purchase from my links, which I"ll totally blow on waffle fries and sweet tea, y'all!**


Disclosure: I received free LeapFrog LeapReader™ products in order to host the LeapFrog sponsored MommyParty.  The opinions expressed here, as well as (some of) the cute kids are all mine.

When a big ol’ box of LeapFrog LeapReader™ products showed up at my door recently, I literally did the happy dance.  (…and just be glad no one was around to see that sad mess…)  I had the distinct pleasure of being chosen to host a LeapReader™ party, a privilege given to only select bloggers, as I later learned!  Included in my party kit were:

LeapFrog LeapReader™ contents

Keep on saving!  :o)
--Barbara

**Remember, y'all, this post may contain affiliate links. I receive a small amount of compensation when you purchase from my links, which I"ll totally blow on waffle fries and sweet tea, y'all!**

Marinated Zucchini and Chickpea Salad

**This post may contain affiliate links. I receive a small amount of compensation when you purchase from my links, which I"ll totally blow on waffle fries and sweet tea, y'all!**


I don’t eat a lot of meat.  I like meat, it’s just that my body is not a big fan of it.  Maybe I’m missing some important enzyme or something that helps me break it down.  That would be my luck.  Anyhow, I tend to eat very little meat to keep from having a crazy, messed up gut all the time.  Well, except for bacon.  Because it’s bacon, duh.

So since I don’t eat a lot of meat, I get my protein from other places.  Like chickpeas!  Of course, I don’t just eat them plain (boring!), I like to mix them in with different dishes.  I threw this particular salad together the other morning to have for lunch, and ended up eating it for 3 days!  It makes a lot more than you would think. 🙂

Marinated-zucchini and chickpea salad

Marinated Zucchini and Chickpea Salad

1 medium zucchini, halved and sliced
1/2 cup thinly sliced onion
2 cups chickpeas (if canned, rinse well first)
2 roma tomatoes, sliced into strips
1/4 cup chopped roasted red pepper
2 Tbs olive oil
2 Tbs lemon juice
1/2 tsp sugar
salt and pepper

Mix all ingredients together and marinate for at least six hours in the refrigerator before serving.  Don’t forget, the longer it sits, the more delicious it tastes!

Marinated-zucchini and chickpea salad

That’s it!  Short, sweet and to the point.  Unless of course, you want me to ramble on and on about chickpeas.  Which I can totally do, by the way.  No?  Fine.  Jeez.

Here’s a video about chick peas instead, just because I find it hilarious.

Look –> Dancing and informative cartoon chick peas!

Keep on saving!  :o)
--Barbara

**Remember, y'all, this post may contain affiliate links. I receive a small amount of compensation when you purchase from my links, which I"ll totally blow on waffle fries and sweet tea, y'all!**

Chicken Saltimbocca from eMeals

**This post may contain affiliate links. I receive a small amount of compensation when you purchase from my links, which I"ll totally blow on waffle fries and sweet tea, y'all!**


If you haven’t heard of eMeals, you are SO missing out!  It’s a meal planning service that makes my life so much easier on busy days.  I’m lucky enough to be working with them as an ambassador, so I get to share some of the awesome food we make along with the recipes so you can try them out at home!


Each week you get a new set of recipes emailed to you, complete with a shopping list and easy-to-follow directions.  They have an awesome app you can use that makes the shopping and preparation fast and simple.  No need to print anything or make a list on a separate sheet of paper!  eMeals offers 12 different dinner plans to choose from, and you can even customize them specifically for the store you shop at the most!  We’re currently using the Mediterranean plan, though I’ve tried out Clean Eating, Classic, and Simple Gourmet in the past as well, and they’ve all been fantastic.  It’s less than $5.00 a month for the yearly membership, and trust me, it is so worth it with the time you’ll save planning out meals and shopping trips!

Tonight we had the Chicken Saltimbocca and it was absolutely amazing.  The kids loved it and so did we.  It’s definitely going on my list of things to make on a regular basis.  I know you’re going to love it too!

Chicken Saltimbocca Recipe from eMeals

Chicken Saltimbocca

Ingredients:
3 boneless, skinless chicken breasts, cut in half lengthwise
½ teaspoon salt
½ teaspoon pepper
12 thin slices prosciutto (about 3 oz)
10 oz package chopped frozen spinach, thawed
1½ cups freshly grated Parmesan cheese
¼ cup olive oil, divided
1 cup chicken broth
2 tablespoons fresh lemon juice
2 tablespoons butter

Chicken Saltimbocca Recipe from eMeals

Directions:
1.  Cut each chicken breast half in half again horizontally to make 12 cutlets.
2.  Pound cutlets to about ¼-inch thickness; sprinkle with salt and pepper.
3.  Top each cutlet with 1 slice prosciutto.
4.  Squeeze excess moisture from spinach; divide spinach evenly among cutlets.
5.  Top each cutlet with 2 tablespoons cheese.
6.  Roll up; secure with wooden picks.
7.  Heat 2 tablespoons oil in a large skillet over medium-high heat.
8.  Add half of cutlets to pan; cook 2 to 3 minutes on each side or until done.
9.  Repeat procedure with remaining oil and cutlets.
10.  Set cutlets aside and keep warm.
11.  Add broth and juice to pan; bring to a boil.
12.  Cook until reduced to ¼ cup; remove from heat and stir in butter.
13.  Serve sauce over cutlets.

Chicken Saltimbocca Recipe from eMeals


eMeals Meal Plans

This post contains affiliate links.  As an ambassador, eMeals has provided me with a free membership in exchange for sharing how awesome I think their service is.  And it really is awesome y’all!

Keep on saving!  :o)
--Barbara

**Remember, y'all, this post may contain affiliate links. I receive a small amount of compensation when you purchase from my links, which I"ll totally blow on waffle fries and sweet tea, y'all!**

First Watch Comes to Dunwoody!

**This post may contain affiliate links. I receive a small amount of compensation when you purchase from my links, which I"ll totally blow on waffle fries and sweet tea, y'all!**


  First Watch sign

If you’re in or near the Dunwoody area, brace yourself: there is an amazing new restaurant opening up that will blow you away!  Earlier last week, I had the pleasure of getting a “sneak peek” dining at First Watch in Dunwoody yesterday, and -well, yum!

I met up with Diana, my blogger pal over at Sandy Springs Macaroni Kid, and had my toddler son tag along as well.  We were kindly greeted upon entering, and promptly seated, with a high chair immediately produced for my son.  Our server, James, was patient and kind.  Patient was a must for me, not only because I had a toddler with me, but because I just couldn’t’ decide what I wanted — there were SO MANY tasty options from which to choose!

You see, at First Watch, the menu is chock full of fresh, healthy dishes prepared made to order.  It’s a breakfast, brunch, and lunch place, so there’s plenty of dishes that offer an egg white options (all cage-free) at no charge, as well as fresh seasonal produce from local growers whenever possible.  Since I am a sucker for breakfast foods, I sat staring at the long list of delicious entrees, including ten different omelets, wraps, crepes, skillet hashes (five choices!), and drool-worthy pancakes, french toast, and much much more!  Many of these dishes were served with a cup of fresh fruit, too.  Oh, and all patrons are welcome to complimentary Sunrise Select Premium Blend coffee.

FirstWatch_eggsbenedict

This was Diana’s meal – most of which went home in a box!


Their lunch menu includes a variety of fresh spring mix salads, sandwiches, and soups.  To entice you even further, they offer a “2 For You” lunch option: pair any two 1/2 salads, 1/2 sandwich, or a cup of soup.

I was treated to delicious sweet tea.  As a Southern girl, that was essential.  My tea was so delicious, I think I got two refills, and then asked for a to-go cup!  They also offer your standard gammer of beverages, sodas, juice, milk, hot chocolate, San Pelligrino water, and herbal teas.  And don’t forget that complmentary coffee, too.

First Watch Kids Menu

Remember my son was with me?  So I got to test out the kids menu as well.  I’m seldom really impressed with kids’ menus: they tend to offer standard not-so-healthy options that my kids don’t even eat anyways.  (Seriously?  My kids don’t care for chicken nuggets or mac and cheese, and I’m ok with that.)  I digress.  The kids menu, which was presented on a placemat with crayons for my son to color upon (or -um- nibble on the crayons…) offered simpler versions of the dishes on the regular menu, including pancakes, waffles, ham sandwich, turkey sandwich, french toast, fresh fruit crepe, or a simple bacon and egg.  All served with a cup of fresh fruit, and a beverage of choice – all for $4.99.

This is the french toast he was served…  YUM!

First Watch - kids menu

I was amazed how accommodating the staff were.  My son took a strong liking to the fresh fruit, particularly the strawberries and blueberries. He gobbled up all of his, then mine, and Diana offered some of hers as well.  During one of the many check-ins the staff had with us, they noted he liked the blueberries and strawberries.  Next thing I knew, they brought him out a big bowl filled with strawberries and blueberries.  He was in berry heaven, and did a great job gobbling them up with his spoon!

First Watch
All in all, I was super-impressed with my entire experience at First Watch.  I can’t wait to take my husband and daughter with us again very soon.  And my parents.  And my in-laws.  And neighbors.  And -well- you get the drift – now go see for yourself!  🙂

Also, when you sign up for their Sun eClub, you will get specials and coupons delivered right to your inbox, including BOGO coupons, as well as a free entree on your birthday!

Keep on saving!  :o)
--Barbara

**Remember, y'all, this post may contain affiliate links. I receive a small amount of compensation when you purchase from my links, which I"ll totally blow on waffle fries and sweet tea, y'all!**

Vegetable Meatloaf Recipe – Great for grilled burgers!

**This post may contain affiliate links. I receive a small amount of compensation when you purchase from my links, which I"ll totally blow on waffle fries and sweet tea, y'all!**


Meatloaf has always been one of my favorite dishes, but it can be pretty, well, meaty.  Several years ago I started adding lots of veggies into my meatloaf recipe and my family loves it!  Red Gold Tomatoes sent me a variety of their canned tomatoes to try out earlier this month, and I just knew their Diced Tomatoes with Basil, Garlic & Oregano would be the perfect complement to my vegetable meatloaf recipe.  This week, I picked up all the ingredients I needed for meatloaf from Aldi and with the added touch of the tomatoes, and our grilled vegetable meatloaf burgers were delicious!

Grilled Vegetable Meatloaf Burgers

Grilled Vegetable Meatloaf Burgers

Ingredients:

1 zucchini, chopped

1/2 bell pepper, chopped

1 cup finely chopped carrots (I use my 3 cup food processor)

1/2 cup minced onion (Yep, food processor again!)

1 can Red Gold Diced Tomatoes with Basil, Garlic & Oregano
(drained and chopped, save liquid for sauce)

2 eggs

2 cups dry oatmeal

1 lb pork sausage

1 lb ground beef

Grilled Vegetable Meatloaf Burgers

Directions:

1.  Mix all ingredients (except liquid from tomatoes) in a large bowl.

2.  Measure out 1/2 cup of meatloaf mixture for each burger patty.

3.  Brush each patty with oil.

4.  Place patties in a grill pan on medium high heat for 5-7 minutes.

5.  Brush tops of patties with oil and flip.

6.  Cook for another 5-7 minutes or until meat is cooked throughout.

Grilled Vegetable Meatloaf Burgers

Grilled Vegetable Meatloaf Burgers

Grilled Vegetable Meatloaf Burgers

Grilled Onion Buns

Ingredients:

Onion buns

Vegetable oil

Directions:

1.  Brush the inside of the onion roll buns with oil.

2.  Place face down on the grill pan at medium high heat.

3.  Grill for about a minute until they are toasted.

4.  Remove from pan and serve with grilled vegetable meatloaf burgers.

Grilled Onion Buns

Jalapeno Tomato Spread

Ingredients:

Reserved liquid from Red Gold Diced Tomatoes with Basil, Garlic & Oregano

1/2 cup jalapeno ketchup (I used Mama Selita’s Jalapeno Ketchup)

1 tsp sugar (optional)

1/2 tsp Worcestershire sauce

Directions:

1.  Pour all ingredients into a small saucepan.

2.  Bring to a boil on high, reduce to medium-low.

3.  Simmer for 5 minutes.

4.  Serve as a spread with grilled vegetable meatloaf burgers.

Jalapeno Tomato spread for Vegetable Meatloaf Burgers

Click here for a printer friendly version of these recipes!

Grilled Vegetable Meatloaf Burgers

This vegetable meatloaf recipe is really simple,  you basically just dump everything in a bowl, mix it up, and slap these puppies on the grill!  Because the weather has been so crazy here lately, I cooked them inside instead on my non-stick grill pan.  It is an awesome way to get those seared grill marks without the hassle of firing up a grill.  And it’s so easy to clean!  I definitely recommend picking one up for your kitchen!

non-stick grill pan

I couldn’t resist sharing this picture of my sweet 5 year old helping me cook.  She’s learning to crack eggs without completely shattering the shell, and she’s getting pretty good at it!

little-asian-girl-cracking-eggs

This recipe is one of our favorites, and the pre-seasoned diced tomatoes Red Gold sent me added the perfect mix of herbs and spices!  You can find more tasty recipes like Caribbean Chicken Burgers and Summer Tomato Burgers on the Red Gold website.

Red Gold provided the tomatoes for this dish, but the recipe and opinions are all my own.  This post contains affiliate links.

Keep on saving!  :o)
--Barbara

**Remember, y'all, this post may contain affiliate links. I receive a small amount of compensation when you purchase from my links, which I"ll totally blow on waffle fries and sweet tea, y'all!**

What Should You Do If Your Dog Is Missing

**This post may contain affiliate links. I receive a small amount of compensation when you purchase from my links, which I"ll totally blow on waffle fries and sweet tea, y'all!**


What SHOULD you do if your dog is missing?  We recently went through this terrible experience, and I don’t wish it on anyone.  While we were extremely lucky with our outcome, it could have easily not rather unfortunate.  SO, I’d like to share what I’ve learned from my experience, to perhaps save y’all the trouble and heartache, if you ever find yourself in my shoes.

What Should You Do If Your Dog Is Missing

Prevention – Things to Do Beforehand

  • Get the chip.  If it’s within your budget and your pet is young, get the chip implanted. It’s the easiest and fastest way to have your beloved pet return home to you.  Our dog is almost 15 years old, and the chip wasn’t available when my husband got him.  (Yes, he got the dog before he got me…)
  • Keep updated tags on him.  Our dog is prone to losing his tag, so it’s a good idea to keep an extra one handy, if yours is the same way.  Check frequently to ensure tags are still in place, and that the information hasn’t rubbed off.
  • Take pictures!  You’ve probably heard about taking pictures of your children before going to a big amusement park, so you’ve got an instant identification of her if you were to get separated.  The same principle applies to your pet.  Make sure you have updated pictures of you pooch, so people will know who to look for!

During the Search – the First Few Hours

  • Begin walking around your neighborhood, calling your dog’s name.  If you frequent a particular route when you walk, go that way.  
  • Perhaps bring a treat or favorite toy, especially if it makes noise.  
  • Also, bring a leash, so he’s easier to walk back home.
  • If a walk around the neighborhood doesn’t turn up results, hop in your car, and do the same thing, only cover a larger radius.  If there are enough adults to do so, have one person walking the route, while another drives around, to cover more ground and faster.
  • If your dog is at all like ours, once he’s spotted, don’t rush over to him — that may just make him run further, and if you’re in a high traffic area, that’s obviously a no-no.  Just continue to approach your dog at a normal pace, with an upbeat tone, perhaps offering that toy or treat.

During the Search – Getting the Word Out

  • Put up posters immediately.  Keep it simple.  Offer a brief description, and make a phone number easily visible.  I recommend running to the dollar store and grabbing some neon poster board. Use a BLACK sharpie to legibly write information, or just type the info (Arial font is best) and paste to poster board.  Posters should be visible all around the neighborhood, and in spots where folks are most likely to see them, like on busy streets.
  • Also, the posters our dog’s founder used were wrapped with plastic wrap, to prevent the rain from ruining them.  Or if you have easy access, laminate them.  (But bear in mind, this could get expensive if you go to an office supply store to do so.)  Clear contact paper may also work well, too; you can grab a roll at Big Lots for $2.
  • Remember the frequent pictures you’re supposed to be taking fo your pup?  Now’s the time to find the best ones to put on social media.  In this day and age, a dog could potentially be lost, found, and returned in an hour’s time, thanks to the overwhelming amount of technology on our hands.  Facebook has groups for neighborhoods, but you can also post on your feed, and ask locals to share. 

During the Search – Contact local establishments

  • Of course, contact your local animal shelters.  Since I live on the border of THREE counties, we contacted all three county’s animal shelters.  One had a way to upload his picture to their “missing” board online, but they all required you to come in person to ID and pick up your dog.  Each suggested we check their “up for adoption” list, which was updated at various intervals.
  • Contact local pet stores and veterinarian offices.  Lost pets can turn up there, and are frequently held there, at least temporarily.  One easy way to see how many pet stores are near you is to do a simple “Yelp” search by proximity and key word.

Our dog was found because my husband happened to spot a poster on his way home from work for a “found dog” about 3 miles from our home.  It turns out, he showed up in the neighborhood of a sweet, older couple the next morning, and was enjoying their company that day.  They’d taken him to the local vet (our vet!) to check for a chip.  They’d gone out and gotten a small supply of dog food, and bought supplies to create about 8 posters.  We came prepared to pay them, but they absolutely refused payment.  However, we did go around the neighborhood, and removed all of their signs for them.  That was the very least we could do!

My hope, of course, is that you’ll never need to take this advice.  But chances are great, if you’re reading this, you’re already looking for a missing pooch.  I certainly hope this proves helpful, and that you and your fur baby are reunited quickly!

Keep on saving!  :o)
--Barbara

**Remember, y'all, this post may contain affiliate links. I receive a small amount of compensation when you purchase from my links, which I"ll totally blow on waffle fries and sweet tea, y'all!**

My Journey with LASIK – Thomas Eye Group

**This post may contain affiliate links. I receive a small amount of compensation when you purchase from my links, which I"ll totally blow on waffle fries and sweet tea, y'all!**


This is a sponsored post, based on my experience with Thomas Eye Group. In exchange for this post, I received a form of compensation; however, all opinions are mine.  Please note, this is MY personal experience with LASIK.  I am not a doctor, nor any sort of expert of LASIK procedures or anything concerning one’s eye health.  I am sharing my experience to help educate others about the options available to them.  Your experience(s) may vary from mine.

DitchingTheGlasses with Thomas Eye Group

About five years ago, I finally got around to making an appointment with a LASIK chain, to get a consultation and to find out more about having the procedure.  By the time the appointment came around, I was pretty certain I would have to put it off.  Later that evening, after my consultation, my suspicions were confirmed: I was pregnant.

PreggoStick

Fast forward five years, two kids, two (or three?) pairs of glasses, and dozens of pairs of contacts later: I was more than ready to ditch the glasses, and revisit LASIK surgery.

Shopping Around

As with anything major I set out to do, I wanted to shop around, not only for price, but for quality and peace of mind.  I ruled out the chains that *just* did LASIK.  For me, I decided I wanted an office that focused on the whole eye, to ensure nothing was overlooked, and to explore alternatives to LASIK, should the need arise.

So, I made two appointments back to back with two different eye centers.  Thomas Eye Group was first.  I was immediately pleased with my experience.  The staff was rather friendly and helpful, from greetings by the lovely ladies at the desk; to Jacqui – their LASIK coordinator – who provided me with all the information I needed regarding the procedure, answering many of my questions before I even had a chance to ask them, and providing me with pricing information; to Dr. Sari Gruber, who conducted my consultation examination and is also a LASIK success story herself.  During the course of my exam, it was noted that the cornea of my left eye was too steep.  (Oh, did I mention you’re supposed to go 3-5 days without your contacts before your appointment?  Did I also mention I had failed to do so?  Yeah, I should’ve listened better!)  So it was recommended that PKR surgery for my left eye may be an option, but we wouldn’t know until the day of the surgery.  LASIK would still be done on the right eye, regardless.  Price would not change, depending on what type of surgery — I liked the stability of that.

Thomas Eye Group general Collage

In terms of recovery, LASIK is the favorable option over PRK.  LASIK recovery time is a few days, where PRK may take a few weeks.  Each would require drops and other post-op care and follow-up; but “normal” vision occurs much more quickly with LASIK.  So, I certainly had my fingers crossed for LASIK, but would be happy with whatever would best suit my eye health.

Lo and behold, the next day, when I went to the other eye group for a consultation, I was again told I had steep corneas, and that PRK may be in the works for me.  Unlike at Thomas Eye Group, I was told they would do PRK on both eyes, if they did it on one.  I was baffled by their inability to offer a good explanation for this, even when I asked for clarification.  The cost for PRK was slightly less than the price I was quoted at Thomas Eye Group.  But I did not like not knowing which price I would be paying until the day of the surgery.  Thus, my decision was clenched: I was going to have Thomas Eye Group handle my LASIK experience.

Best. Decision. Ever.


LASIK Preparation
So for the next week or so, I stuck with my clunky ol’ glasses, and contacts were a thing of the past.  I confirmed my appointment about a week beforehand, and provided my pharmacy information so my prescriptions would be called in and ready to go after surgery.  I’m not a makeup person, so this wasn’t an issue for me; however, you should avoid eye make-up for at least two days before your procedure.  

On the day of the surgery, I came in bright and early in the morning, and was warmly greeted by the staff.  Within minutes, I was whisked away for a pre-op exam.  I honestly don’t remember all the technicalities here, except that 1) they needed to measure the steepness of my corneas, and 2) in order to perform LASIK, you have to have a “map” of the eye for the lasers to do what they do.  Dr. Jeffrey Carlisle introduced himself to me, and confirmed I would -indeed- be able to do LASIK in both eyes.

Thomas Eye Group Surgery Day

I will say, although the wait time felt super-long, it wasn’t — 20 minutes tops.  I was also given a dose of valium to relax.  (And when you’re about to have lasers come at your eyes, things to help you relax are a definite plus!)  Again, the entire staff was super-supportive, and kept my sprits up during the wait time.

Bring On the Lasers!

I was ushered in to the room for my procedure, and all aspects were carefully explained.  I was laying on the super-comfy fully reclined chair, and given a stuffed bear to hold.  And, yes, I gripped that poor bear a few times, just out of sheer nerves.  Dr. Carlisle -who was seated behind me during the procedure- began on my right eye, and honestly, it was but a few minutes before he declared it done.  Same with the left eye.  All was explained as it was happening, which proved reassuring.

Bam!  It was done.  I was helped up from the table, and asked to look at the clock across the room.  Imagine my excitement when I could read it with NO assistance!

Thomas Eye Group PostOpDrCarlisle

Post-Op Recovery

Soon thereafter, the water works started.  My eyes simply couldn’t handle the light nor the dryness.  So tissues galore were in order.  This is all to be expected.  I came home, took my allotted drops (4 different kinds) and just slept.  It actually took me a while to comfortably fall asleep because it felt a bit like there was a grain of sand on my eyes – neither blinking nor keeping them open nor keeping them shut seemed to help.  But then, ……I slept.  I’d only intended to sleep for a few hours, since my parents were watching my kids that morning.  But the next thing I knew, it was 4 in the afternoon!

My mantra for that entire day was simple: this is temporary.  The grainy feeling was temporary.  The endless pool of uncontrollable tears was temporary.  The blurry vision was temporary.  The sensitivity to light was temporary.  The inability to open my eyes for an extended time was temporary.

The following day, my husband helped load the kids in to the van, and drove me to my follow-up appointment.  Dr. Gruber looked me over, and gave me the green light to drive, and resume most of my normal activities.  However, I was not to swim for about two more weeks; I had to take care not to rub my eyes for another week, nor wear eye makeup during that time, and I was to continue wearing my eye shields at night, to help protect my eyes while I sleep.

Getting Better All the Time

Over the course of the next few weeks, I kept up my routine with my eye drops, as outlined in my post-LASIK packet.  I continue to use drops as needed when they feel dry, and keep them in the refrigerator for added comfort.  I came back a week later for my one-week post-op check, again hearing from Dr. Gruber that all looked well.  I continue to use sunglasses, as I still find light proves too much at times, especially being out and about with my kids during the day.

My eyes would become tired by the end of the day.  Dr. Gruber and Dr. Carlisle both assured me this is common, and goes away over time.  I’ve gotten in the habit of laying down and closing my eyes with my daughter when she naps.  But at age four, naps are rather hit or miss.  So when she doesn’t nap, those are the days when my eyes would just tire out around dinner time.  Thankfully, that fatigue has also dissipated greatly as well.

Old habits are rather hard to break, I find, as I continued to want to reach for my glasses when I had to get out of bed.  Slowly, that urge is going away.  My bathroom counter is less cluttered, with the absence of my glasses case, contacts case, saline solution, and weekly cleaning solution.

And the FREEDOM that has come with ditching the glasses is amazing!  I no longer need to plan ahead if I wish to swim laps when I take my kids to the pool, nor worry about getting splashed and having my contacts fall out.  And with two young kids, how I’d POSSIBLY drive home sans contacts!

I am quite grateful for the care I received at Thomas Eye Group, and would highly recommend them to anyone wishing to learn more about LASIK, and if it’s the right option for them.  The only regret I have is not doing this sooner.

About Thomas Eye Group

Founded in 1974, Thomas Eye Group has served the greater Atlanta community by providing eye care services to patients ranging in age from infants to seniors. Thomas Eye Group is a full service eye care provider with offices in nine locations in and around the greater Atlanta area providing routine eye exams, glasses, contact lenses, LASIK, as well as medical, surgical and cosmetic services —  AND, they are in the process of opening a new Sandy Springs location soon!  Additionally, Thomas Eye Group is active in social media, including Twitter, Facebook, Pinterest, Instagram, and YouTube.


LASIK at Thomas Eye Group:

Thomas Eye Group is one of the pioneers of refractive surgery in Atlanta, and has performed laser vision correction procedures since 1990. Dr. Carlisle uses the most precise, advanced LASIK technology in Atlanta to perform the 100% Blade-Free LASIK procedure.

How to schedule a LASIK consultation:

Call 855-ATL-LASIK or click: here

You can also check out my cheesy testimonial (and hear my son’s excitement) here, and then go look at all the other awesome testimonials about Thomas Eye Group:

This is a sponsored post, based on my experience with Thomas Eye Group. In exchange for this post, I received a form of compensation; however, all opinions are mine.

Keep on saving!  :o)
--Barbara

**Remember, y'all, this post may contain affiliate links. I receive a small amount of compensation when you purchase from my links, which I"ll totally blow on waffle fries and sweet tea, y'all!**

Atlanta's Frugal Mom is a participant in the Amazon Services LLC Associates Program, an affiliate advertising program designed to provide a means for sites to earn advertising fees by advertising and linking to Amazon. In other words, if you click through to Amazon from some of the books or products I recommend and make a purchase, I get a small percentage in exchange for your purchase. It's a small way you can support AFM.