Frugal Parenting Tips and Tricks

Here are some great ways I've learned to be a frugal parent over the years. Got more frugal parenting tips? Do share! :)

Buried Treasure Sensory Bin

**This post may contain affiliate links. I receive a small amount of compensation when you purchase from my links, which I"ll totally blow on waffle fries and sweet tea, y'all!**

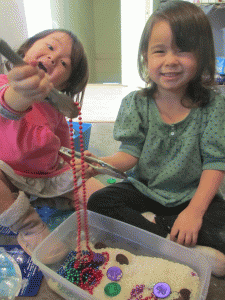
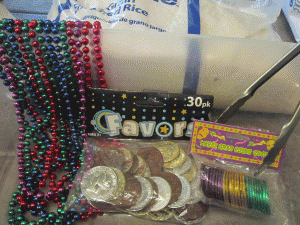
All children, young and old, love the idea of hunting for treasure.  This week’s sensory bin plays on that fascination using colorful fake coins and necklaces.  The inspiration for this bin comes from a pirate party game by The Fickle Pickle, and the original post can be found here.

Buried Treasure Sensory Bin

Buried Treasure Sensory Bin

Supplies needed:

Rice (uncooked, of course)

Play necklaces

Colorful pirate coins

Suction cup hooks (optional)

Tongs (optional)

Plastic bin

Tub for sorting

Buried Treasure Sensory Bin

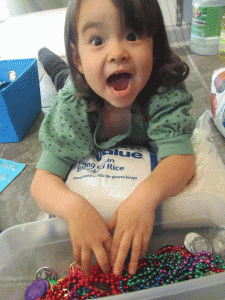
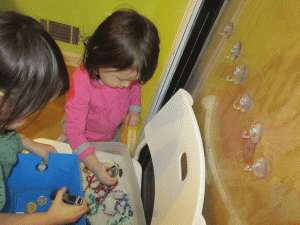
Fill the bin about halfway with rice, then add in your necklaces and coins.  That is, if you can get your thrilled-to-death daughter off of the bag of rice.

Buried Treasure Sensory Bin

I chose to have the girls use tongs instead of their hands to dig around for treasure, as a way to work on their fine motor skills.  Using their hands works just as well. 🙂

Buried Treasure Sensory Bin

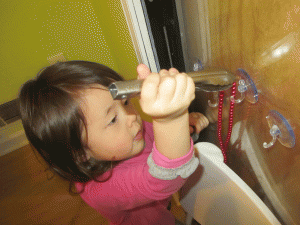
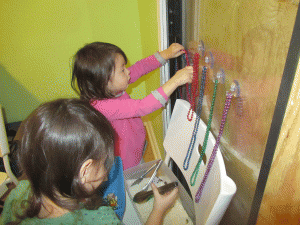
You can give them an additional bin or box at this point to put their found treasures in, or you can take it a step further and use the suction cup hooks for hanging necklaces.  I just stuck them to our sliding glass door at about eye level.

Buried Treasure Sensory Bin

I gave them simple directions to follow.  Use the tongs to get the treasure out of the box.  Then put the coins in the blue bin and hang the necklaces on the hooks.

Buried Treasure Sensory Bin

They had a blast!

Buried Treasure Sensory Bin

As any parent of preschoolers will tell you, finding an activity that will keep them occupied for more than mere seconds can be a challenge.  Eva and Chooby actively played with their buried treasure bin for well over an hour, which gave me time to get some work done around my house and online.  This one is definitely a winner!

Almost all of the supplies for the buried treasure bin came from the Dollar Tree.  I had tongs at home already, but plastic ones can be found in the party/wedding supplies section of your local store, and obviously rice is pretty easy to get anywhere.  I spent a total of $7 on this bin, which was well worth it for the hours of play time it will provide in the future!

Do you have a sensory bin that your little ones really love?  Please share your ideas in the comment box below!

(Disclaimer: Be prepared for some rice on the floor.  I made it a point to remind them that if they spilled all of the rice, then their game would be over, so they tried really hard to keep it all in the bin.)

Keep on saving!  :o)
--Barbara

**Remember, y'all, this post may contain affiliate links. I receive a small amount of compensation when you purchase from my links, which I"ll totally blow on waffle fries and sweet tea, y'all!**
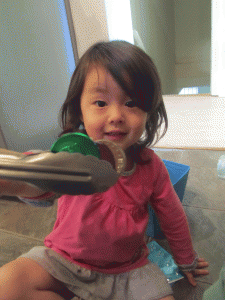
Bib Clip: Making Feedings (A Little Less) Messy

**This post may contain affiliate links. I receive a small amount of compensation when you purchase from my links, which I"ll totally blow on waffle fries and sweet tea, y'all!**


Perhaps knowing that I would one day have a son, I bough gender-neutral “toddler” pullover bibs when my daughter outgrew her “baby” bibs about two years ago.  ( I opted for the Cookie Monster and Elmo combo, similar to these here.)

Fast forward to the present, I have baby boy intent on constantly pulling off his “baby” bibs (basically any velcro or snap-on bib).  So a few weeks ago, I decided to try putting him in his sister’s old pullover ones.  The problem being, however, those were too long, and resulted in a gaping hole up front, allowing some of most of his food to fall through on to his shirt – thus, defeating the purpose of said bib! 

My solution?  I clipped the bib in the back, about an inch away from his neck — and voila!  No more messes!
Keep on saving!  :o)
–Barbara 
**This post may contain affiliate links.**

Follow Me on Pinterest

Keep on saving!  :o)
--Barbara

**Remember, y'all, this post may contain affiliate links. I receive a small amount of compensation when you purchase from my links, which I"ll totally blow on waffle fries and sweet tea, y'all!**
Homemade "Pixie Dust"

**This post may contain affiliate links. I receive a small amount of compensation when you purchase from my links, which I"ll totally blow on waffle fries and sweet tea, y'all!**


Rumor has it, when mixed with happy thoughts, this edible, homemade pixie dust will lift your right off the ground.  ;o)


Riding the coattails of our trip to Disney World last month, I decided to create homemade (and edible) “pixie dust” for my daughter. It’s an easy thing to add to applesauce, PBJs, sprinkle a little over a plate of fruit — you name it! The best part? Thanks to my friends at NurturMe, it’s got peas and sweet potatoes in it!!

Here’s what I did. I used 1 package of NurturMe peas and 1 package of NurturMe sweet potatoes, combined with about 2 tablespoons of cinnamon, and 1 small tablespoon of sugar.  Voila!  Edible Pixie Dust.  


(Note: you’ll need to stir it a little bit before sprinkling on, as it tends to settle after a while.)

Keep on saving!  :o)
–Barbara
**This post may contain affiliate links.**

Follow Me on Pinterest

Keep on saving!  :o)
--Barbara

**Remember, y'all, this post may contain affiliate links. I receive a small amount of compensation when you purchase from my links, which I"ll totally blow on waffle fries and sweet tea, y'all!**

HANDSFREE Bottle Feeding On-the-Go

**This post may contain affiliate links. I receive a small amount of compensation when you purchase from my links, which I"ll totally blow on waffle fries and sweet tea, y'all!**


My son frequently turns heads these days when we’re out and about.  And not just from his dashing good looks either!  ….let me back up a little: I used to spend meals out eating with one hand.  My son’s bottle in the other hand, feeding a hungry baby.  It was miserable.  

And then my husband found a solution: the Podee bottle system!  This genius feeding system features a regular bottle, and nipple, but further includes a set of tubes to allow your baby to take the bottle -much like he would a paci- with the bottle free to rest nearby.  For younger babies who can’t yet hold their bottle, and even older babies who may frequently drop, the Podee will allow instant access to the bottle, while freeing caregiver’s hands!

In addition, parents of multiples can achieve more productive feedings with the Podee!  Imagine, being able to simultaneously feed two or thee (or more!) babies at once, all while keeping your hands free!

My son, enjoying a bottle
before nodding off.


We invested in this bottle system a few months ago, with but two regrets:

  1. Why did we wait so long to try this??!
  2. I wish we’d gotten more than just a 2-pack, or at least gotten some extra tubes and nipples in the beginning.  A minor point, but I find I have to clean them more frequently.  And since they’re dishwasher safe, I either must pull them out of the dishwasher and wash by hand if I find myself in a pinch.
You can snag the Podee at Amazon, with a variety of options, including a single bottle, a two-pack, three-pack, or four-pack.  Also, you can grab an extra set of tubes and nipples, which I would recommend.

What could possibly make these even better?  Snagging them with your Amazon Mom Membership or Amazon Prime Membership, which allows for free two-day shipping, among other perks!

BTW: This is NOT a paid endorsement.  I am sharing about this product because we love it so much, and wanted to share with all y’all.  If I can help make YOUR life easier, great!  :o)

Keep on saving!  :o)
–Barbara
**This post may contain affiliate links.**

Follow Me on Pinterest

Keep on saving!  :o)
--Barbara

**Remember, y'all, this post may contain affiliate links. I receive a small amount of compensation when you purchase from my links, which I"ll totally blow on waffle fries and sweet tea, y'all!**

Putting the Baby’s Stamp on Cards

**This post may contain affiliate links. I receive a small amount of compensation when you purchase from my links, which I"ll totally blow on waffle fries and sweet tea, y'all!**
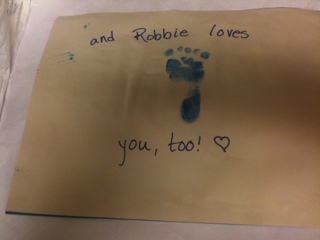


Since my infant son is still too young to help his big sis “make” cards for various occasions, I try to include him in the process anyhow. 🙂


Keep on saving!  :o)
–Barbara 

**This post may contain affiliate links.**

Follow Me on Pinterest

Keep on saving!  :o)
--Barbara

**Remember, y'all, this post may contain affiliate links. I receive a small amount of compensation when you purchase from my links, which I"ll totally blow on waffle fries and sweet tea, y'all!**

Nighttime Diaper Leaks for Baby Boys – One Mother’s Solution

**This post may contain affiliate links. I receive a small amount of compensation when you purchase from my links, which I"ll totally blow on waffle fries and sweet tea, y'all!**


nighttime diaper leaks - m'boy

My happy li’l redhead —
now DRY in the morning! :o)

My happy li’l redhead —
now DRY in the morning!  :o)

Mothers of baby boys everywhere instantly know what this post is about: our little boys have a knack for filling up their diaper at night, well above capacity!

I’ve heard many mothers discuss their solutions to this nighttime diaper leaks dilemma:

  • move up a size at night, just strap it on tight
  • try a different brand
  • put in a maxipad (yep, a maxi pad!)
  • change him at once during the night
  • special “night time” diapers
  • …..and so on…..

I tried several of those options for nighttime diaper leaks when my little boy started leaking through at night — him wetting through his jammies each night was just getting to be way too much!  Since I was more than well-stocked with diapers of various brands (y’all already know how I find cheap diapers!), I tried several brands, both in his current size and a size up.I even tried the maxi pad, which actually resulted in even wetter jammies in the morning!

But that lead me to believe that there had to be an insert of some sort I could put in his diaper to help absorb all that extra liquid.  I headed over to Babies R Us, and did a little on-site research.  I immediately saw two options: a pack of about 30 liners that looked akin to maxi pads for about $4, or a pack of 105 gDiapers gCloth liners for about $8.  Being frugal me, I went with the one with the best unit price: the gDiapers liners.

nighttime diaper leaks
These liners are designed to be used with cloth diapers, as an easy, biodegrabdable and flushable way to -um- get poo in to the potty, with less mess.  But these suckers also work well to soak up the excess liquids, too!  I fold them in half (teachers will understand when I say it’s a “hot dog” fold, not a “hamburger” fold), and place it in the front of his diaper.  (I’ve stuck with using a size up.)  Now, he still wakes up in the mornings with a bulging diaper, but it’s all contained!  And on the rare occassion when he wakes up with a -ahem!-  package for us, it’s even easier to dump the diaper!
You can find these liners at Babies R Us, or you can order them from Amazon, too.  For less than 3 bucks a month, I am keeping my sweet little guy dry at night, and we are all happy for it!  I hope this helps you shed some light on your nighttime diaper leaks, too!
Keep on saving!  :o)
--Barbara

**Remember, y'all, this post may contain affiliate links. I receive a small amount of compensation when you purchase from my links, which I"ll totally blow on waffle fries and sweet tea, y'all!**

Frugal Parenting: DIY Fathers Day Crafts

**This post may contain affiliate links. I receive a small amount of compensation when you purchase from my links, which I"ll totally blow on waffle fries and sweet tea, y'all!**


For Father’s Day this year, I wanted to continue to impress upon my daughter the importance of ownership of the gifts she gives. Gifts, thank you notes, and various cards hold more meaning to the giver and receiver when made more personable, so I helped my daughter create some cards for her daddy, and both grandfathers this year.  Thus, a DIY Father’s Day craft seemed in order….

DIY Father's Day crafts
Lesson learned: Glue the construction paper to the cardstock FIRST,
to prevent the glue from interfering with the paint!

We sat down, working bit by bit over the span of a few days, creating these cards. I brushed washable paint over her hand to create the “flower”. (The paint acquired, by luck, at a garage sale — a pack of 10 small tubs for a quarter.) Then, while she colored on a few sheets of construction paper (to be used later), I asked her “why do you love daddy?”, recording her responses and offering prompts (basically rephrasing the question) to redirect her when needed.

She helped put down the glue for each step (reciting our glue motto of “just a dot, not a lot!”), then placed the strips with her responses on the paper. It was all glued down to card stock, to make it sturdier. The card stock also served as a quick and simple way for my infant son to put his own stamp on each card, too. 🙂

DIY Father's Day crafts - baby's stamp

We repeated this for a single-flowered card for each of her grandfathers.

DIY Father's Day crafts

The sheets she colored were used as wrapping paper for the two small gifts we got for her daddy. (Since he had actually requested something specific, we indulged him.)

Each card was greeted with great pride by its intended receiver– so much so, that first thing Monday morning the card for her Daddy was proudly displayed at his office. 🙂

Do you have any DIY Fathers Day crafts or gift ideas to share? Please leave a comment here or contact me. I’d love to hear all about it!

Keep on saving!  :o)
--Barbara

**Remember, y'all, this post may contain affiliate links. I receive a small amount of compensation when you purchase from my links, which I"ll totally blow on waffle fries and sweet tea, y'all!**

Frugal Parenting: Fun with Paint, Water, and Recyclables

**This post may contain affiliate links. I receive a small amount of compensation when you purchase from my links, which I"ll totally blow on waffle fries and sweet tea, y'all!**


I hoard containers. There — I put it out there. I save various, sturdy containers, with the idea that I could re-use it ….for something. This came in handy the other day with my 3-year-old daughter.

I’m always looking for ways to keep my children entertained, as well as offer them chances to explore and learn.  If I can additionally do so in a “green” manner, even better.

For this occasion, I put red food coloring in an old throat spray bottle, blue in an old dish soap bottle, grabbed some old foam letters (but sponges would work just as well) and put a little paint in old flushable wipes containers, gathered up a few unused medicine droppers, opened some paper bags at the seems, and threw in a few paint brushes, and  empty toilet paper and paper towel rolls.

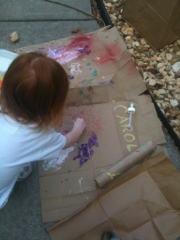
In our driveway, we “painted” a large hopscotch-like path with various shapes using the dish soap bottle. Then we experimented with painting with rocks, sticks, and our fingers. When asked which she liked best,she responded “the rock — because it’s MAGIC!”

She and I had a blast, and all for pennies. More importantly, these activities encouraged her imagination, worked on dexterity (pushing the spray button, utilizing the various objects for painting, etc), and allowed for open-ended inquiry. Certainly this was a good example of “process over product”.

My next plan is to get some old, large containers to create makeshift water tubs, and let her play and explore. I already have a few containers in mind for this. When my son is a little older -perhaps later in the summer- he can join in the fun.

Do YOU have some great, cheap (and green) ways to entertain your kids? Please share, or contact me. 🙂

**Sidenote: I’ve learned that food coloring, while great for learning, does not easily come off hands — it requires a good dose of elbow grease.

Keep on saving!  :o)
--Barbara

**Remember, y'all, this post may contain affiliate links. I receive a small amount of compensation when you purchase from my links, which I"ll totally blow on waffle fries and sweet tea, y'all!**
Ditching the Diapers: Potty Training in 3 (or 4) Days

**This post may contain affiliate links. I receive a small amount of compensation when you purchase from my links, which I"ll totally blow on waffle fries and sweet tea, y'all!**


Disclaimer: The following is my account of potty training my daughter, using a particular method*. I am not claiming to be an expert on the subject. However, in 30 years, I’ve 20 years experience with working with kids, including two degrees in education. I’ve taught in middle school and elementary schools, and just finished up my first year in preschool. Again, I am NOT an expert in the matter, but I do feel my combined education and experience makes my account worthwhile. :o)
 
ditching the diapers: potty trainingDuring the third full week in May, I undertook the daunting task of potty training my daughter, who was 26 months at the time. She was ready; she was more than ready, and I knew it. This just happened to be the first block of time where I could set aside to truly devote to the task. School had finished up the week before, and we had nothing critical that needed to be done. (Gym, schmym – we’re ditching diapers!!) So, I began hyping up going on the potty even more, leading up to that week.
 
She’d been sitting on the potty at night since January. But that’s all she had done: sit. So the potty was already a familiar entity for her. Plus, she frequently saw Mommy go potty, and -hee hee- taught her self how to “wipe”, as well.
 
I knew what I did and didn’t want to do with PT. For one, I did not want to use the “timer method” – I didn’t feel like that was a way to teach a child how to read their body’s signals. I also did NOT want to make the transition from diapers to training pants (like Pull-Ups) full time. That didn’t seem to make sense for us. I started making Carol work on pulling her pants on and off for over six months prior, so she’d already mastered that task. (This was easily accomplished during diaper changes. After the diaper was put on, I’d stand her up, with pants at her ankles, and have her pull them up. She still needs a little help getting them up in the back.) I knew I wanted to go straight from diapers to panties, with the exception of naps and nighttime. (I’ll touch more upon that later.)
 
We ceremoniously took a trip to Target and picked out a few packs of Big Girl Panties. She got to pick out one pack , with princesses on them, naturally; while I tossed in a few more packs that were more cost-efficient. All the while, I talked very upbeat but casually, about how big girls wear panties instead of diapers, sit on the potty, AND put their pee-pee and poo-poo in the potty, and NOT in a diaper. Further, we read plenty of “going potty” books in the weeks leading up to Operation: Ditching the Diapers. Finally, I deliberately opened the packs of panties in front of her, and gave her the “princess” cardboard insert that came with the one pack, and made sure she watched me fold the newly-washed panties, talking up how neat it is to have her very own big girl panties.
 
Day One
So Tuesday -Day One- arrived, and after breakfast, we ceremoniously went back up stairs to take off our jammies, and take off our verylastdiaper. (Yes, my child eats breakfast in her jammies… That’s blog entry for another day.) I pulled out the new panties from her dresser drawer, and told her how, from now on, she was not going to wear diapers, but wear panties like a big girl. I showed her the picture of the princess on the front, to which she cooly remarked, “oooh, nice” while patting the princess. I went on to explain that big girls keep their panties dry, so if she felt “the pee-pees”, to tell mommy and we’d go sit on the potty. (She wore just a t-shirt and panties, no pants, to minimize the time needed to sit on the potty.)
 
I’m not going to lie, within two hours of this, I was totally exhausted, and halfway convinced this method just wouldn’t work. (I’m going to chalk up most of the exhaustion to pregnancy.) But I knew I had to have faith in what I set out to do, and push forward. The key to this method of potty training is to stay right by your child’s side at all times. This way, you pick up on their cues, and therefore, teach the child their cues to go potty. With frequent reminders to “tell mommy if you feel the pee-pees”, we still had our share of accidents. The key was to rush her to the potty the second I saw her pause (to pee), if the first drop came out, or if those legs started to spread apart, I’d scoop her up and plop her on the potty. All with a casual reminder that “we sit on the potty to go pee pee!”
 
We had about half a dozen accidents within the first two hours, but only a few that were paper-towel-worthy; mostly, her panties got a little damp, and we simply had to change in to a new pair. I frequently had her feel the new, dry pair, and compare it to the damp pair we just took off. I’d say things like, “see, these panties are dry. Let’s keep our new panties dry. So you tell mommy if you feel the pee-pees.” Also, for intermittent reinforcement, I would “quiz” her to see if the panties were dry; if they were, we would enthusiastically celebrate. Sometimes that entailed doing the “Woo-Hoo! My Panties are STILL Dry” dance.
 
While I was getting lunch ready, I failed to keep a close of an eye on her, and that’s when her little table and chair in the kitchen got a downpour. She stood in her chair, just letting it gush out – all the while looking over at me, unable to articulate what she needed to do, so she just, well, showed me…
 
And then it all started to click.
 
She would not necessarily verbally state that she needed to go potty, but her body language was clear. She would “hold” herself; she’d knowingly pause whatever she was doing, becoming motionless. I cracked her code, and so did she! Before I put her down for her nap, not only did she pee on the potty, while keeping her panties dry, but she even pooped on the potty, too! I really saw the tide starting to turn, and almost hated to have to put her down for a nap. (Naps were necessary – if for no other reason, so I could have a little break during such an exhausting time!) I reluctantly put on her “night-night panties” (Pull-Ups), and she went down for a nap.
 
Post-nap, we continued to ride the train of potty training success! While she still wasn’t verbally expressing when she needed to go, her body language was loud and clear. She went through only one or two pairs of panties until bedtime, and I could really tell it was starting to sink in with her.
 
With each successful attempt to sit on the potty, we called a loved one: daddy at work, grandparents, etc. This proved to be enough of a reward for her. She also got to “watch the babies” on my iPhone. (She likes to watch videos of herself on my phone.) Occassionally, I would further supplement a successful trip and dry panties with an animal cracker, but I didn’t want her to become dependent on tangible rewards. Calls to loved ones, and plenty of praise and enthuiasm proved valuable!
 
Day Two
The next day started off much like the previous. Except for the pooping in the panties… While she was going pee-pee in the potty like a champ, she would not repeat yesterday’s performance of going poo-poo on the potty. The first time this happened, she paused, and I honestly just missed her cue. So, she didn’t get the message that she should also poop in the potty, just the same as she goes pee-pee. The next incident occurred when she hid behind a chair to poop. This told me she knew what she was supposed to do, but wasn’t ready to try it out on the potty.
 
It’s important to note that, with this method (or any potty-training method, IMHO), you do not scold a child for an accident. With positively stating my expectations, Carol learned what she was supposed to do. When I saw that glaring nugget poking out of the back of her pants, I would swiftly take her to sit on the potty, all the while reminding her that “poo-poo goes in the potty”, and “remember to tell Mommy if you feel the poo-poo or the pee-pee”. My phrases from the day before continued well in to Day Three.
 
Day Three
Thursday arrived, much like the day before. She kept her panties dry the entire day. But, she still wouldn’t poop in the potty. She didn’t have any accidents, she just didn’t have to go. (Side note: this method encourages a fiber-rich diet, starting a few days prior to starting, as well as encouraging the child to drink, drink, drink. The drinking was not a problem. But when you have a picky child, it’s difficult to get her to eat most meals, let alone a fiber-rich diet!)
 
Knowing that she was peeing in the potty without incident, I felt good. However, not knowing if she would poop in the potty made me a bit nervous. I was beginning to develop a motivational reward program in my head, involving charts, stickers, and other small tangible rewards. Keeping all this in mind, I reluctantly decided to extend the “method” to a fourth day, just to be cautious. Reluctant, as we were both going stir crazy, being at home for yet another day; but, I was committed to potty-training my daughter!
 
Day Four
Friday turned out to be a mixed blessing, much like the day before. She continued to excel at peeing in the potty. But she didn’t poop: not in her pants, not in the potty. Argh.
 
However, I determined that I had to just trust that she would get it, perhaps with the help of a rewards system, which I was fully ready and prepared to implement. As it turned out, she started pooping in the potty the following day. The first time she did so, Daddy was home too, so we just made such a fuss about going poo poo in the potty, I think that was all the motivation she required. For the next two weeks, she would applaud herself for pooping in the potty, usually with a hand clap and a ceremonious “yay, I did it!”
 
So, I can say now, a month later, that I have a successfully and fully potty-trained child. She truly knows when she has to go, and began verbally stating when she does shortly thereafter the training experience. I’ve learned to take her at her word, whether she says she does have to go, or if she claims she needn’t go at the moment. I do still encourage her to sit on the potty before we leave the house, and as soon as we get home. But, now that I have a really cool foldable potty seat, I’m not afraid to take her to (most) public restrooms. Almost. ;o)
 
In an upcoming post, I will share a list of items I highly recommend you have on hand before and during potty training. I certainly have learned along the way, and feel much more confident about Pting Baby Number Two; however, I know now how consuming this method is, and will likely need a caretaker for Carol during the duration of PTing the next child. I digress; that’s an obstacle I’ll face and accomplish in a little over two years.
 
I will leave you with these last words: this method worked for me and for my child. I’ve heard testimonials from several other mothers of their success in using this method for their children as well. However, it is not for everyone, especially if you haven’t the ability to carve out 3-5 days solely to devote to PTing. You cannot “work from home” on these days. Your child needs your full attention. Period. I highly recommend you do your own research, and find a method that will work for your family. :o)
 
* – I used a slightly modified version of the 3 Day Method. It’s a program that you can purchase online. It is my opinion that you should not have to pay for a method that can help a child learn a basic life skill. However, it is copyrighted material, and I cannot LEGALLY give it away. I suggest if you’d like to learn more about the 3 Day Method, you ask your friends if they’ve used it; perhaps they could loan you their copy (it comes as a PDF, too), so you can see if it might work for you and your child.
Keep on saving!  :o)
--Barbara

**Remember, y'all, this post may contain affiliate links. I receive a small amount of compensation when you purchase from my links, which I"ll totally blow on waffle fries and sweet tea, y'all!**

Atlanta's Frugal Mom is a participant in the Amazon Services LLC Associates Program, an affiliate advertising program designed to provide a means for sites to earn advertising fees by advertising and linking to Amazon. In other words, if you click through to Amazon from some of the books or products I recommend and make a purchase, I get a small percentage in exchange for your purchase. It's a small way you can support AFM.