frugal living

Explore a wide way of keeping your spending down, beyond just clipping coupons and being "cheap".  Whether it be ways to cut out excess spending, or how to tighten up your budget, how to get by during the holidays or holiday flights, tips to a frugal Disney trip, or even if you just want to keep your kids cool during the summer - I've got it all covered!

Holding a Successful Garage Sale

**This post may contain affiliate links. I receive a small amount of compensation when you purchase from my links, which I"ll totally blow on waffle fries and sweet tea, y'all!**


holding a successful garage sale

Holding a successful garage sale

Holding a successful garage sale takes a little planning, and a little thought.  If you expect to just throw your stuff out on the lawn the morning of, with no price tags, and sell everything like hot cakes, then you’ll likely be sorely disappointed.  Unless you actually have hot cakes to sell, in which case, let me know; I’ll bring my own fork.  😉

As a self-proclaimed veteran garage sale goer and holder, I’ve picked up a few tips and tricks along the way. And with it being “garage sale season”, I know many of you may be looking to unload lots of your loot.

So, here are my (sometimes rather opinionated) tips to making the most of your garage sale:

Holding a Successful Garage Sale: Before the sale (Prep work)

  • Take the sentimentality out of your pricing. So you’re ready to part with that adorable costume your kid wore for Halloween? Great, but keep in mind what someone would actually PAY for it, not what you think it was worth to you.
  • It doesn’t matter what you paid for something new.  This is a garage sale, and people expect reasonable prices for goods being sold.  You may have paid $100 for that lovely purse when it was new, but if you’re selling it at a garage sale, expect to let it go for less than $20.  If you think you could (should) get more for it, try posting it to a Facebook yard sale group, Craigslist, Amazon, or eBay.  Remember, this is a garage sale; people are looking for cheap finds on used goods.  You just won’t see many high-end items at a garage sale, and there’s good reason for that.
  • Have prices clearly marked or posted.  My biggest pet peeve, and the quickest way for me to exit a sale, is to not find prices on anything.  Yes, this takes time and preparation before hand.  You’ll want to start pricing things at least a few days ahead of time, and put price tags on as much as you can.  If you have a group of like items all at the same price (clothes, books, etc), you may be able to get away with just posting a sign for that group.
  • Advertise your sale.  Utilize free tools, like Craigslist and Facebook, to get the word out about your sale.  If you don’t have any, create (or buy) signs so people can know where you are.  Make sure your signs are EASILY readable from the street, and your address is clearly shown.
  • “Display” as much as possible.  Don’t make me dig through a box on your driveway to find something worthwhile.  Set up multiple tables, shelves, and other areas on which to display what you’re selling.  The more visible your items are, the easier people can spot them, the more likely they’ll be to come over and browse!  This is especially critical for big-ticket items or any items you really wish to MOVE!  Selling clothes? Take two ladders, and run a pole through the rungs, and voila!  You’ve got a rack to display clothing on hangers.  Or if you’re really lucky or fancy, utilize one of these.  Books — show as many of them with their front covers showing as possible.  Group series, and/or same authors together — people may wish to “bundle” them.

Holding a Successful Garage Sale: During the sale

  • Be prepared for haggling.  This should go without saying, but I’ve been to many garage sales where people seemed shocked that I suggested a lower price on items.  Along those lines, see my next point:
  • Keep your goal in mind.  Are you selling items to help make ends meet?  Are you simply looking to purge clutter in your home?  Are you raising money for a charity?  (If so, you definitely advertise that it’s a fundraiser — it’ll be certain to drive customers your way.)  What will happen with unsold items: will they be donated, or will some items come back in to be sold at future garage sales or online?  If you’re looking simply to lighten your load, then flexibility in price is key.  However, if you are looking to make money, then stay firm with your (reasonable, well-thought-out) prices; but be prepared for some items to not sell that day.  Consider an online sale via Craigslist, eBay, or in a Facebook group.  There are TONS of Facebook groups just within the Atlanta area dedicated to this purpose.


All in all, if you take a little time before hand to prep and tag your items at reasonable prices, but are prepared to wiggle on them; have things displayed well for folks to peruse through;  and can let that sentimental item out of your tight grip — you, too, can hold a successful garage sale!

Keep on saving!  :o)
--Barbara

**Remember, y'all, this post may contain affiliate links. I receive a small amount of compensation when you purchase from my links, which I"ll totally blow on waffle fries and sweet tea, y'all!**
Take a Load Off Your Laundry – Practical Tips to Beat the Laundry Blahs

**This post may contain affiliate links. I receive a small amount of compensation when you purchase from my links, which I"ll totally blow on waffle fries and sweet tea, y'all!**


Tips for beating the laundry blahs


Take a load off your laundry?  I’ll be the first to say it: I loath laundry!  Perhaps because it’s one of those household tasks that literally never ends, or because stubborn stains just seem to laugh at you time after time, or perhaps it’s the snarky sock monster — for whatever reason, I know I’m not alone in my feelings about this.  Am I right?

In any case, I’ve developed a few strategies to help ease the pain of this never-ending saga known as laundry.  Take a look, and see which ones work for you, or what more you would add to this.

* Schedule it: I do one load of laundry every weekday.  (An awesome tip I picked up from The Stressed Mom!)  I’ve found that by sticking to a schedule, and doing just one load a day, it’s MUCH more manageable for me.  I bring that load down either first thing in the morning or after I put the kids to bed the night before; throw the clothes in the dryer in the morning; then fold while the kids nap – or whenever I get a moment.  This also allows for a little wiggle room, like if I fall behind, it’s not dreadful to catch up, doing two loads a day, or simply moving each load back a day, and doing one load over the weekend.  Here’s my schedule, if you need some inspiration: Monday – whites; Tuesday – darks; Wednesday – alternate between bed sheets and hub’s dress shirts; Thursday – towels (includes all bibs, washcloths, hand towels, etc); Friday – kids clothes

Vinegar! If you haven’t unleashed the awesomeness that is vinegar, the laundry is a great place to start.  Since I only use a little bit of laundry detergent, I fill the rest of my cup with vinegar.   This acts as both a fabric softener, and helps to brighten clothes.  As a bonus, it costs only a buck or two for a gallon size, compared to the much smaller containers of liquid fabric softener.

Make it Smell Good.  Yeah, this may seem silly, but indulge in products like Downy Unstopables or Purex Crystals for select loads of laundry, and your senses will thank you!  I use them on bed sheets, towels, and my husband’s dress shirts.  (I also stick some in mismatched baby socks, and toss them under the trash bags in our diaper pail and kitchen trash.  This makes a BIG difference!)  An added benefit is the rather long-lasting scent that’ll stick with you (er, your clothes) for WEEKS!

* Designate a “Soaking” Area. I’m fortunate to have a sink in my laundry room; but I don’t like taking up the sink for the sake of soaking one (or even a few) pieces of clothes in the process, nor using the washing machine either.  SO, I use a small bucket or tub (the ones we brought home with us from the hospital) to soak a few items.  I use a paint stick to stir or agitate when needed.  This would be easy to do in a smaller laundry area, as well.  (P.S.  WHY don’t I soak in the machine?  Because sometimes I let items soak overnight, and want to keep the machine available.  Also, it typically takes less water to soak this way.)

That’s a few of my favorite laundry tips.  Do you have others you’d like to share?  Please comment below with some of your favorite tips OR questions about laundry.

Keep on saving!  :o)

–Barbara [Read more…]
Keep on saving!  :o)
--Barbara

**Remember, y'all, this post may contain affiliate links. I receive a small amount of compensation when you purchase from my links, which I"ll totally blow on waffle fries and sweet tea, y'all!**
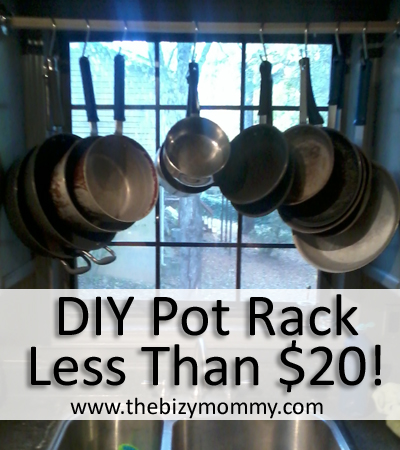
DIY Pot Rack: Extra cabinet space for less than $20!

**This post may contain affiliate links. I receive a small amount of compensation when you purchase from my links, which I"ll totally blow on waffle fries and sweet tea, y'all!**


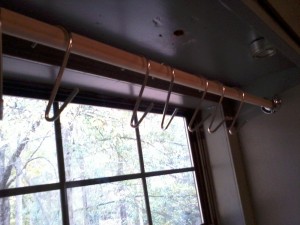
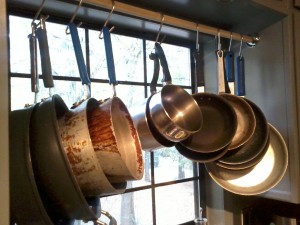
As I’ve mentioned before, our kitchen just does not have enough storage space for a family of eight.  We only have a few cabinets for pots and pans, and it’s just not been working out too well these past 3 years.  In our previous home, we installed DIY pot rack that was a rod that sat on top of the cabinets on either side of the sink, and used that to hang pots and pans.  I’ve been talking about doing the same thing in this home, and finally got around to it this week.

DIY Pot Rack

Supplies needed:

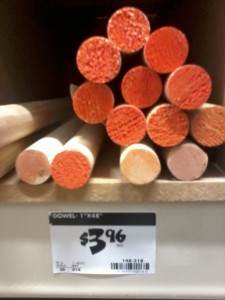
1″ dowel rod 36-48 inches long (Less than $4 from Home Depot)

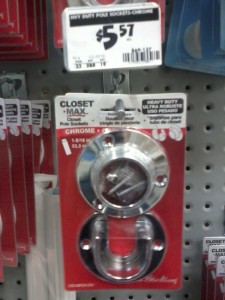
1 package of closet pole sockets ($2-6 at Home Depot depending on the type you purchase)

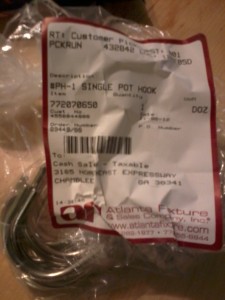
1 package of pot hooks (I got a dozen for $9 from a local store, but you can get them from Amazon
for pretty cheap as well)

DIY Pot Rack

DIY Pot Rack

DIY Pot Rack

It’s really quite simple.  You just install the pole sockets on the cabinets above your sink, cut the dowel rod to size and put it in place, and start hanging your cookware!

DIY Pot Rack

The pots and pans are close enough to the window that they aren’t in my face when I’m at the sink, and they are easy to access when cooking.  Now my two cabinets that were full of pans are freed up for other things, like my absurdly large amount of plastic containers and bowls!

DIY Pot Rack

Have you seen the roll out pantry I built to go in the empty space beside my fridge?  It only cost $63 and added 13 square feet of storage space in my kitchen!

Keep on saving!  :o)
--Barbara

**Remember, y'all, this post may contain affiliate links. I receive a small amount of compensation when you purchase from my links, which I"ll totally blow on waffle fries and sweet tea, y'all!**
Frugal Parenting: DIY Fathers Day Crafts

**This post may contain affiliate links. I receive a small amount of compensation when you purchase from my links, which I"ll totally blow on waffle fries and sweet tea, y'all!**


For Father’s Day this year, I wanted to continue to impress upon my daughter the importance of ownership of the gifts she gives. Gifts, thank you notes, and various cards hold more meaning to the giver and receiver when made more personable, so I helped my daughter create some cards for her daddy, and both grandfathers this year.  Thus, a DIY Father’s Day craft seemed in order….

DIY Father's Day crafts
Lesson learned: Glue the construction paper to the cardstock FIRST,
to prevent the glue from interfering with the paint!

We sat down, working bit by bit over the span of a few days, creating these cards. I brushed washable paint over her hand to create the “flower”. (The paint acquired, by luck, at a garage sale — a pack of 10 small tubs for a quarter.) Then, while she colored on a few sheets of construction paper (to be used later), I asked her “why do you love daddy?”, recording her responses and offering prompts (basically rephrasing the question) to redirect her when needed.

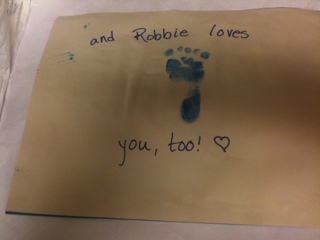
She helped put down the glue for each step (reciting our glue motto of “just a dot, not a lot!”), then placed the strips with her responses on the paper. It was all glued down to card stock, to make it sturdier. The card stock also served as a quick and simple way for my infant son to put his own stamp on each card, too. 🙂

DIY Father's Day crafts - baby's stamp

We repeated this for a single-flowered card for each of her grandfathers.

DIY Father's Day crafts

The sheets she colored were used as wrapping paper for the two small gifts we got for her daddy. (Since he had actually requested something specific, we indulged him.)

Each card was greeted with great pride by its intended receiver– so much so, that first thing Monday morning the card for her Daddy was proudly displayed at his office. 🙂

Do you have any DIY Fathers Day crafts or gift ideas to share? Please leave a comment here or contact me. I’d love to hear all about it!

Keep on saving!  :o)
--Barbara

**Remember, y'all, this post may contain affiliate links. I receive a small amount of compensation when you purchase from my links, which I"ll totally blow on waffle fries and sweet tea, y'all!**

Frugal Parenting: Fun with Paint, Water, and Recyclables

**This post may contain affiliate links. I receive a small amount of compensation when you purchase from my links, which I"ll totally blow on waffle fries and sweet tea, y'all!**


I hoard containers. There — I put it out there. I save various, sturdy containers, with the idea that I could re-use it ….for something. This came in handy the other day with my 3-year-old daughter.

I’m always looking for ways to keep my children entertained, as well as offer them chances to explore and learn.  If I can additionally do so in a “green” manner, even better.

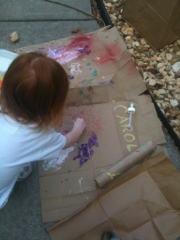
For this occasion, I put red food coloring in an old throat spray bottle, blue in an old dish soap bottle, grabbed some old foam letters (but sponges would work just as well) and put a little paint in old flushable wipes containers, gathered up a few unused medicine droppers, opened some paper bags at the seems, and threw in a few paint brushes, and  empty toilet paper and paper towel rolls.

In our driveway, we “painted” a large hopscotch-like path with various shapes using the dish soap bottle. Then we experimented with painting with rocks, sticks, and our fingers. When asked which she liked best,she responded “the rock — because it’s MAGIC!”

She and I had a blast, and all for pennies. More importantly, these activities encouraged her imagination, worked on dexterity (pushing the spray button, utilizing the various objects for painting, etc), and allowed for open-ended inquiry. Certainly this was a good example of “process over product”.

My next plan is to get some old, large containers to create makeshift water tubs, and let her play and explore. I already have a few containers in mind for this. When my son is a little older -perhaps later in the summer- he can join in the fun.

Do YOU have some great, cheap (and green) ways to entertain your kids? Please share, or contact me. 🙂

**Sidenote: I’ve learned that food coloring, while great for learning, does not easily come off hands — it requires a good dose of elbow grease.

Keep on saving!  :o)
--Barbara

**Remember, y'all, this post may contain affiliate links. I receive a small amount of compensation when you purchase from my links, which I"ll totally blow on waffle fries and sweet tea, y'all!**

Are You Using Too Much Laundry Detergent???

**This post may contain affiliate links. I receive a small amount of compensation when you purchase from my links, which I"ll totally blow on waffle fries and sweet tea, y'all!**


Are you using too much laundry detergent?

A trick I’ve learned after doing laundry for almost twenty years?  (I know, I know, I started doing laundry when I was, like, five…  tee hee) Never go by how much the manufacture label tells you to use!  Think about it: they WANT you to use large amounts, so that you go through it faster, so you have to run out and buy more of their product.  SO, are YOU using too much laundry detergent??? [Read more…]

Keep on saving!  :o)
--Barbara

**Remember, y'all, this post may contain affiliate links. I receive a small amount of compensation when you purchase from my links, which I"ll totally blow on waffle fries and sweet tea, y'all!**

Atlanta's Frugal Mom is a participant in the Amazon Services LLC Associates Program, an affiliate advertising program designed to provide a means for sites to earn advertising fees by advertising and linking to Amazon. In other words, if you click through to Amazon from some of the books or products I recommend and make a purchase, I get a small percentage in exchange for your purchase. It's a small way you can support AFM.