Revising My Mission Statement

**This post may contain affiliate links. I receive a small amount of compensation when you purchase from my links, which I"ll totally blow on waffle fries and sweet tea, y'all!**


Mission Statement

In the last year or so, the number of “deal/frugal bloggers” has exploded exponentially!  I started Atlanta’s Frugal Mom as a means to share my money-saving strategies with my continuously growing reader base.

However, as happens, life seems to slow down the pace of the blog.  The idea of AFM was born shortly after my daughter was born, and became a reality about a year thereafter.  In the meantime, -well- life continued to happen.  I started teaching preschool, and then found out our cozy family of three would be expanding, along with my waistline.  ;o)  With pregnancy and then the birth of my son, the blog simply had to take a backseat.

While I feel like I’ve learned much about myself and about blogging in the process, as well as met many incredible bloggers -many of whom I am now proud to call my friends- I feel like I fell behind the times a bit, so to speak.  I’ve given careful consideration to the direction AFM needs to take, in order to continue to stay relevant in a world over-saturated with deal/coupon blogs.  I have no intention of discontinuing what I’ve been doing, on the contrary!

I do, however, plan to shift my focus slightly.  There are, after all, three components to Atlanta’s Frugal Mom:

  1. Atlanta — events and opportunities in and around the metro Atlanta area;
  2. Frugal – frugal living, including but not limited to, coupons and money-saving advice and deals;
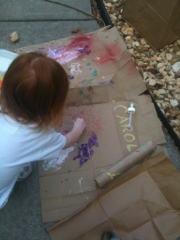
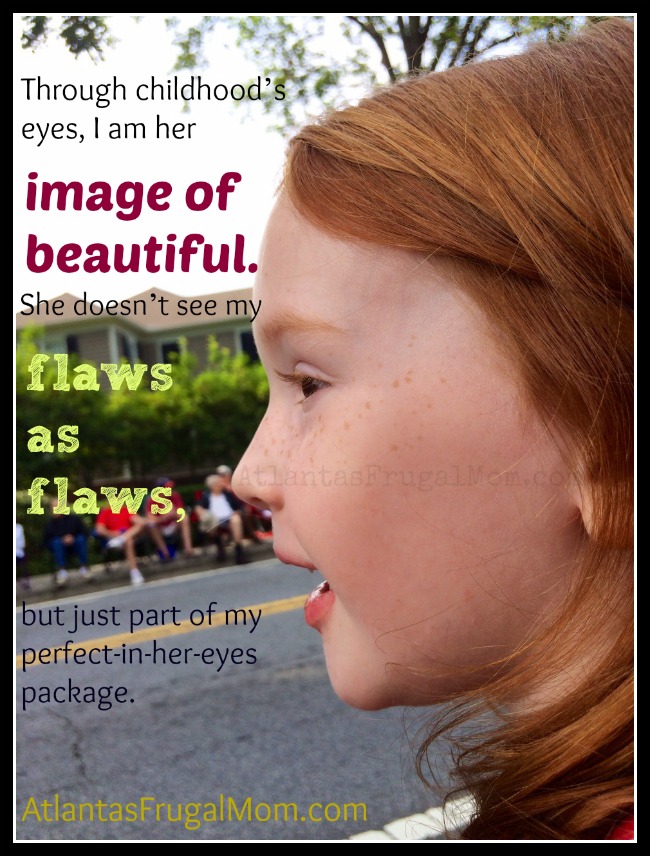
  3. Mom – parenting advice, “frugal parenting”, little nuggets of sage wisdom (hee hee!), and my own observations, lamentations, and curiosities relating to being a mom.
Up until now, my focus has been on the Frugal portion of the blog, with “Atlanta” coming in at a close second.  However, the “mom” component simply can’t be ignored.  With that, I bring to you “Wordless Wednesdays“, where I share little glimpses in to my life as a mother, rich with sweet little red-headed morsels of cuteness. As well as my “Frugal Parenting” pieces — which serve as quick little snippets of ideas to take and use as you see fit.  (And if you see anything Pinterest-worthy, by all means “pin” away!)

In addition to shifting my focus, I am rather excited to get to start bringing you all many giveaway opportunities, as they become available to me.  With my “bloggers circle” expanding, comes more networking, which has opened many new doors for me.   I have partiicpated in quite a few giveaways within the last six months — some being fantastic opportunities, other -eh- not so great.  But with each experience comes new lessons and ideas, and I learn to be a bit more discerning about with whom I choose to work.

I digress.  My mission statement is shifting, as I alluded to earlier.  I will always continue to bring my readers great deals, but I must also focus on the other two pieces: Atlanta and parenting.  After all, I would not be who I am if I was just “frugal”.  :o)

Keep on saving!  :o)
--Barbara

**Remember, y'all, this post may contain affiliate links. I receive a small amount of compensation when you purchase from my links, which I"ll totally blow on waffle fries and sweet tea, y'all!**

Putting the Baby’s Stamp on Cards

**This post may contain affiliate links. I receive a small amount of compensation when you purchase from my links, which I"ll totally blow on waffle fries and sweet tea, y'all!**


Since my infant son is still too young to help his big sis “make” cards for various occasions, I try to include him in the process anyhow. 🙂


Keep on saving!  :o)
–Barbara 

**This post may contain affiliate links.**

Follow Me on Pinterest

Keep on saving!  :o)
--Barbara

**Remember, y'all, this post may contain affiliate links. I receive a small amount of compensation when you purchase from my links, which I"ll totally blow on waffle fries and sweet tea, y'all!**

(Not so) Wordless Wednesday – 8/29/12

**This post may contain affiliate links. I receive a small amount of compensation when you purchase from my links, which I"ll totally blow on waffle fries and sweet tea, y'all!**


My daughter spent the day with my parents yesterday, and came home with some of the chocolate chip cookie they made. Apparently, she’s a (chocolate) chip off the ol’ block!

Happy Wednesday, y’all!


Keep on saving!  :o)
–Barbara 

**This post may contain affiliate links.**

Follow Me on Pinterest

Keep on saving!  :o)
--Barbara

**Remember, y'all, this post may contain affiliate links. I receive a small amount of compensation when you purchase from my links, which I"ll totally blow on waffle fries and sweet tea, y'all!**

Nighttime Diaper Leaks for Baby Boys – One Mother’s Solution

**This post may contain affiliate links. I receive a small amount of compensation when you purchase from my links, which I"ll totally blow on waffle fries and sweet tea, y'all!**


nighttime diaper leaks - m'boy

My happy li’l redhead —
now DRY in the morning! :o)

My happy li’l redhead —
now DRY in the morning!  :o)

Mothers of baby boys everywhere instantly know what this post is about: our little boys have a knack for filling up their diaper at night, well above capacity!

I’ve heard many mothers discuss their solutions to this nighttime diaper leaks dilemma:

  • move up a size at night, just strap it on tight
  • try a different brand
  • put in a maxipad (yep, a maxi pad!)
  • change him at once during the night
  • special “night time” diapers
  • …..and so on…..

I tried several of those options for nighttime diaper leaks when my little boy started leaking through at night — him wetting through his jammies each night was just getting to be way too much!  Since I was more than well-stocked with diapers of various brands (y’all already know how I find cheap diapers!), I tried several brands, both in his current size and a size up.I even tried the maxi pad, which actually resulted in even wetter jammies in the morning!

But that lead me to believe that there had to be an insert of some sort I could put in his diaper to help absorb all that extra liquid.  I headed over to Babies R Us, and did a little on-site research.  I immediately saw two options: a pack of about 30 liners that looked akin to maxi pads for about $4, or a pack of 105 gDiapers gCloth liners for about $8.  Being frugal me, I went with the one with the best unit price: the gDiapers liners.

nighttime diaper leaks
These liners are designed to be used with cloth diapers, as an easy, biodegrabdable and flushable way to -um- get poo in to the potty, with less mess.  But these suckers also work well to soak up the excess liquids, too!  I fold them in half (teachers will understand when I say it’s a “hot dog” fold, not a “hamburger” fold), and place it in the front of his diaper.  (I’ve stuck with using a size up.)  Now, he still wakes up in the mornings with a bulging diaper, but it’s all contained!  And on the rare occassion when he wakes up with a -ahem!-  package for us, it’s even easier to dump the diaper!
You can find these liners at Babies R Us, or you can order them from Amazon, too.  For less than 3 bucks a month, I am keeping my sweet little guy dry at night, and we are all happy for it!  I hope this helps you shed some light on your nighttime diaper leaks, too!
Keep on saving!  :o)
--Barbara

**Remember, y'all, this post may contain affiliate links. I receive a small amount of compensation when you purchase from my links, which I"ll totally blow on waffle fries and sweet tea, y'all!**

Wordless Wednesday: Can’t We Just Keep Them Little??

**This post may contain affiliate links. I receive a small amount of compensation when you purchase from my links, which I"ll totally blow on waffle fries and sweet tea, y'all!**


This weekend as I watched my son start rocking back and forth, with his arms and legs pushed up in crawling stance, I can’t help but recall when I was about seven or eight. My mom would playfully push on the top of my head and remark, “stop growing up so fast!”


I now know what you mean, Mom. I know what you mean.

Keep on saving!  :o)
–Barbara 


**This post may contain affiliate links.**

Follow Me on Pinterest

Keep on saving!  :o)
--Barbara

**Remember, y'all, this post may contain affiliate links. I receive a small amount of compensation when you purchase from my links, which I"ll totally blow on waffle fries and sweet tea, y'all!**

Cleaning an Electric Toothbrush {Frugal Homemaking}

**This post may contain affiliate links. I receive a small amount of compensation when you purchase from my links, which I"ll totally blow on waffle fries and sweet tea, y'all!**


Every time I changed the head on my electric toothbrush, I spent hours devising the perfect method of cleaning the (absurdly nasty!) gunk from the inside. The dilemma I faced was finding a cleaner that was safe to use on an item I put in my mouth


Then it finally dawned on me: vinegar!


First, I let it dry out overnight with the head off.  Once dry, I knocked as much funk out as I could, then let it soak in a glass of vinegar for about 15 minutes. Next, I used one of my “for cleaning only” manual toothbrushes, and cleaned most I the gunk out.


However, there was still some gunk I couldn’t quite reach just inside the neck. So I thought back to 2nd grade science… I put the toothbrush back in the glass of vinegar, then added about a tsp of baking soda.


After marveling over the bubbles (hee hee!  it never gets old!), I was then able to loosen the remaining gunk, and -voila!- my toothbrush was good as new again.


What uses have YOU discovered for vinegar?


Keep on saving!  :o)


–Barbara 

**This post may contain affiliate links.**

Follow Me on Pinterest

Keep on saving!  :o)
--Barbara

**Remember, y'all, this post may contain affiliate links. I receive a small amount of compensation when you purchase from my links, which I"ll totally blow on waffle fries and sweet tea, y'all!**

Wordless Wednesday: Good Idea/Bad Idea

**This post may contain affiliate links. I receive a small amount of compensation when you purchase from my links, which I"ll totally blow on waffle fries and sweet tea, y'all!**


(Remember that cartoon from the 90s, Animaniacs?)

And now it’s time for Good Idea/Bad Idea.

Good Idea: Wearing a hard hat

Bad idea: Wearing a hard hat on your bike. Ouch!


Keep on saving!  :o)

–Barbara 

**This post may contain affiliate links.**

Follow Me on Pinterest

Keep on saving!  :o)
--Barbara

**Remember, y'all, this post may contain affiliate links. I receive a small amount of compensation when you purchase from my links, which I"ll totally blow on waffle fries and sweet tea, y'all!**

Frugal Parenting: DIY Fathers Day Crafts

**This post may contain affiliate links. I receive a small amount of compensation when you purchase from my links, which I"ll totally blow on waffle fries and sweet tea, y'all!**


For Father’s Day this year, I wanted to continue to impress upon my daughter the importance of ownership of the gifts she gives. Gifts, thank you notes, and various cards hold more meaning to the giver and receiver when made more personable, so I helped my daughter create some cards for her daddy, and both grandfathers this year.  Thus, a DIY Father’s Day craft seemed in order….

DIY Father's Day crafts
Lesson learned: Glue the construction paper to the cardstock FIRST,
to prevent the glue from interfering with the paint!

We sat down, working bit by bit over the span of a few days, creating these cards. I brushed washable paint over her hand to create the “flower”. (The paint acquired, by luck, at a garage sale — a pack of 10 small tubs for a quarter.) Then, while she colored on a few sheets of construction paper (to be used later), I asked her “why do you love daddy?”, recording her responses and offering prompts (basically rephrasing the question) to redirect her when needed.

She helped put down the glue for each step (reciting our glue motto of “just a dot, not a lot!”), then placed the strips with her responses on the paper. It was all glued down to card stock, to make it sturdier. The card stock also served as a quick and simple way for my infant son to put his own stamp on each card, too. 🙂

DIY Father's Day crafts - baby's stamp

We repeated this for a single-flowered card for each of her grandfathers.

DIY Father's Day crafts

The sheets she colored were used as wrapping paper for the two small gifts we got for her daddy. (Since he had actually requested something specific, we indulged him.)

Each card was greeted with great pride by its intended receiver– so much so, that first thing Monday morning the card for her Daddy was proudly displayed at his office. 🙂

Do you have any DIY Fathers Day crafts or gift ideas to share? Please leave a comment here or contact me. I’d love to hear all about it!

Keep on saving!  :o)
--Barbara

**Remember, y'all, this post may contain affiliate links. I receive a small amount of compensation when you purchase from my links, which I"ll totally blow on waffle fries and sweet tea, y'all!**

Quick & Easy Frittata

**This post may contain affiliate links. I receive a small amount of compensation when you purchase from my links, which I"ll totally blow on waffle fries and sweet tea, y'all!**


For lunch today, I made a surprisingly quick, easy, and semi-healthy (except-for-the-cheese-and-potato) frittata. –and all with ingredients in the fridge.  You can add or omit ingredients to your liking, and depending on what’ in your freezer or fridge.  

Quick and Easy Frittata

  • 1 tb oil (EVOO)
  • 1 hasbrown patty (thawed overnight in fridge if frozen)
  • 1/2 c frozen veggies (also thawed overnight in fridge, if possible) — I used onion, and red, green, and yellow pepper
  • 1/2 c finely chopped fresh spinach (yep, spinach again!)
  • turkey bacon, crumbled OR bacon bits
  • 1 egg (I use egg substitute)
  • 1/4 c shredded cheese
  • salt and pepper to taste
Warm up oil in small pan.  In small dish, crumble up and grind hashbrown patty, then combine veggies and bacon. Cook on medium heat for 2-3 minutes, until hashbrowns are browned and veggies sauteed to desired consistency.  Add eggs, cheese, salt and pepper.  Let sit for about 3-4 minutes, then flip.  Finish cooking for another 2-3 minutes.  Enjoy!


Check out all the recipes and cooking ideas available at AFM!

Keep on saving!  :o)

–Barbara 
**This post may contain affiliate links.**

Follow Me on Pinterest

Keep on saving!  :o)
--Barbara

**Remember, y'all, this post may contain affiliate links. I receive a small amount of compensation when you purchase from my links, which I"ll totally blow on waffle fries and sweet tea, y'all!**

Frugal Parenting: Fun with Paint, Water, and Recyclables

**This post may contain affiliate links. I receive a small amount of compensation when you purchase from my links, which I"ll totally blow on waffle fries and sweet tea, y'all!**


I hoard containers. There — I put it out there. I save various, sturdy containers, with the idea that I could re-use it ….for something. This came in handy the other day with my 3-year-old daughter.

I’m always looking for ways to keep my children entertained, as well as offer them chances to explore and learn.  If I can additionally do so in a “green” manner, even better.

For this occasion, I put red food coloring in an old throat spray bottle, blue in an old dish soap bottle, grabbed some old foam letters (but sponges would work just as well) and put a little paint in old flushable wipes containers, gathered up a few unused medicine droppers, opened some paper bags at the seems, and threw in a few paint brushes, and  empty toilet paper and paper towel rolls.

In our driveway, we “painted” a large hopscotch-like path with various shapes using the dish soap bottle. Then we experimented with painting with rocks, sticks, and our fingers. When asked which she liked best,she responded “the rock — because it’s MAGIC!”

She and I had a blast, and all for pennies. More importantly, these activities encouraged her imagination, worked on dexterity (pushing the spray button, utilizing the various objects for painting, etc), and allowed for open-ended inquiry. Certainly this was a good example of “process over product”.

My next plan is to get some old, large containers to create makeshift water tubs, and let her play and explore. I already have a few containers in mind for this. When my son is a little older -perhaps later in the summer- he can join in the fun.

Do YOU have some great, cheap (and green) ways to entertain your kids? Please share, or contact me. 🙂

**Sidenote: I’ve learned that food coloring, while great for learning, does not easily come off hands — it requires a good dose of elbow grease.

Keep on saving!  :o)
--Barbara

**Remember, y'all, this post may contain affiliate links. I receive a small amount of compensation when you purchase from my links, which I"ll totally blow on waffle fries and sweet tea, y'all!**

Atlanta's Frugal Mom is a participant in the Amazon Services LLC Associates Program, an affiliate advertising program designed to provide a means for sites to earn advertising fees by advertising and linking to Amazon. In other words, if you click through to Amazon from some of the books or products I recommend and make a purchase, I get a small percentage in exchange for your purchase. It's a small way you can support AFM.