Tips for making a summer bucket list for your family

**This post may contain affiliate links. I receive a small amount of compensation when you purchase from my links, which I"ll totally blow on waffle fries and sweet tea, y'all!**


Tips for Making a Summer Bucket List for Your FamilyA few years ago, Tiffany of RealMomTalk.com created this post on creating a summer bucket list.  I am reviving it, in hopes that it may help inspire some of y’all this summer, as we zip through these last few days of school, and prepare for summer with our kiddos.  

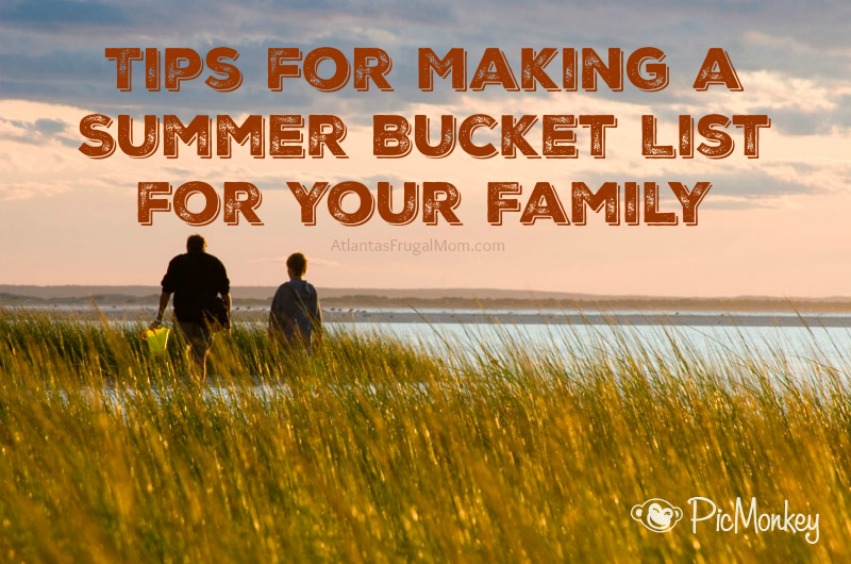
We’ve all been seeing a lot of stuff on Facebook and Pinterest about Family Summer Bucket Lists, and many of you have said that you wish you could do something similar with your family.  Well today, I’m sharing tips on how to make your own summer bucket list!

First off, let me say that our summer bucket list is SUPER long, but yours doesn’t have to be.  We have eight people in our family, and I told the kids I would include everything they suggested, within reason of course.  Pretty much everything made the cut, except Nate’s desires for worldwide travel to places like China, that’s not quite possible with our budget right now!  Plus, there’s really no possible way we will do it all, but it’s still fun to dream!  So don’t feel like your list is no good just because it may only have 5 items on it.  That’s still 5 more super fun memories you will be making with your family this summer!  The point is to make a list of activities and then make a conscious effort to allot time to do those things with your family.  Here are some of my top tips and suggestions to help you get your list going! [Read more…]

Keep on saving!  :o)
--Barbara

**Remember, y'all, this post may contain affiliate links. I receive a small amount of compensation when you purchase from my links, which I"ll totally blow on waffle fries and sweet tea, y'all!**

Smoked Salmon Flatbread

**This post may contain affiliate links. I receive a small amount of compensation when you purchase from my links, which I"ll totally blow on waffle fries and sweet tea, y'all!**


I seriously heart smoked salmon.  Like borderline addict love it.  This oh-so-fancy smoked salmon and arugula flatbread is one of my favorite dishes to order when we manage to sneak out to a nice restaurant without kiddos.  Unfortunately, that happens never like twice a year, and that’s just not often enough for me.  Did I mention how much I love smoked salmon?

Anyhow, after making the ghost pizzas with the kiddos for Halloween, I realized there was a leftover tube of pizza dough, and I had a smoked-salmon-withdrawal-induced stroke of genius.  I could just make my own flatbread at home!  Duh, right?  I’m super cheap and make copycat restaurant meals all the time, so why this never occurred to me, I don’t know.

It’s awesome.  You’ll love it.  I promise.

Smoked salmon flatbread with arugula, dill, lemon, capers, onions and cream cheese - Super easy and great for parties!

Smoked Salmon Flatbread

Ingredients:
1 tube prepared pizza dough (in the canned biscuit aisle)
8 ounces cream cheese (whipped is easier to spread)
1 Tbs minced garlic
Juice of 1/2 lemon
1 Tbs chopped fresh dill
2 cups arugula
2-3 ounces smoked salmon, torn into small pieces
2 Tbs chopped red onion
2 Tbs capers
Salt and pepper

Smoked salmon flatbread with arugula, dill, lemon, capers, onions and cream cheese - Super easy and great for parties!

Directions:
1. Preheat oven to 425
2. Unroll pizza dough and spread out onto a large cookie sheet
3. Bake until lightly browned and cooked all the way through
4. Remove from heat and let cool
5. Mix together cream cheese, lemon juice, garlic and dill
6. Spread evenly over cooled flatbread
7. Top with arugula, salmon, onions and capers
8. Season with salt and pepper as desired
9. Cut into squares and serve immediately

Printer friendly version of Smoked Salmon Flatbread

Smoked salmon flatbread with arugula, dill, lemon, capers, onions and cream cheese - Super easy and great for parties!

This smoked salmon flatbread is the perfect finger food for parties.  Or delicious for lunch if you want to keep the whole thing to yourself.  I won’t tell anyone if you eat all of it in one sitting.  As long as you don’t tell anyone that I did the same thing. 😉

Keep on saving!  :o)
--Barbara

**Remember, y'all, this post may contain affiliate links. I receive a small amount of compensation when you purchase from my links, which I"ll totally blow on waffle fries and sweet tea, y'all!**

Marinated Zucchini and Chickpea Salad

**This post may contain affiliate links. I receive a small amount of compensation when you purchase from my links, which I"ll totally blow on waffle fries and sweet tea, y'all!**


I don’t eat a lot of meat.  I like meat, it’s just that my body is not a big fan of it.  Maybe I’m missing some important enzyme or something that helps me break it down.  That would be my luck.  Anyhow, I tend to eat very little meat to keep from having a crazy, messed up gut all the time.  Well, except for bacon.  Because it’s bacon, duh.

So since I don’t eat a lot of meat, I get my protein from other places.  Like chickpeas!  Of course, I don’t just eat them plain (boring!), I like to mix them in with different dishes.  I threw this particular salad together the other morning to have for lunch, and ended up eating it for 3 days!  It makes a lot more than you would think. 🙂

Marinated-zucchini and chickpea salad

Marinated Zucchini and Chickpea Salad

1 medium zucchini, halved and sliced
1/2 cup thinly sliced onion
2 cups chickpeas (if canned, rinse well first)
2 roma tomatoes, sliced into strips
1/4 cup chopped roasted red pepper
2 Tbs olive oil
2 Tbs lemon juice
1/2 tsp sugar
salt and pepper

Mix all ingredients together and marinate for at least six hours in the refrigerator before serving.  Don’t forget, the longer it sits, the more delicious it tastes!

Marinated-zucchini and chickpea salad

That’s it!  Short, sweet and to the point.  Unless of course, you want me to ramble on and on about chickpeas.  Which I can totally do, by the way.  No?  Fine.  Jeez.

Here’s a video about chick peas instead, just because I find it hilarious.

Look –> Dancing and informative cartoon chick peas!

Keep on saving!  :o)
--Barbara

**Remember, y'all, this post may contain affiliate links. I receive a small amount of compensation when you purchase from my links, which I"ll totally blow on waffle fries and sweet tea, y'all!**

Chicken Saltimbocca from eMeals

**This post may contain affiliate links. I receive a small amount of compensation when you purchase from my links, which I"ll totally blow on waffle fries and sweet tea, y'all!**


If you haven’t heard of eMeals, you are SO missing out!  It’s a meal planning service that makes my life so much easier on busy days.  I’m lucky enough to be working with them as an ambassador, so I get to share some of the awesome food we make along with the recipes so you can try them out at home!


Each week you get a new set of recipes emailed to you, complete with a shopping list and easy-to-follow directions.  They have an awesome app you can use that makes the shopping and preparation fast and simple.  No need to print anything or make a list on a separate sheet of paper!  eMeals offers 12 different dinner plans to choose from, and you can even customize them specifically for the store you shop at the most!  We’re currently using the Mediterranean plan, though I’ve tried out Clean Eating, Classic, and Simple Gourmet in the past as well, and they’ve all been fantastic.  It’s less than $5.00 a month for the yearly membership, and trust me, it is so worth it with the time you’ll save planning out meals and shopping trips!

Tonight we had the Chicken Saltimbocca and it was absolutely amazing.  The kids loved it and so did we.  It’s definitely going on my list of things to make on a regular basis.  I know you’re going to love it too!

Chicken Saltimbocca Recipe from eMeals

Chicken Saltimbocca

Ingredients:
3 boneless, skinless chicken breasts, cut in half lengthwise
½ teaspoon salt
½ teaspoon pepper
12 thin slices prosciutto (about 3 oz)
10 oz package chopped frozen spinach, thawed
1½ cups freshly grated Parmesan cheese
¼ cup olive oil, divided
1 cup chicken broth
2 tablespoons fresh lemon juice
2 tablespoons butter

Chicken Saltimbocca Recipe from eMeals

Directions:
1.  Cut each chicken breast half in half again horizontally to make 12 cutlets.
2.  Pound cutlets to about ¼-inch thickness; sprinkle with salt and pepper.
3.  Top each cutlet with 1 slice prosciutto.
4.  Squeeze excess moisture from spinach; divide spinach evenly among cutlets.
5.  Top each cutlet with 2 tablespoons cheese.
6.  Roll up; secure with wooden picks.
7.  Heat 2 tablespoons oil in a large skillet over medium-high heat.
8.  Add half of cutlets to pan; cook 2 to 3 minutes on each side or until done.
9.  Repeat procedure with remaining oil and cutlets.
10.  Set cutlets aside and keep warm.
11.  Add broth and juice to pan; bring to a boil.
12.  Cook until reduced to ¼ cup; remove from heat and stir in butter.
13.  Serve sauce over cutlets.

Chicken Saltimbocca Recipe from eMeals


eMeals Meal Plans

This post contains affiliate links.  As an ambassador, eMeals has provided me with a free membership in exchange for sharing how awesome I think their service is.  And it really is awesome y’all!

Keep on saving!  :o)
--Barbara

**Remember, y'all, this post may contain affiliate links. I receive a small amount of compensation when you purchase from my links, which I"ll totally blow on waffle fries and sweet tea, y'all!**

Caramel Apple Cream Puffs – Delicious and easy!

**This post may contain affiliate links. I receive a small amount of compensation when you purchase from my links, which I"ll totally blow on waffle fries and sweet tea, y'all!**


Cream puffs. You know you love them. I typically buy the tub of them from the freezer section of the grocery store as an impulse, you know like when you’ve been shopping for over an hour and your kids are asking for everything and you haven’t had dinner and OH MY GOD I MUST HAVE THESE RIGHT NOW.

Those shopping trips. Lol.

However, if I actually plan ahead, I can just make them at home in under an hour for a lot less money.  Cream puffs are actually one of the easiest desserts to make, yet they come out looking fancy schmancy like they took all day.  They always make me think of the rice krispies treats commercial from years ago, you know the one I’m talking about!  (No?  What’s wrong with you?!  Just kidding, you can check it out below!)


Today I’m sharing how to make cream puffs at home, with a delicious caramel apple twist on the traditional cream and chocolate.  I got a jar of Musselman’s Apple Butter at a conference I attended this summer (they were a sponsor for Reviewer’s Retreat) and I knew it’s spiced apple flavor would be perfect for making my fall inspired cream puffs!  Check out the recipe below, and see just how easy they are to make for yourself!

Caramel Apple Cream Puffs

Caramel Apple Cream Puffs

Ingredients:

Dough for Puffs
1 cup water
1/3 cup butter
1/3 tsp salt
1 cup all purpose flour
4 eggs (beaten)

Apple Cream Filling
8 oz container whipped cream (frozen)
½ cup powdered sugar
1 tsp vanilla extract
1/2 cup Musselman’s Apple Butter

Caramel Drizzle
1 cup of unwrapped hard caramels

Caramel Apple Cream Puffs

Directions:

Puffs
1.  Preheat oven to 375.
2.  Bring water, salt and butter to a boil in a small saucepan.
3.  Quickly stir in flour until the dough forms a ball in the middle of the saucepan.
4.  Remove from heat and add eggs.  Whisk until smooth. (Quickly, before the eggs cook from the heat)
5.  Grease two mini muffin pans (Cake Release is AWESOME for this!)
6.  Scoop dough by the tablespoon into the mini muffin pans. (I know it doesn’t look like a lot, trust me!)
7.  Bake for 20 minutes.
8.  Remove from heat and cool.  (With a fan, if you are impatient like me!)

Caramel Apple Cream Puffs

Caramel Apple Cream Puffs

I wasn’t joking about the fan!

Cream Filling
1.  Mix all cream ingredients together until smooth.
2.  Fill a squirt bottle or piping bag with the filling.
3.  Poke a hole in the side of the cooled puffs and fill with cream mixture.

Caramel Apple Cream Puffs

Caramel
1.  Melt the caramel in a microwave safe bowl for 10 seconds at a time.
2.  Remove and quickly drizzle with a fork over tops of cream puffs.
3.  Reheat as needed, as it will cool VERY quickly!

Caramel Apple Cream Puffs

Now put your beautiful Caramel Apple Cream Puffs out on a fancy plate and tell everyone to get over there and ohh and ahh over them grab one and experience the deliciousness!

Caramel Apple Cream Puffs

Thank you to Double Duty Divas, iRetreat Conference, and Musselman’s Apple Butter for the inspiration behind this recipe!  I hope you enjoy these tasty puffs of amazingness as much as we do!

Keep on saving!  :o)
--Barbara

**Remember, y'all, this post may contain affiliate links. I receive a small amount of compensation when you purchase from my links, which I"ll totally blow on waffle fries and sweet tea, y'all!**

Carbonara Pasta Casserole Recipe

**This post may contain affiliate links. I receive a small amount of compensation when you purchase from my links, which I"ll totally blow on waffle fries and sweet tea, y'all!**


On busy nights, one of my favorite things to do for dinner is a one dish casserole.  Casseroles mean less dirty dishes, less preparation, and less time, all of which are awesome when Nate has a report due, Nikoletta needs help with handwriting, Eva is asking for me to listen to her read out loud, Ryan is confused about his algebra….you get the point. 🙂

Just because it’s a one dish meal doesn’t mean that is has to be bland.  Simple does not have to mean boring.  Tonight I put together a delicious carbonara pasta casserole that took less than 20 minutes to prepare, and was ready and on the table in just 40 minutes, from start to finish.

Traditional Italian carbonara is made with eggs, cheese, bacon and black pepper, and of course pasta.  I tweaked that a bit and added in some veggies and skipped the eggs in favor of a ricotta to help hold the casserole together better.  It was really delicious, and all of the kids just gobbled it right up!  I hope your family enjoys it as much as we did!

Carbonara Pasta Casserole

Carbonara Pasta Casserole

Ingredients:

1 pound of short pasta noodles
1/4 cup Country Crock spread
1 cup thin sliced red onion
1 cup bacon bits
1/2 cup chopped roasted red pepper
1 bag of baby spinach
1 cup halved cherry tomatoes
3/4 cup ricotta
1/2 cup milk
2 Tbs grated Pecorino Romano
2 Tbs grated Parmesan
2 tsp black pepper
1/2 Tbs salt
2 cups shredded Italian cheese blend

Carbonara Pasta Casserole

Directions:

1.  Bring a large pot of water to a boil to cook pasta, drain and set aside once finished.
2.  Preheat oven to 350.
3.  Melt 1/4 cup Country Crock spread over medium heat in a large saucepan.
4.  Add in sliced onion and cook for 2-3 minutes until soft.
5.  Add in bacon bits and red pepper to onions and cook for another 2 minutes.
6.  Turn off the heat, but leave the pan on the eye and fold in the spinach to wilt (about a minute)
7.  Remove from heat completely and mix in cooked pasta.
8.  Add in tomatoes, ricotta, milk, pecorino, parmesan, salt and pepper.
9.  Pour into a baking dish and top with Italian cheese blend.
10. Bake at 350 degrees for 20 minutes.
11.  Set oven to high broil and cook for another 2 minutes to brown cheese on top.
12.  Remove from oven and enjoy!

Download the printer friendly version of Carbonara Pasta Casserole

Carbonara Pasta Casserole

Now, I know the list of ingredients looks a little long for a “quick fix casserole,” but it’s really not as much work as it seems.  Most of the time for this dish comes from baking, so you can get back to taking care of your family and home while it’s in the oven!  Here’s the prep work involved for this recipe:

-Slicing cherry tomatoes in half (or you could use canned diced tomatoes that have been drained instead)
-Slicing the red onion
-Chopping up roasted red pepper (comes in strips already, I just like it in smaller pieces)

Everything else can just be poured right in and mixed up!  It’s easy and delicious, I know you’ll agree once you try it yourself!

If your family likes casseroles, be sure to check out this cheesy bacon biscuit casserole that’s perfect for breakfast!

What’s your favorite one dish casserole recipe?  I’d love for you to share in the comments below!

I was selected for this opportunity as a member of Clever Girls Collective and the content and opinions expressed here are all my own.

Keep on saving!  :o)
--Barbara

**Remember, y'all, this post may contain affiliate links. I receive a small amount of compensation when you purchase from my links, which I"ll totally blow on waffle fries and sweet tea, y'all!**

Vegetable Meatloaf Recipe – Great for grilled burgers!

**This post may contain affiliate links. I receive a small amount of compensation when you purchase from my links, which I"ll totally blow on waffle fries and sweet tea, y'all!**


Meatloaf has always been one of my favorite dishes, but it can be pretty, well, meaty.  Several years ago I started adding lots of veggies into my meatloaf recipe and my family loves it!  Red Gold Tomatoes sent me a variety of their canned tomatoes to try out earlier this month, and I just knew their Diced Tomatoes with Basil, Garlic & Oregano would be the perfect complement to my vegetable meatloaf recipe.  This week, I picked up all the ingredients I needed for meatloaf from Aldi and with the added touch of the tomatoes, and our grilled vegetable meatloaf burgers were delicious!

Grilled Vegetable Meatloaf Burgers

Grilled Vegetable Meatloaf Burgers

Ingredients:

1 zucchini, chopped

1/2 bell pepper, chopped

1 cup finely chopped carrots (I use my 3 cup food processor)

1/2 cup minced onion (Yep, food processor again!)

1 can Red Gold Diced Tomatoes with Basil, Garlic & Oregano
(drained and chopped, save liquid for sauce)

2 eggs

2 cups dry oatmeal

1 lb pork sausage

1 lb ground beef

Grilled Vegetable Meatloaf Burgers

Directions:

1.  Mix all ingredients (except liquid from tomatoes) in a large bowl.

2.  Measure out 1/2 cup of meatloaf mixture for each burger patty.

3.  Brush each patty with oil.

4.  Place patties in a grill pan on medium high heat for 5-7 minutes.

5.  Brush tops of patties with oil and flip.

6.  Cook for another 5-7 minutes or until meat is cooked throughout.

Grilled Vegetable Meatloaf Burgers

Grilled Vegetable Meatloaf Burgers

Grilled Vegetable Meatloaf Burgers

Grilled Onion Buns

Ingredients:

Onion buns

Vegetable oil

Directions:

1.  Brush the inside of the onion roll buns with oil.

2.  Place face down on the grill pan at medium high heat.

3.  Grill for about a minute until they are toasted.

4.  Remove from pan and serve with grilled vegetable meatloaf burgers.

Grilled Onion Buns

Jalapeno Tomato Spread

Ingredients:

Reserved liquid from Red Gold Diced Tomatoes with Basil, Garlic & Oregano

1/2 cup jalapeno ketchup (I used Mama Selita’s Jalapeno Ketchup)

1 tsp sugar (optional)

1/2 tsp Worcestershire sauce

Directions:

1.  Pour all ingredients into a small saucepan.

2.  Bring to a boil on high, reduce to medium-low.

3.  Simmer for 5 minutes.

4.  Serve as a spread with grilled vegetable meatloaf burgers.

Jalapeno Tomato spread for Vegetable Meatloaf Burgers

Click here for a printer friendly version of these recipes!

Grilled Vegetable Meatloaf Burgers

This vegetable meatloaf recipe is really simple,  you basically just dump everything in a bowl, mix it up, and slap these puppies on the grill!  Because the weather has been so crazy here lately, I cooked them inside instead on my non-stick grill pan.  It is an awesome way to get those seared grill marks without the hassle of firing up a grill.  And it’s so easy to clean!  I definitely recommend picking one up for your kitchen!

non-stick grill pan

I couldn’t resist sharing this picture of my sweet 5 year old helping me cook.  She’s learning to crack eggs without completely shattering the shell, and she’s getting pretty good at it!

little-asian-girl-cracking-eggs

This recipe is one of our favorites, and the pre-seasoned diced tomatoes Red Gold sent me added the perfect mix of herbs and spices!  You can find more tasty recipes like Caribbean Chicken Burgers and Summer Tomato Burgers on the Red Gold website.

Red Gold provided the tomatoes for this dish, but the recipe and opinions are all my own.  This post contains affiliate links.

Keep on saving!  :o)
--Barbara

**Remember, y'all, this post may contain affiliate links. I receive a small amount of compensation when you purchase from my links, which I"ll totally blow on waffle fries and sweet tea, y'all!**

Christmas in July – 10 ways to start planning now and avoid holiday debt

**This post may contain affiliate links. I receive a small amount of compensation when you purchase from my links, which I"ll totally blow on waffle fries and sweet tea, y'all!**


Being extremely active on social media, I’ve seen tons of updates about how Christmas is just around the corner.  As much as I don’t want to start planning right now (procastinator!) it’s important so that I’m not breaking the bank in December.  So many families don’t plan for the holidays early enough, and end up putting a lot of their holiday gifts on credit cards.  Proper planning and smart shopping starting now can help you save in the long run, and avoid massive credit card bills when the new year rolls around.  Check out these 10 tips for making your Christmas as financially un-stressful as possible!

Start Christmas planning now avoid holiday debt

10 tips for planning Christmas on a budget

10.  Start making a list of what your kids want – As you hear them ask for specific things, or notice something that they could use, add it to a list.  You can easily make a list on your smartphone with an app like Evernote, and access it from anywhere.  This will really come in handy once you start actually purchasing gifts.

9.  Put aside money each pay period – Set aside a little bit each time you get paid.  Cut out stopping for coffee in the morning a few days a week, or maybe pack your lunch for work instead of going out.  Use that money for your Christmas fund instead.  There are about 25 weeks from the beginning of July until Christmas, so just saving $20 a week means you’ll have $500 to spend on gifts!  Be sure that money goes into a separate account so you don’t accidentally spend it!

8.  Subscribe to Amazon deals – Did you know that Amazon has Gold Box lightening deals available for a short period each day?  Subscribe to get those deals in your inbox and never miss out again!  Many of the deals are well over 50% off!

Start Christmas planning now avoid holiday debt

7.  Start cleaning out toys – Go ahead and start going through your kids’ toys now, and get rid of items that are broken, missing pieces, or that they have outgrown.  Once you pare them down and see what they have left, you’ll have a better idea of what they need.  You may realize they already have tons of stuff they still play with, or that they could use more Barbie clothes or Legos for their collection.  It’s easier to figure out what to buy when you have an accurate list of what they already own.

6.  Talk to your family about what to buy – If you have family members that always give your children gifts, talk to them about what they plan to purchase.  If there are specific items that you know your child wants, let everyone know.  If you plan to buy something that has accessories or add-on kits, that’s a great thing to clue family in on.  Another great way to share your child’s holiday wish list is through a site like GiftBirdy, which lets the kids make their own list online and then share it with others.

5.  Shop Craigslist, Ebay, and consignment sales – You can find great deals on gently used (and often new) items by searching Craigslist and Ebay.   I’ve also found great gifts by shopping yard sales and consignment sales in during the fall.  Your kids are going to open the boxes and use their gifts anyway, so why not buy something that’s out of the box but still in excellent condition?  This is a great way to pick up things like toddler toys, video games, outdoor toys and more, for often less than 50% of the regular retail price.  (Just be sure to exercise caution when purchasing items from Craigslist.  Meet sellers in a very public place, and if a deal sounds way too good to be true, it probably is.)

4.  Utilize layaway plans – If you have your eye on a big ticket item that you don’t currently have the money for, see if one of your local stores offers layaway.  You can pay a portion of the money up front, and then make payments over several weeks.  If the item goes on sale while it’s on layaway, most stores will honor that price and adjust it if you just bring it to their attention. Toys R Us, KMart, and Sears are just a few of the stores that currently offer layaway programs for their customers.

3.  Shop daily deal sites – Sites like Zulily and One Kings Lane offer short term deals on popular items.  Sign up to get their updates via email, and you’ll know about the big deals as soon as they are available.  Last year I got the super popular Pillow Pets for my kids for $1o from 1SaleADay.com for just $10, when they were retailing for at least $25 at other stores!  Be sure to share deals your friends would like as well, because most of those sites reward you with credit when your friends place an order.

Start Christmas planning now avoid holiday debt

2.  Check out the clearance section – Big name stores like Walmart and Target always have items on clearance, so when you are doing your regular shopping each week, take a second to check out the clearance aisle.  I have picked up several gifts at a huge discount that way.  I also like to look for clearance deals at local drug stores, and even grocery stores have good deals sometimes!

1.  Saving pocket change – Instead of using that change in the bottom of your purse, set it aside for your holiday fund.  Just a few coins here and there can really add up!  Do the same thing with found money, and you’ll have a nice little stash of cash to add to your holiday budget by the end of the year.  Every penny really does count, trust me!

Start Christmas planning now avoid holiday debt

Using these tips and a few others, I managed to spend just $250 on holiday gifts for my six children last year.  Christmas on a budget is totally possible, as long as you plan ahead!  Need some ideas for budget friendly gifts?  Check out the post I wrote with over 100 gifts you can get on Amazon for $2.00 or less, including shipping!

http://thebizymommy.com/100-gifts-can-buy-2-00-less/

Keep on saving!  :o)
--Barbara

**Remember, y'all, this post may contain affiliate links. I receive a small amount of compensation when you purchase from my links, which I"ll totally blow on waffle fries and sweet tea, y'all!**

Red, White and Blue Party Food Roundup

**This post may contain affiliate links. I receive a small amount of compensation when you purchase from my links, which I"ll totally blow on waffle fries and sweet tea, y'all!**


Fourth of July is just around the corner, and if you’re a regular reader of my blog you know that I have been sharing all sorts of fun red, white, and blue recipes over the last few weeks.  Today’s post is a roundup of fun patriotic recipes that are perfect for your holiday get together!

Red White and Blue Party Foods

Red, White and Blue Patriotic Party Foods

1.  Pigs in a blanket – These are pretty simple.  Just make them like usual, then brush with a little bit of food coloring before baking.  We used blue, but you could do red as well.

Red White and Blue Party Foods | Pigs in a blanket

2.  Two step cupcakes – Cute and tasty, these cupcakes can be made by little ones in just a matter of minutes!

Red White and Blue Cupcakes | Only two steps!

3.  Dipped strawberries – Another really easy treat, these strawberries are just dipped in white chocolate and blue sprinkles.

Red White and Blue Party Foods | Dipped strawberries

4.  American flag pizzaSometimes it’s nice to have something more filling than finger foods, and this pizza makes a great centerpiece for your holiday party table too!

Red White and Blue Party Foods | American Flag Pizza

5.  Fruit salad – Blueberries, raspberries, and star shaped cheese make a cute salad that’s good for you too!

Red White and Blue Party Foods | Fruit salad

6.  Patriotic pinwheels – Yummy and adorable, these pinwheels are made with cream cheese, provolone, peppers and tortillas.

Red White and Blue Party Foods | Patriotic Pinwheels

7.  Layered party punch – A science experiment and refreshing drink, your kids are sure to love this tri-colored beverage.

Red White and Blue Party Foods | Layered punch

8.  Caprese salad – Mozzarella pearls, grape tomatoes, basil and olive oil make a simple, beautiful salad that is super delicious.

Red White and Blue Party Foods | Caprese Salad

9.  Twizzlers – No preparation needed here!  Red and blue twizzlers make a sweet addition to your party foods.

Red White and Blue Party Foods

10.  Parent punch – Grown up cocktails with a patriotic twist, the same 3 ingredients make two tasty drinks for Mom and Dad!

Red White and Blue Party Foods | Party Punch and Martinis

Did you know that June 27th is National Bomb Pop Day?  Bomb Pops are one of my all time favorite childhood treats, and we still buy them on a regular basis today.  So you can probably imagine how tickled I was when they asked me to share some pops with my kids along with some other neat holiday party food ideas!  The folks over at Bomb Pop and Publix sent us a whole party pack to celebrate with, along with 2 boxes of popsicles, and that’s where the inspiration for all of my recipes came from!  Check out all of our fun party pictures below!

Red White and Blue Party Foods

Keep on saving!  :o)
--Barbara

**Remember, y'all, this post may contain affiliate links. I receive a small amount of compensation when you purchase from my links, which I"ll totally blow on waffle fries and sweet tea, y'all!**

Red white and blue martini – Parent party punch recipe

**This post may contain affiliate links. I receive a small amount of compensation when you purchase from my links, which I"ll totally blow on waffle fries and sweet tea, y'all!**


Last week I shared a recipe for a cute red, white, and blue layered party punch for kids, and it was so popular that today I’m sharing another drink that’s just for grown ups!  It fits right in with the patriotic party theme for the upcoming 4th of July holiday, and I’ve got two versions for you: one for a casual cookout and another for a more formal get together.  They both have the same exact ingredients, they are just prepared a little differently.  Check out the recipe below!Red White and Blue Party Foods | Party Punch and Martinis


Red, White and Blue Parent Party Punch and Martinis

Ingredients:

2 oz vodka

6 oz mandarin orange sparkling water (I used Clear American)

1 Tbsp grenadine

Ice

Fresh blueberries on a skewer for garnish

Red White & Blue Martinis and Parent Party Punch

Parent Party Punch Directions:

1.  Mix vodka, sparkling water, and grenadine in a 16 oz glass.

2.  Fill with ice to the top.

3.  Garnish with blueberry skewer and a cute straw (if desired)

Red White and Blue Party Punch

Red, White and Blue Martini Directions:

1.  Fill a shaker with ice.

2.  Pour in vodka and sparkling water, shake well to mix.

3.  Strain into a chilled martini glass.

4.  Slowly pour grenadine down the side of the glass so it settles in the bottom.

5.  Garnish with blueberry skewer.Red White & Blue Martinis and Parent Party Punch


***Tip – If you pour the grenadine into the martini glass too quickly, it will just mix with the vodka.  You MUST pour it slowly down the side of the glass for it to layer properly.

This drink is just as delicious with rum or a silver tequila, I’m just a vodka kind of gal. 😉  You could also you a different flavor of sparkling water if you like, but trust me, the mandarin orange is really tasty!Red White & Blue Martinis and Parent Party Punch


Red White & Blue Martinis and Parent Party Punch


Having lots of people over?  Make a whole pitcher!  You can premix all of it without ice for the punch, or just premix the vodka and sparkling water to prep for the martinis.  Blueberry skewers can be made in advance as well.  Just remember to keep it out of the reach of kiddos, it’s colorful and fun, and they’ll be tempted to take a sip!

Red White & Blue Martinis and Parent Party Punch


Have you checked out my other red, white, and blue recipes? 

Red White and Blue Party Foods

Keep on saving!  :o)
--Barbara

**Remember, y'all, this post may contain affiliate links. I receive a small amount of compensation when you purchase from my links, which I"ll totally blow on waffle fries and sweet tea, y'all!**

Atlanta's Frugal Mom is a participant in the Amazon Services LLC Associates Program, an affiliate advertising program designed to provide a means for sites to earn advertising fees by advertising and linking to Amazon. In other words, if you click through to Amazon from some of the books or products I recommend and make a purchase, I get a small percentage in exchange for your purchase. It's a small way you can support AFM.